Creating an email campaign
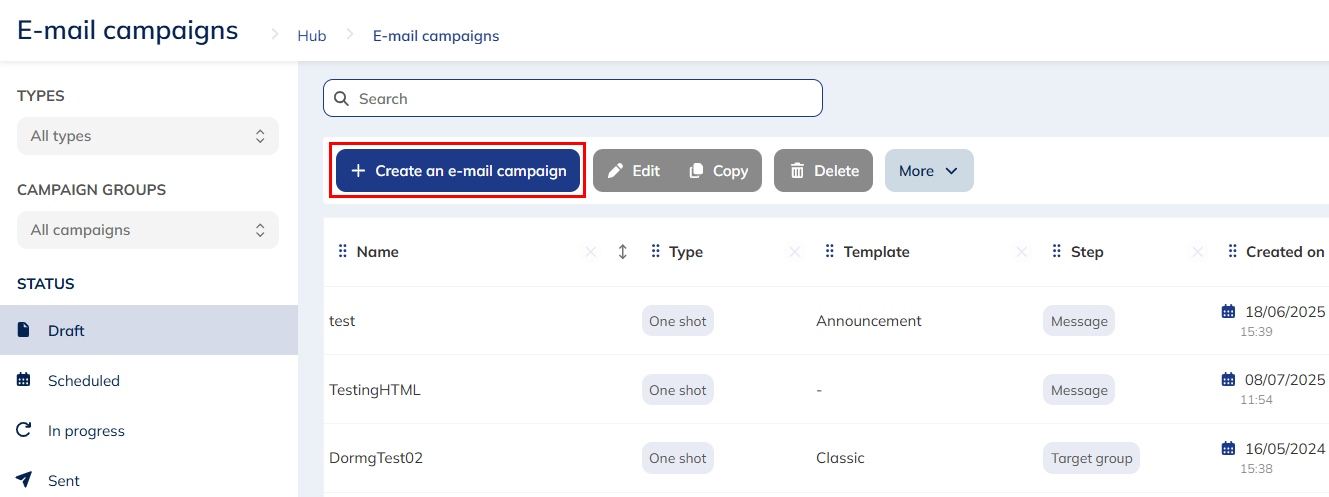
To create a new e-mail campaign, go to the Email campaigns module (Hub > E-mail campaigns > E-mail campaigns).

Click on the + Create a new campaign button.
Choosing the campaign type
Choose the type of campaign you want to create.
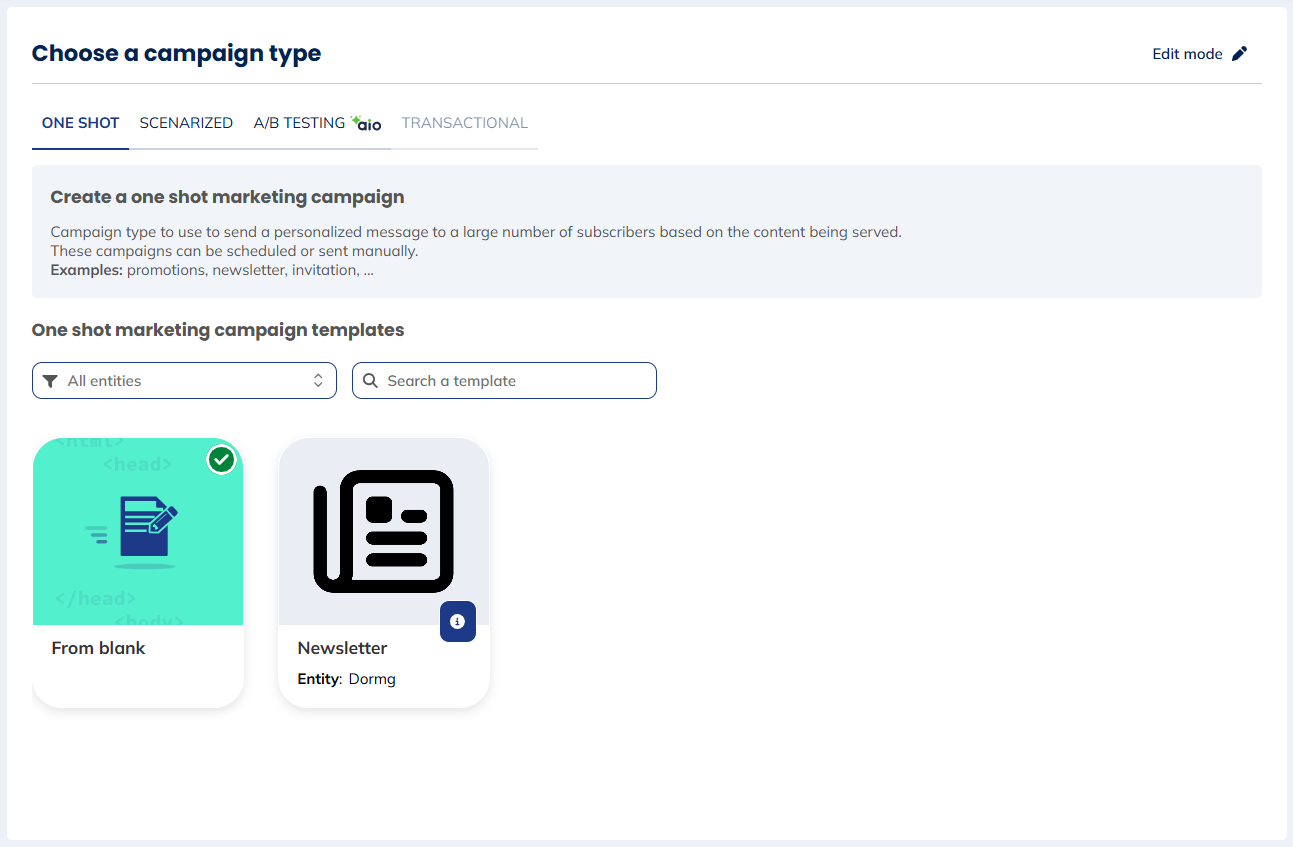
There are 4 different types of campaigns:
- One shot: Sent at a given time to a large number of profiles all at once.
- Scenarized: Triggered automatically via Scenarios or via API.
- A/B Testing: Test several versions of your e-mails to find out which performs best.
- Transactional: Continuous campaigns routed without any filter towards the destination address. Only available if your licence allows it.
Also choose the creation mode:
- From blank: Define the e-mail from A to Z, based on a template or coded in HTML.
- From a saved campaign template: Only templates for the chosen campaign type are displayed. You can filter by entity or search by name.
Modifying the campaign type
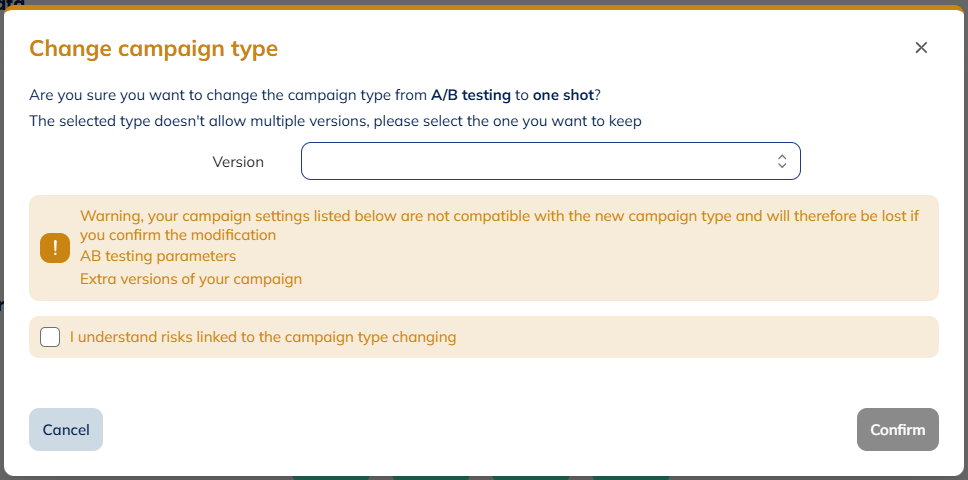
If you chose the wrong type, you can change it at any step using the button in the top right corner, which also shows the current campaign type.

Some parameters are not compatible across types (e.g. no Targeting step or unsubscribe link in Transactional, API personalizations only available for Scenarized and Transactional). A warning screen will detail what will be lost before you confirm. Note that reverting to the original type does not restore those parameters.
Step 1: General data
General Data
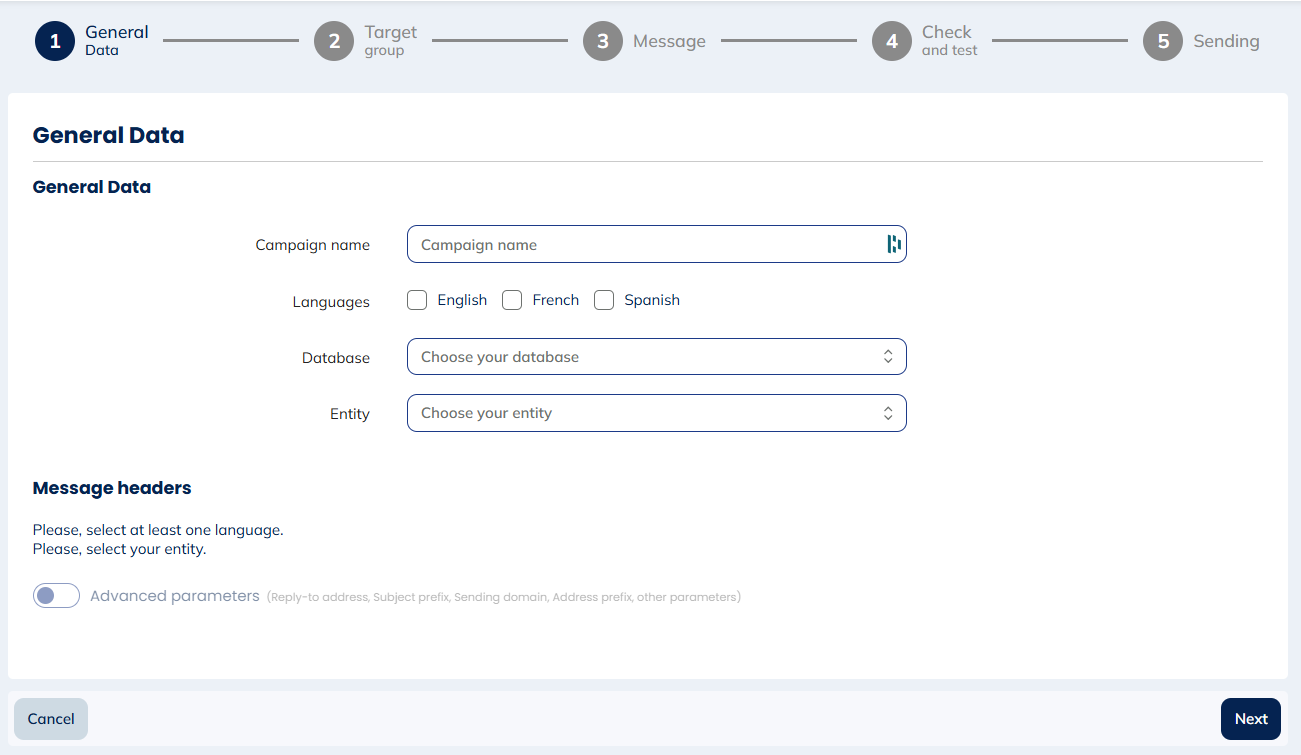
- Campaign name: The technical name used in Actito — not visible to recipients. We advise using a clear naming convention (e.g. dateCampaignName).
- Campaign languages: The language(s) of your campaign. Actito supports multi-lingual campaigns if your licence is set up for it. Note that modifying language parameters while editing your message can affect already created content.
- Database: The profile database to send to. Each campaign can only be sent to a single database.
- Entity: Where the campaign is stored.
Entity and database cannot be modified once validated.
Message headers
- Sender: The name appearing in the recipient's inbox (the 'from').
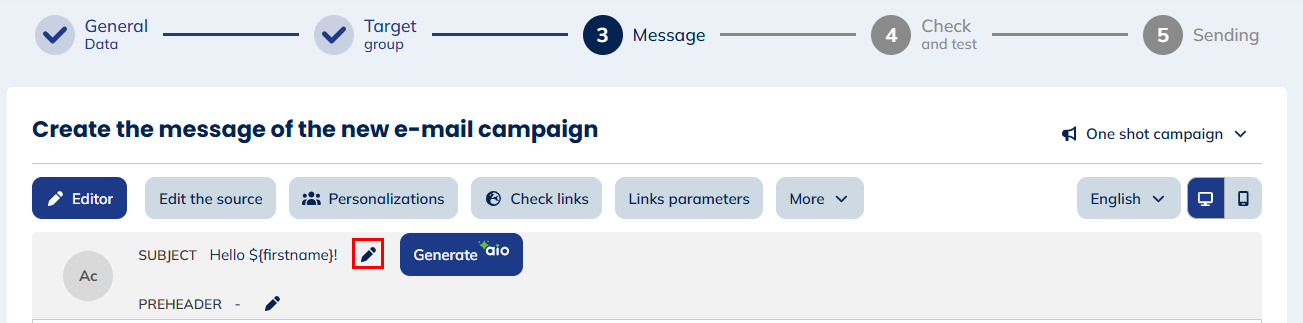
- Subject: The subject line. You can write your own or use suggestions from AIO.
- Pre-header: Complements the subject in the inbox. Not mandatory, but it influences opening rates.
Add personalizations in the headers using the blue button next to each field, to insert profile attribute values. Only profile attributes and technical values are supported here.

The header information is also visible in a banner above your e-mail preview in step 3, where you can edit the subject and preheader.
Advanced parameters
Check the option to display additional technical parameters.
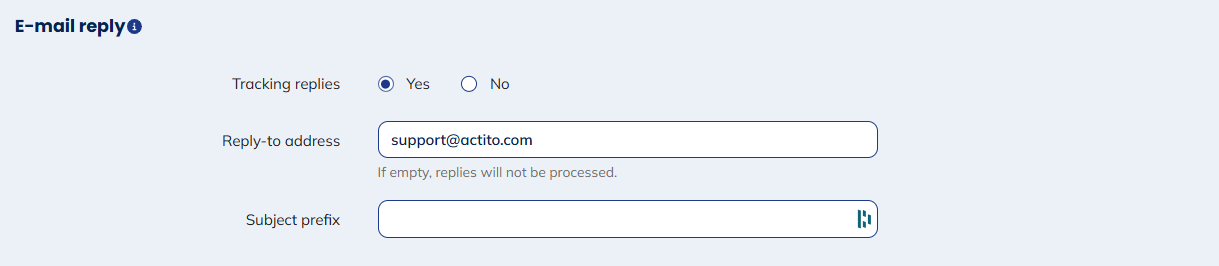
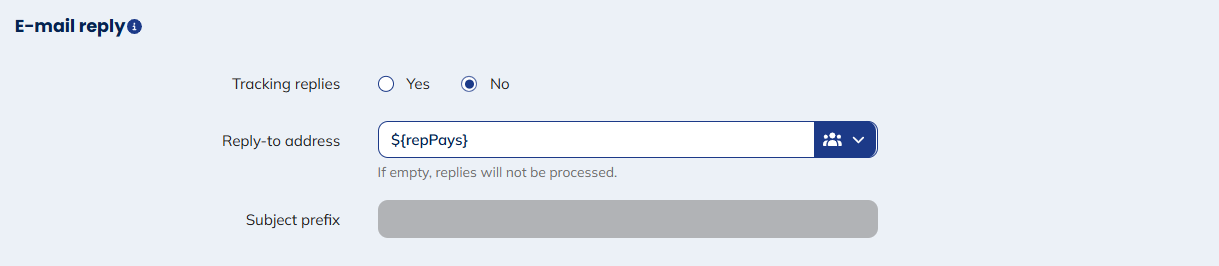
E-mail reply
- Reply-to address: Where replies to your campaign are sent. If none is specified, you will not receive any replies.
Two tracking options are available:
-
Tracking ON: Replies transit through an Actito server (updating the profile interaction), then are forwarded to your reply-to address. Recipients see a unique interaction address rather than yours.
-
Tracking OFF: Replies go directly to your reply-to address, visible to the recipient. A personalization can be used (e.g. to route the reply to the appropriate customer representative).
-
Subject prefix: Prefix added to the reply subject line (e.g. if your campaign subject is "Season essentials" and the prefix is "Enquiry", you receive "Enquiry - Season essentials").
Sender e-mail address
- Sending domain: Choose among the domains available in your licence.
- Address prefix: Replaces the sending prefix (the part before @) for this campaign, when a fixed "from" is configured. Maximum 20 characters, no special characters (only alphanumeric characters).

To set up a default fixed "from" for your licence, contact Actito support.
Links
Select the domain for your e-mail links from those available in your licence.
Impact on commercial pressure
If your licence has commercial pressure rules, specify the weight of this campaign: normal (default), not recorded (e.g. for transactional e-mails), or double for high-impact campaigns.
Campaign groups
Add this campaign to an existing campaign group to analyze results as a whole.
Goals
Enable or disable goal tracking. When enabled, goal query parameters are added to each link. Goals are enabled by default.
Step 2: Target population
Subscription and languages
Specifying a subscription is mandatory. It enables reporting (opens, clicks, unsubscriptions), cross-campaign monitoring, and deliverability tracking. Only profiles subscribed to the chosen subscription will receive the campaign.
You can also choose the unsubscribe scenario to use.
By default, e-mails are only sent to profiles whose language matches the campaign languages defined in step 1. Uncheck the 'Language' box to also reach profiles with other languages, and select a default language for them.
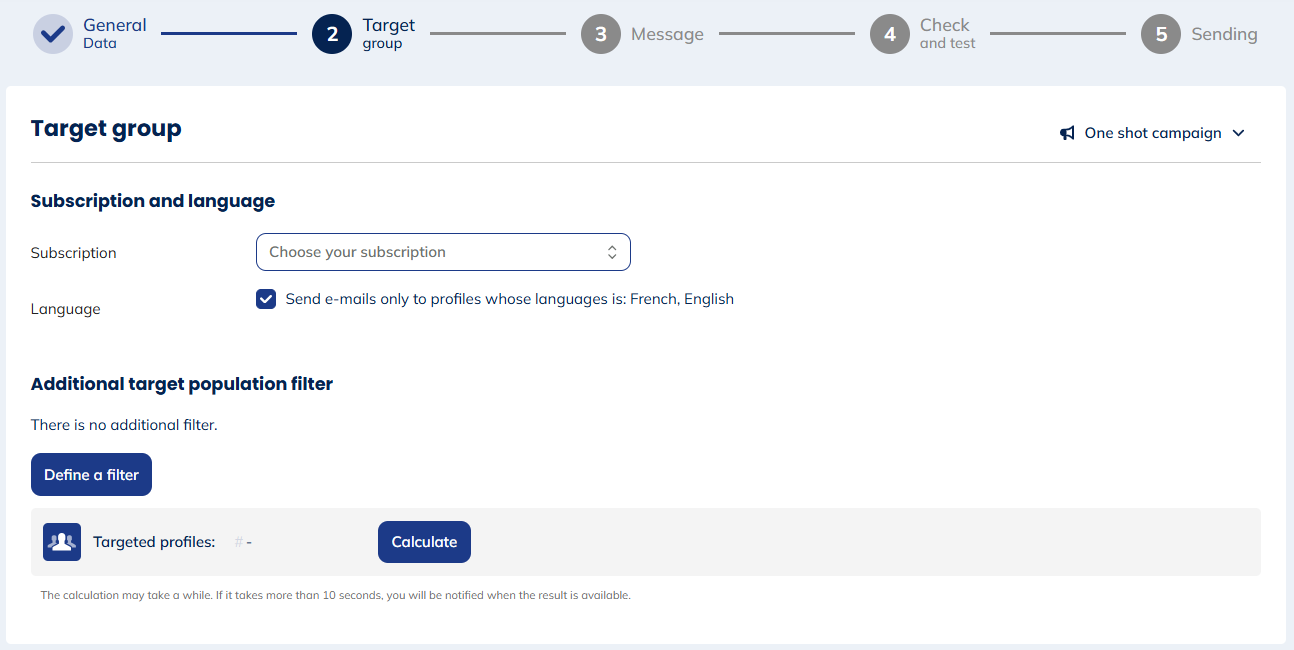
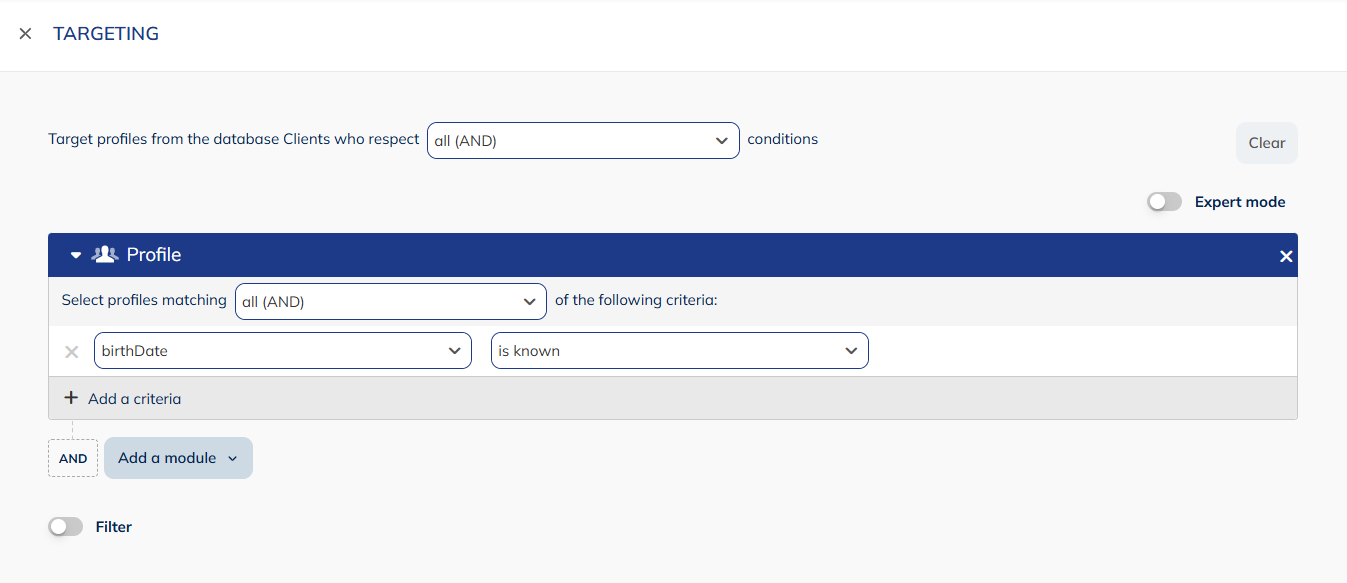
Additional filter on target population
Click Define a filter to open the targeting module in a pop-up and refine your target population. After setting filters, click Calculate to estimate the number of targeted profiles at time T.
Filters applied at sending
- Commercial pressure: If your licence has these rules, check the relevant box to apply them at sending. This filter is not applied by default and is not included in the target estimation.
- Duplicate e-mail addresses: If the e-mail address is not a unique attribute in your database, check "Send only one e-mail by e-mail address" to avoid duplicates. The profile used for personalizations is selected randomly.
Step 3: Message
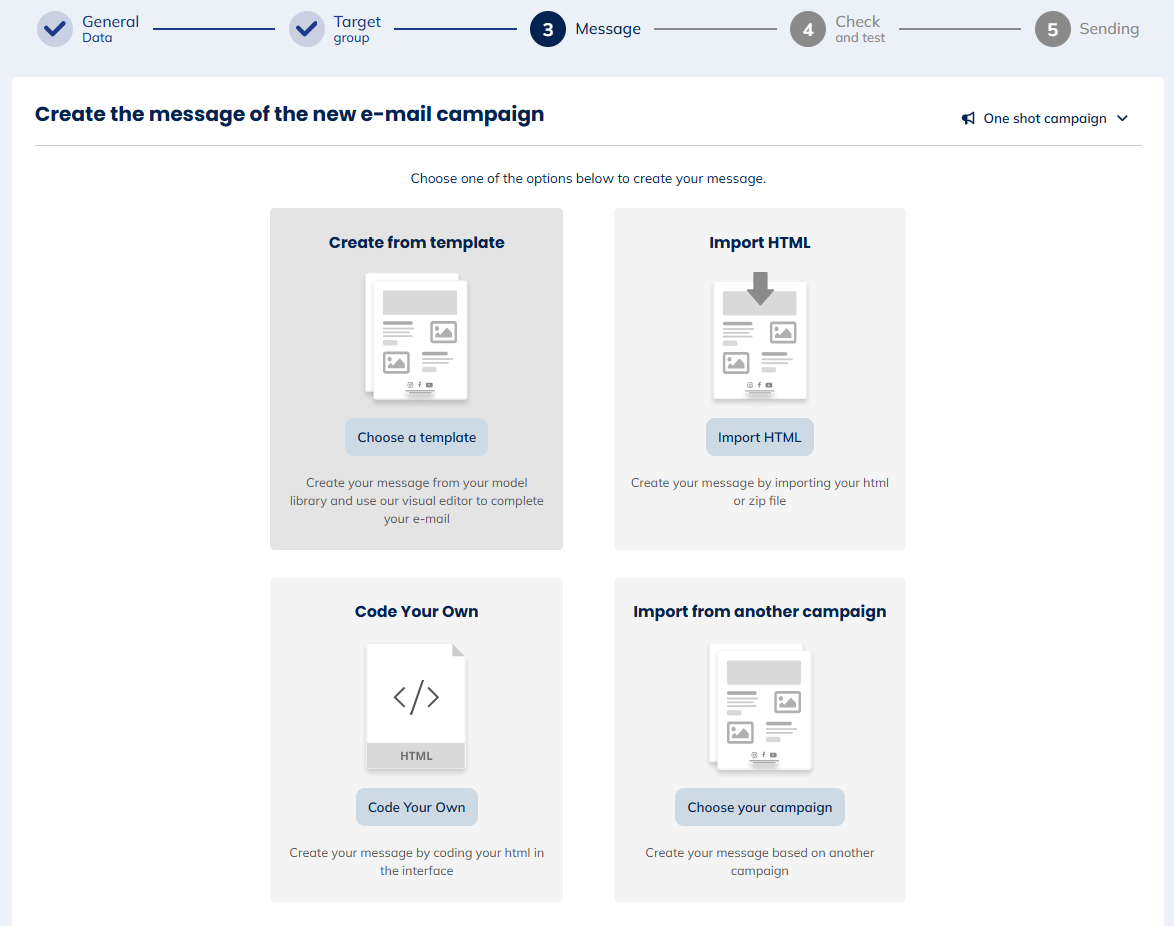
Choose how to create your e-mail:
- Create from template: Choose from the Actito template library. No HTML knowledge required.
- Import HTML: Import an HTML file (with images hosted externally) or a ZIP file (one HTML + one image file per language, max 12 MB total, max 4 MB per version).
- Code your own HTML: A base code is provided with predefined encoding and style.
Whether you import or code HTML, you can still use personalizations with the ${} tag format.
Personalizing the message
Personalize your e-mails using ${attributeName} tags (e.g. ${firstName}). The tag is replaced by the corresponding profile value on sending. Special characters and spaces are not allowed in personalization names.
Check links
Click Check links in the message preview to review all links found in your e-mail.

For each link, you will see its text, URL (or personalization), name used in reporting, and status (green = working, red = unreachable, grey = technical/untestable).
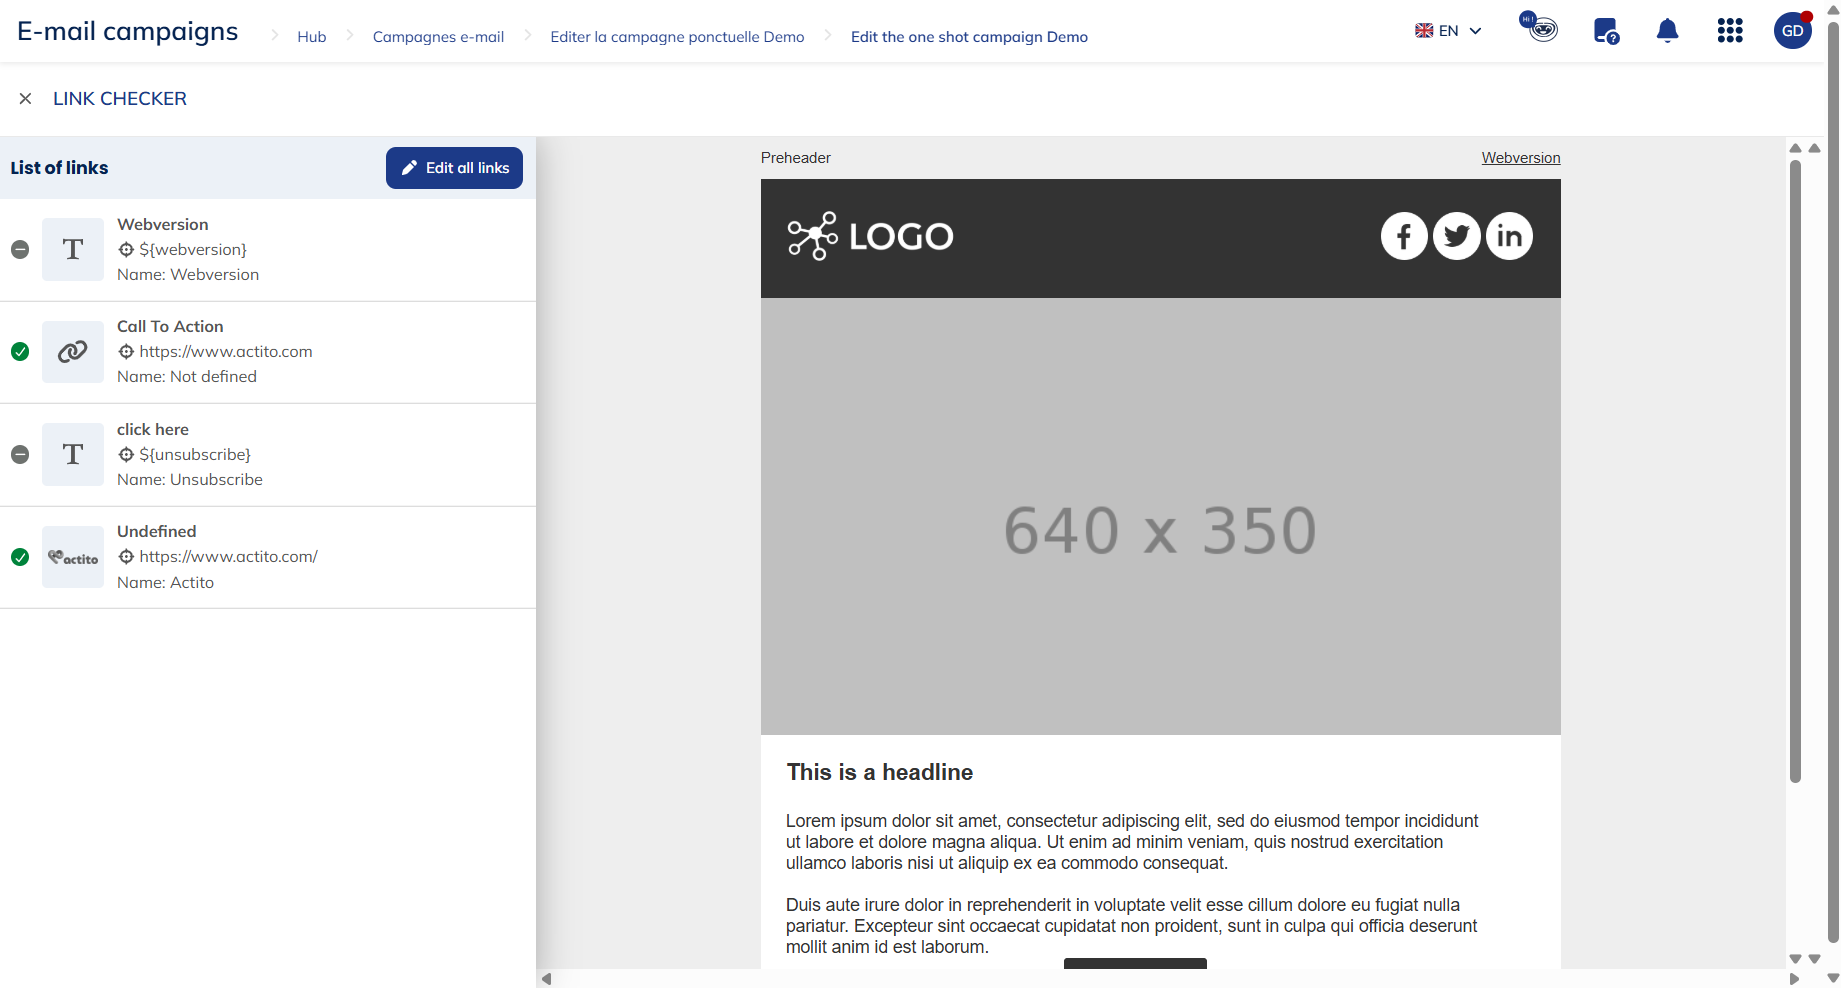
A red status is not necessarily an error — it may indicate authentication-protected pages, pop-up blocks, or special characters in the URL. Treat it as a prompt to double-check in test e-mails.
Click each link to assign it a reporting name. If left empty, the full URL is displayed in the report. Hover over a link to highlight its location in the e-mail. Give each link a unique name to facilitate click analysis, but use the same name across campaigns for similar links (e.g. "facebook", "pre-header") to enable global analysis.
Links parameters (UTM...)
Add URL parameters to every link for web traffic analysis tools (Google Analytics, etc.). Click Links parameters (UTM, ...) to set them up.

Click Add Google Analytics to prefill the standard UTM parameters:
- utm_source: Traffic source
- utm_medium: Marketing channel (e-mail)
- utm_campaign: Campaign name (prefilled with a campaign name personalization by default)
utm_content and utm_term are optional. Personalizations can be added using ${variable} format. Maximum 8 parameters can use personalizations.
Export the content
Click More > Export to download your campaign content as a ZIP file, which can then be imported for other campaigns.
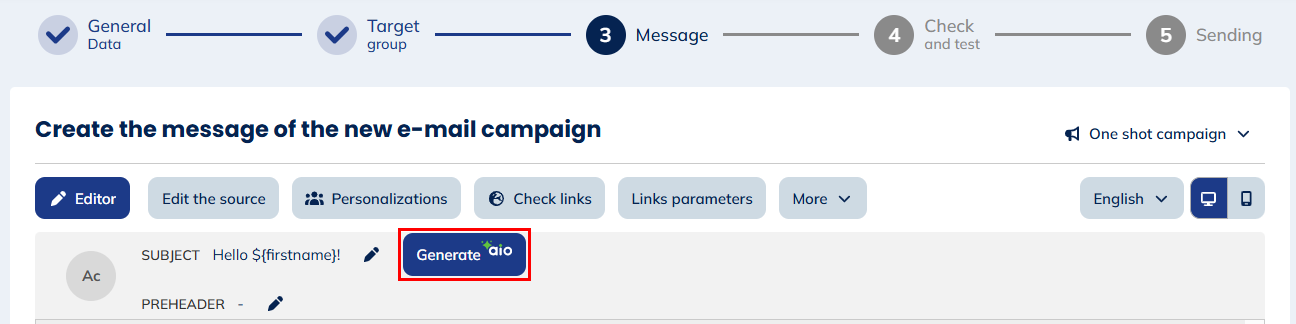
AI Generate based on content
Click Generate next to the subject in the banner to get 3 AI-suggested subjects based on your e-mail content (powered by OpenAI). Select the one you prefer and click Validate. Suggestions are editable: you can modify text, add emojis, or insert personalizations using the pencil icon.
The marketer is responsible for the information provided and the final message. No personal data stored in profile or custom tables is used by the AI service.
Step 4: Check and Test
Check the rendering of your e-mail with the personalizations and conditions you defined. Choose a testing group, select test profiles, and specify a test e-mail address (all test e-mails go to this address, with personalizations applied per profile). Multiple redirection addresses are supported.
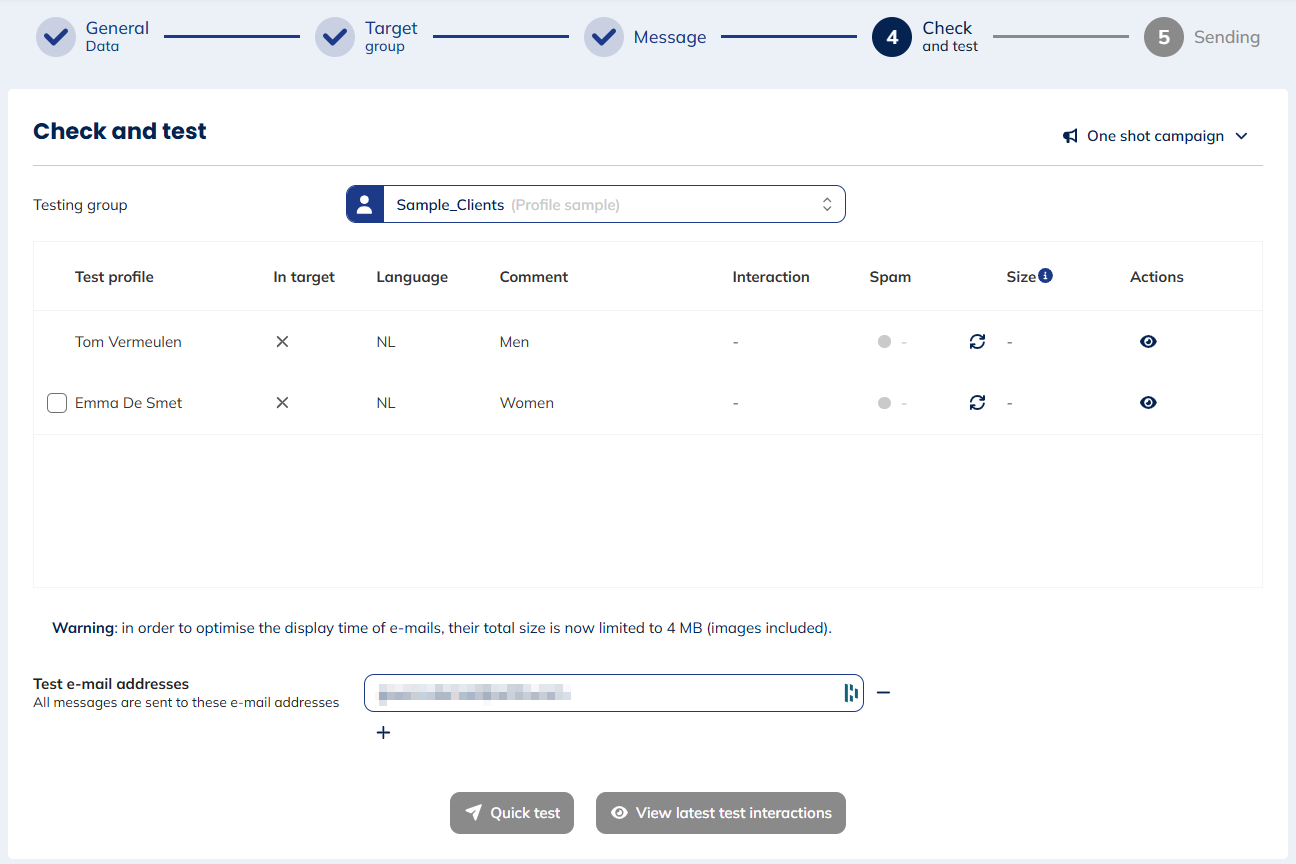
Use View latest test interaction to check the test e-mail status per profile without opening the Profiles module.
Send the e-mail to validators at this step rather than forwarding the same test message, as forwarding may affect layout and images.
Clicking unsubscribe links during testing will actually unsubscribe each test profile.
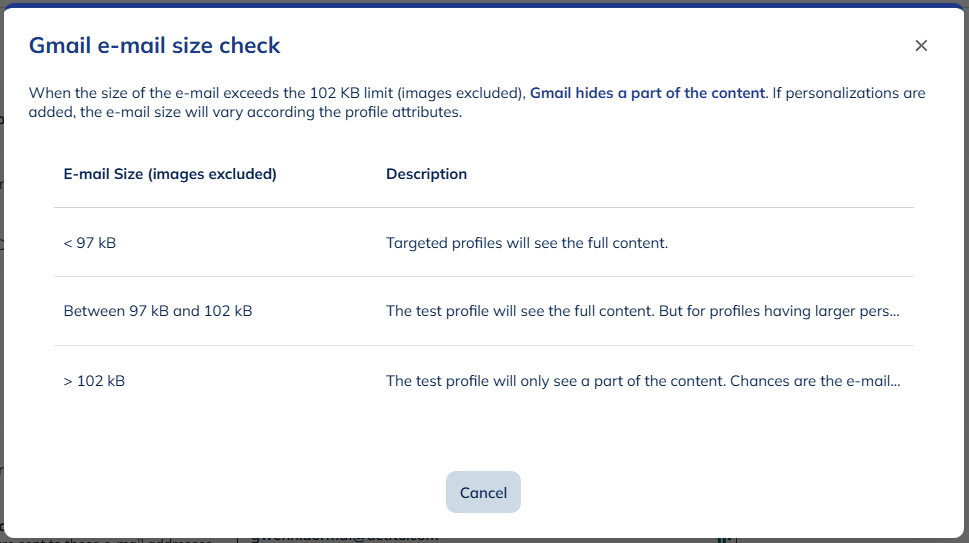
Checking the size of the e-mail
After sending a test, Actito displays the e-mail size. Gmail clips messages above 102 KB (HTML content only, without images), which is a poor user experience and may prevent recipients from seeing the full message.
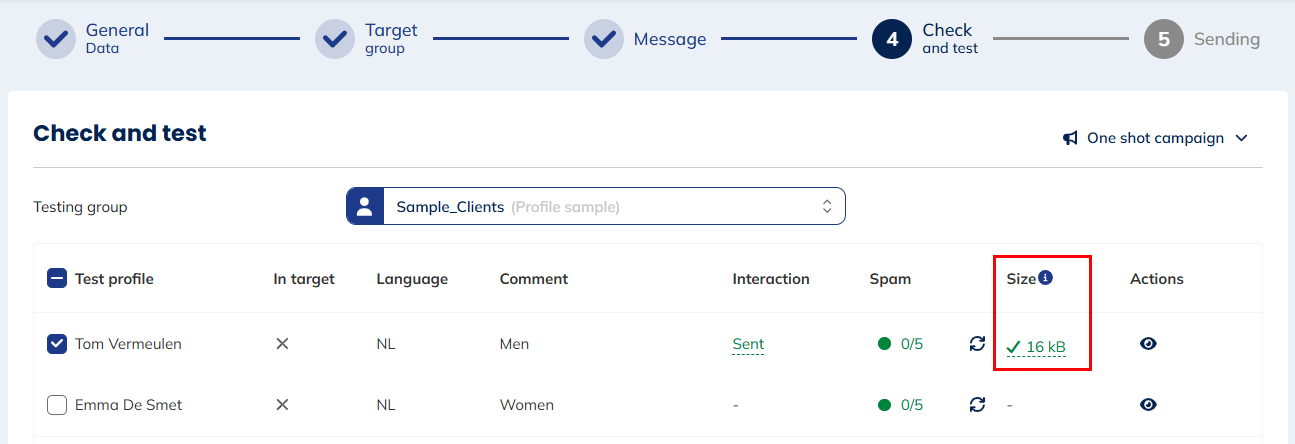
Click the double arrow in the spam column for a color-coded size rating:
- Green (below 97 KB): No clipping risk.
- Orange (97–102 KB): The test e-mail displays fully, but profiles with more personalizations may exceed the limit.
- Red (above 102 KB): The e-mail will be clipped for all recipients.
The 102 KB limit applies to HTML content only. A separate 4 MB limit applies to the full e-mail including images — see Optimizing E-mail Loading Time. To reduce content size, Actito offers a shorter URL encryption method for tracking links (contact support@actito.com to activate it).
Step 5: Sending
Actito will block sending if errors are detected and display a detailed error message. Review the summary of campaign settings (general data, target group, message warnings). Yellow warnings are non-blocking; red warnings are blocking.
One-shot or AB test campaign
Advanced parameters
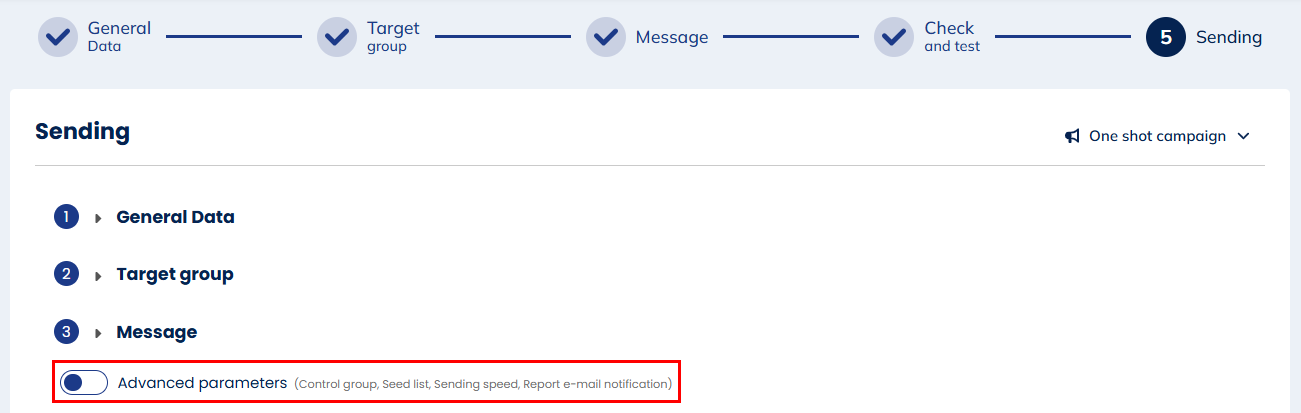
- Control group: Exclude a percentage or absolute number of profiles from the send to compare their behavior against recipients. Excluded profiles can be found via the "E-mail" targeting module.
- Seed list: Select a seed list of contacts (outside the profile database) who receive a copy of the campaign when it is sent. You can also add individual addresses not in the list.
- Sending speed: Normal by default. "Slow/very slow" avoids traffic spikes on your website; "Fast" pre-generates the campaign. Fast and (very) slow speeds require specific licence rights.
- Report email notification: Automatically send a link to the campaign report to people without Actito access. Choose a delay of 0, 1, 2, 3, or 7 days after sending.
Sending
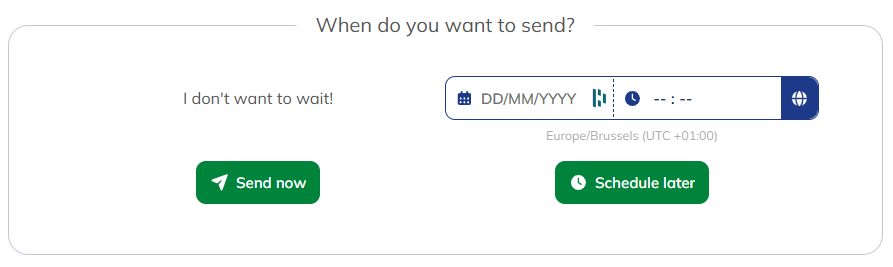
- Send now: Sends immediately.
- Schedule later: Define a date and time for sending.
Use AIO – Best sending moment to send when your profiles are most likely to open or click.
If you haven't recalculated the target since the last modification, a warning will appear when clicking Send now or Schedule later. Go back to step 2 and click Calculate to update the count before proceeding.
Timezone management
The sending time defaults to your browser's timezone. Click the world icon to convert a different timezone to your local time.
Scenarized or transactional campaign
Select Activate sending to make the e-mail available for automation (scenarios, API triggers).
Save as template
Click Save as template at the bottom of the page to save this campaign as a reusable template for similar future campaigns.