Scenario creation
The creation of a scenario happens in the Scenarios module (Hub > Automation > Scenarios).

Step 1 - Defining the general data
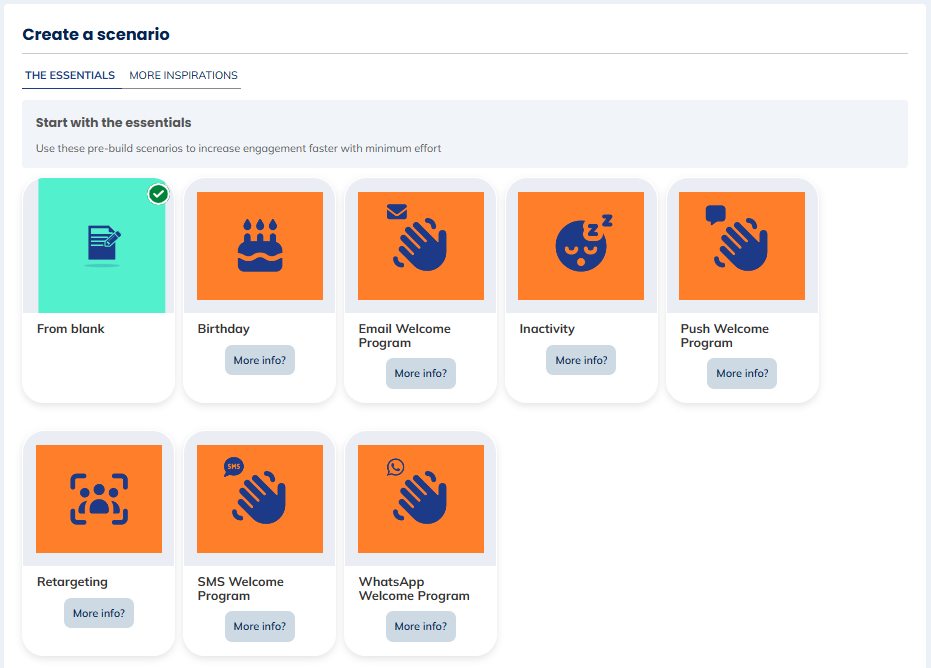
Click on "Create a scenario" to begin. You will first have to choose between creating your scenario from blank or from a template.
Then, you will have to define the name of the scenario, choose the relevant profile database as well as the entity. You will also have the opportunity to add a description related to this new scenario.
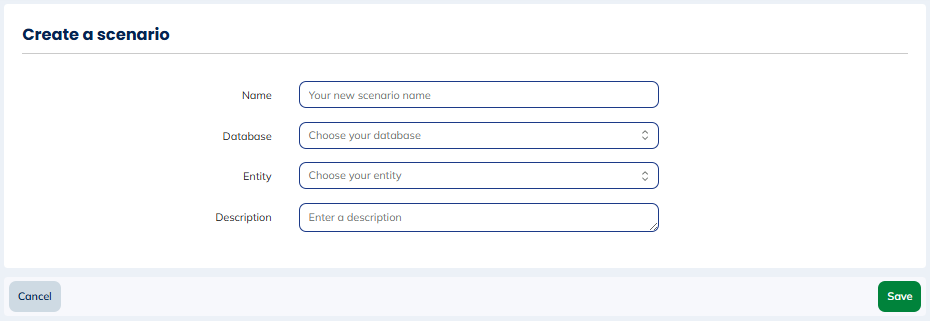
Note that the name and the description can be edited at a further stage. However, it will not be possible to modify the database and the entity.
Scenarios can only access resources that are stored in the same entity where the scenario is created.
After the creation of the scenario (when you click on "Create"), you will reach the configuration page and will be in "Edition" mode.
Step 2 - Building the worklow
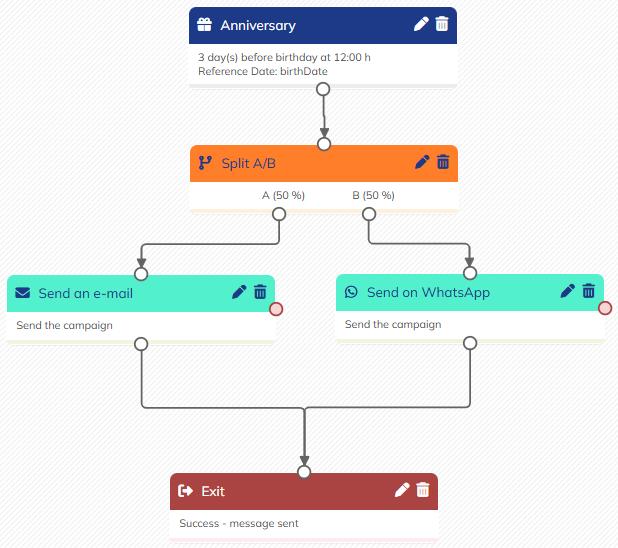
The worklow of a scenario is built out of different categories of blocks:
- Start event: mandatory block that starts the workflow
- Filter: optional block to add filter in your workflow
- Wait: optional block that enables to add waiting times in the workflow
- Action: mandatory block that defines the action that should be performed in the workflow
- Exit: optional (but highly recommanded) block that enables to see where the profile quit the workflow
Building the scenario is easy: you can drag & drop the blocks in the order you want to build your workflow.
You can connect the blocks through the nodes. Each node can receive as many incoming connections as needed. In other words, multiple nodes can be linked to the same node without any limit.
However, a node can send its output to only one other node. This means an output can be connected to only one input at a time.
In summary:
- A node can have multiple incoming connections
- A node can have only one outgoing connection
If you connect several action blocks to the same Campaign clicked or Campaign opened waiting block, only one of the campaigns in the action blocks is taken into account.
Step 3 - Defining the options

Number of executions
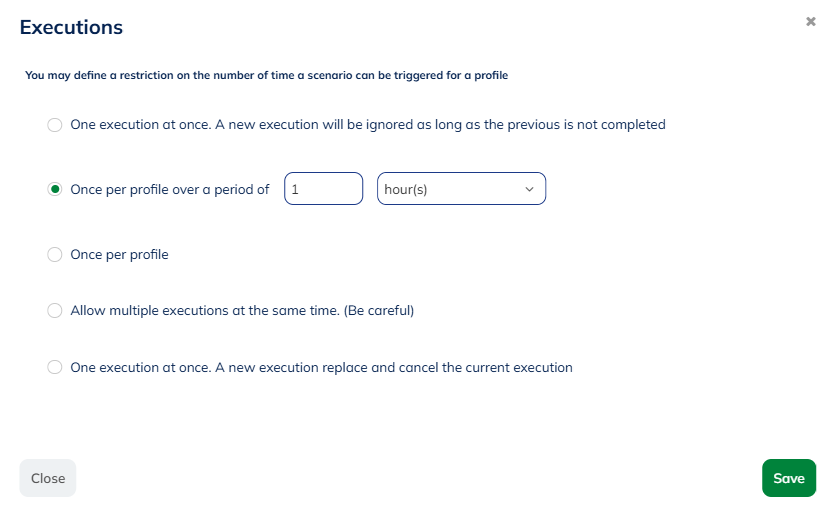
You can also choose the number of times a profile can go through your scenario.
The following options are available:
- One execution at once. A new execution will be ignored as long as the previous is not completed (default): if a profile is in one step of the scenario and finds himself once again as part of the starting conditions of this very same scenario, this second execution will not be launched and will be ignored.
- Once per profile over a period of X hours/days/weeks/months/years: the profile can only enter the scenario once during the defined time frame. For the reference periods days/weeks/months/years, checks are only carried out on the day. The moment (hours, minutes, seconds) is not taken into account. For example, in a scenario with a limit "Once per profile over a period of 12 months", if the scenario is triggered on the 16/06/2023 03:30:10, it will be triggered again on the 16/06/2024, without taking into account the hour, the minutes and the seconds.
- Once per profile: the profile can only be part of the scenario once and only once. This option can for example be used for a "Welcome" scenario that offers a discount.
- Allow multiple executions at the same time: in contrast to the default mode, there will be no restriction for a profile to be part of the scenario several times all at once. This option would allow a profile that meets the starting conditions several times over a short period to find itself at various stages of the scenario.
- One execution at once. A new execution replaces and will cancel the current execution: if a profile meets once again the starting conditions of a scenario while it was still going through it, the first execution will be stopped and replaced by the second one.
For profile tables where the email address and/or phone number is not unique, you can apply a filter at the start.
This filter allows you to limit the scenario to a single execution per email address or phone number (if the same email address or phone number is entered for two profiles, only one of the profiles will enter the scenario).

Global exit conditions

Defining a global exit condition will allow to stop the execution of a scenario if an interaction is created in a table linked to the profile table.
For example, in an abandoned cart reminder scenario, you might want to add a global exit condition which will stop the scenario for the profile as soon as it makes a purchase.
How to set it up?
- An Order interaction table must exist in Actito
- A global exit condition must be defined in the scenario and must take the name of the table which registers all purchases
- As soon as a purchase is recorded in this table for a profile relevant to the scenario, this scenario will stop for this particular profile
If you set up global exit conditions to your scenario, it is possible to target profiles who exited the scenario due to these conditions thanks to the following targeting:

Step 4 - Activating the scenario
Once everything is setup correctly, you can activate your scenario.
If there is missing information in your blocks, you will have a warning and will not be able to activate it. These warnings could be:
- Missing campaign in an action block: you need to select a campaign in order to activate the scenario
- Wait date of a waiting block is in the past: choose a new date
- More than one action linked to a campaign opened or campaign clicked block: add another block or do nothing if this is wanted
Correct the scenario, and try to activate it again.
When you click on the "Activate scenario" button, a pop-up window will open allowing you to set parameters for starting and ending your scenario.
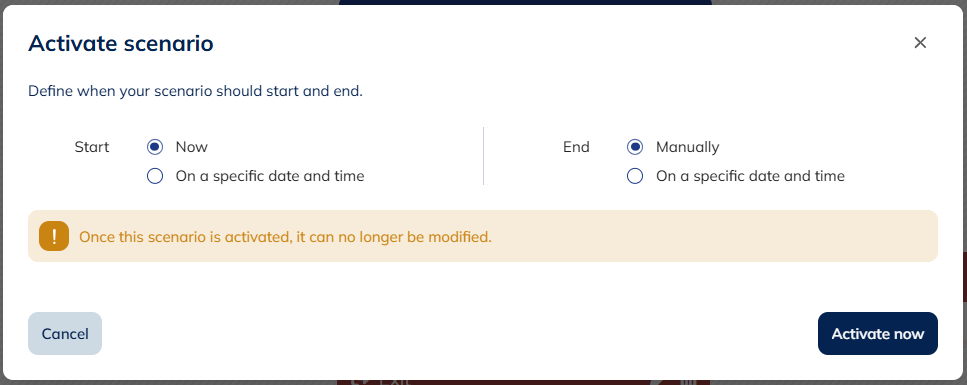
To activate it, you will have the choice to:
- Start now: allows you to activate the scenario immediately, making it effective as soon as you click on the button
- Start at a specific time and date: allows you to set the date and time for your scenario to be activated. By scheduling your scenario for a later date, you ensure that the activation will be taken into account, without any need for further intervention.
Once you've scheduled the start date for your scenario, you'll find it in the "Scheduled" tab. From this tab, you can perform various actions on the scenario (view details, copy, reschedule, etc.).
Before activation, you will also have the option to set an end time:
-
End manually: if you choose this option, the scenario will run continuously with no end date. However, you will have the possibility to stop it manually by clicking on "Finish" in the "In progress" tab.
-
End at a specific time and date: if you choose this option, your scenario will run until the specified date. After this date, the scenario will be stopped.
- By choosing an end date, you can also determine how the scenario will stop. By checking "Finalise", the scenario will end when all current executions finish normally, but no new executions will be launched. This means that any profile that has entered the scenario will run through it from start to finish.
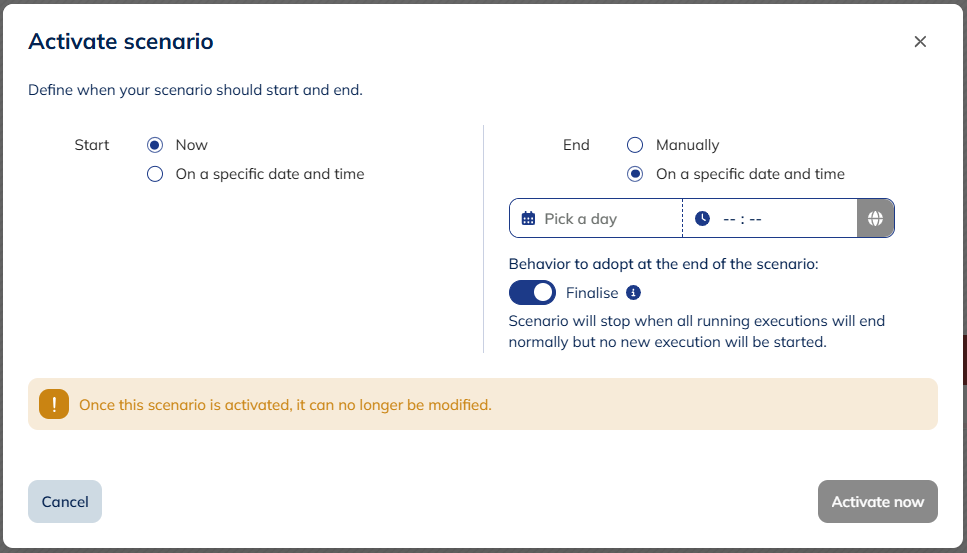
- Otherwise, the scenario will end immediately at the defined time. This means that all running executions will be stopped regardless of their stage in the scenario.
As soon as a scenario is activated, it will not be possible to edit it anymore. Once a scenario is active, the "Edit" button is greyed out.