Authentication parameters
Starting May 11, 2026, only the mobile app two-factor authentication (2FA) method will be supported in Actito.
- 2FA methods via email and SMS can no longer be configured.
- Users and licenses already configured with these methods may keep them temporarily to prepare for the transition.
- Once disabled, the email or SMS methods cannot be reactivated.
👉 For any questions or assistance with the migration, contact our support.
Two-factor authentication via SMS or email already improves security compared to a simple login/password combination.
However, these methods have vulnerabilities:
- SMS: They can be intercepted or hijacked through techniques like SIM swapping, where an attacker takes control of your number to receive your codes.
- Emails: They remain exposed to phishing attacks or email account hacking.
In such cases, the second factor no longer fulfills its protective role.
By choosing a dedicated app (such as Google Authenticator, Microsoft Authenticator, or another reliable solution), you significantly reduce the risk of identity theft. These apps generate codes locally on your device, without relying on vulnerable external channels. For more information, do not hesitate consult the ANSSI (French National Cybersecurity Agency) guide on multi-factor authentication and password management (Available in French only).
Authentication parameters are a major stake of account security, especially to guarantee the protection of private data regarding GDPR.
Passwords alone are considered outdated, which is why Actito gives the "Admin" users of a licence the possibility to set up additional authentication factors.
This is done through the "Authentication" module of the License configuration portal.
Login page parameters
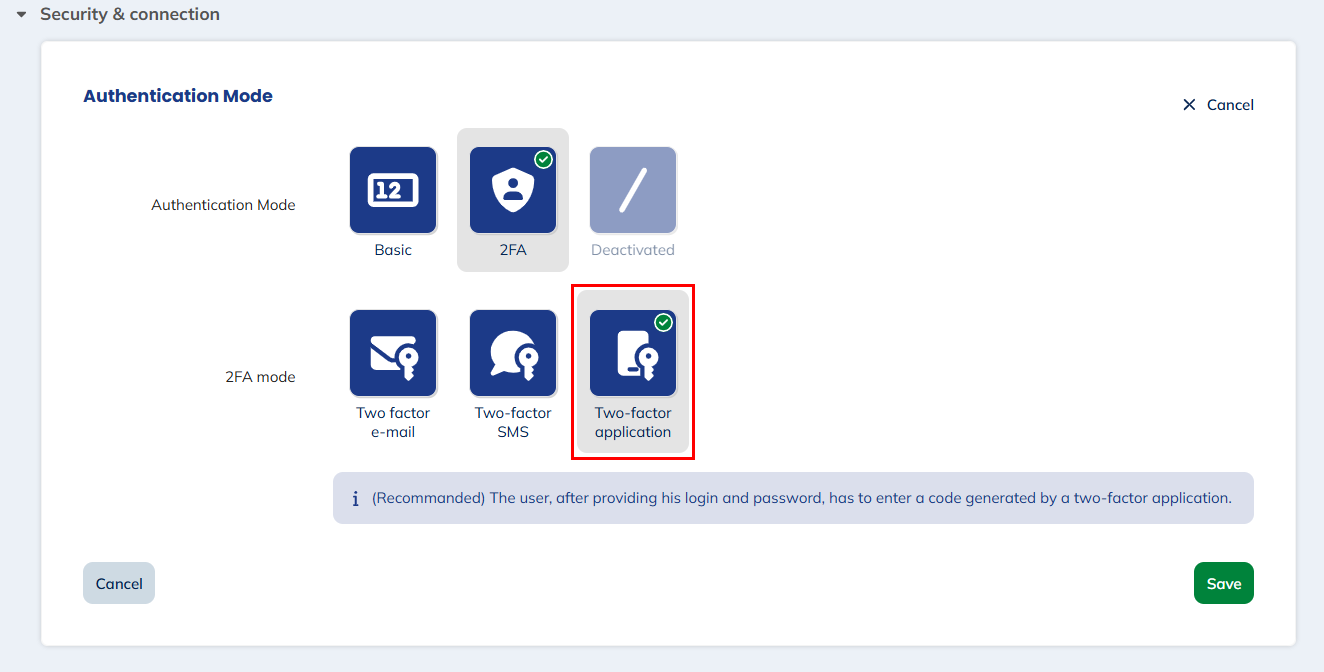
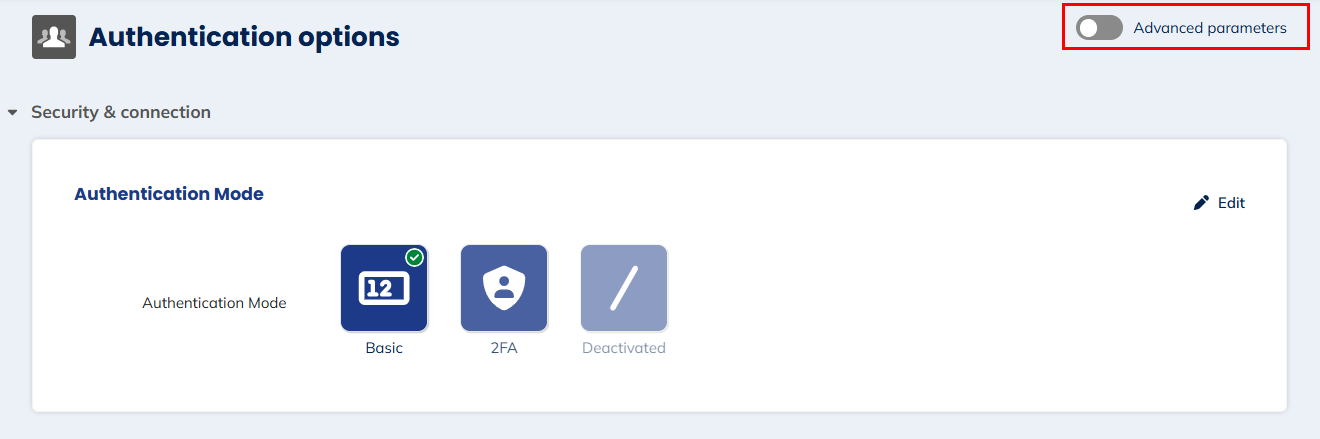
To choose the authentication mode of the login page, click on "Edit" in the top right corner.
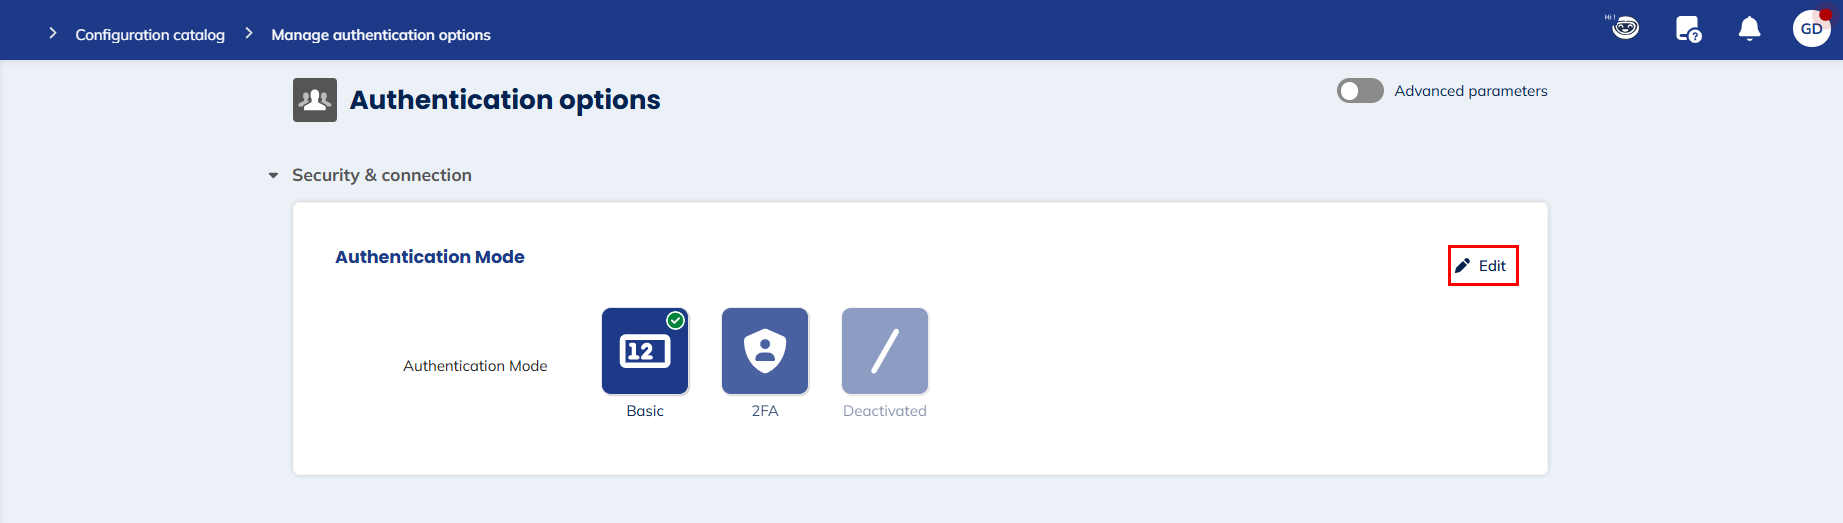
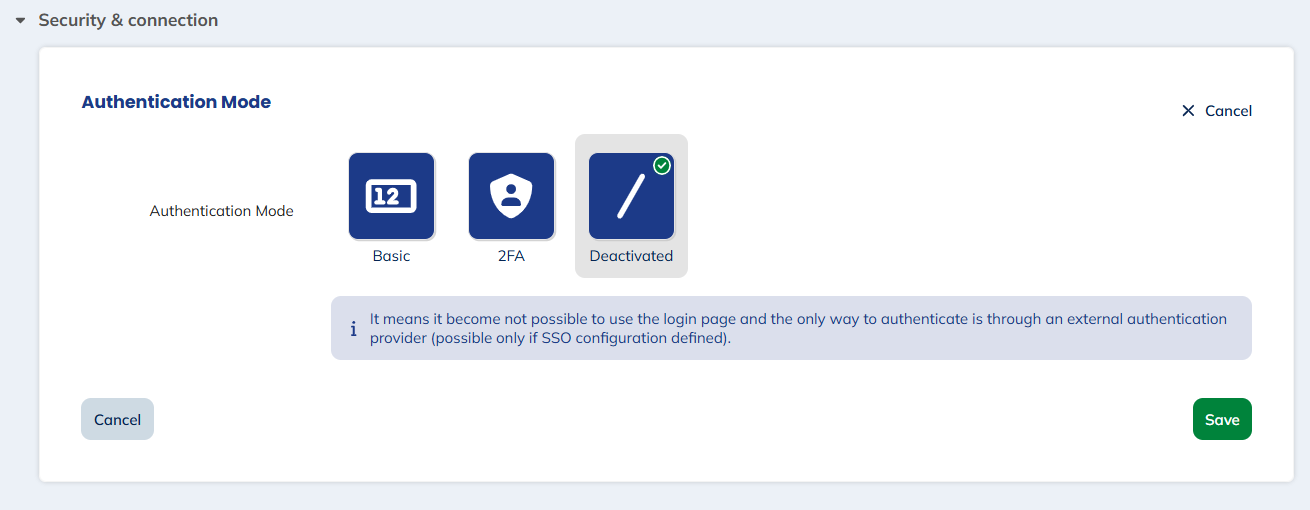
This allows the "Admin" user to select one of the 2 possible authentication modes.
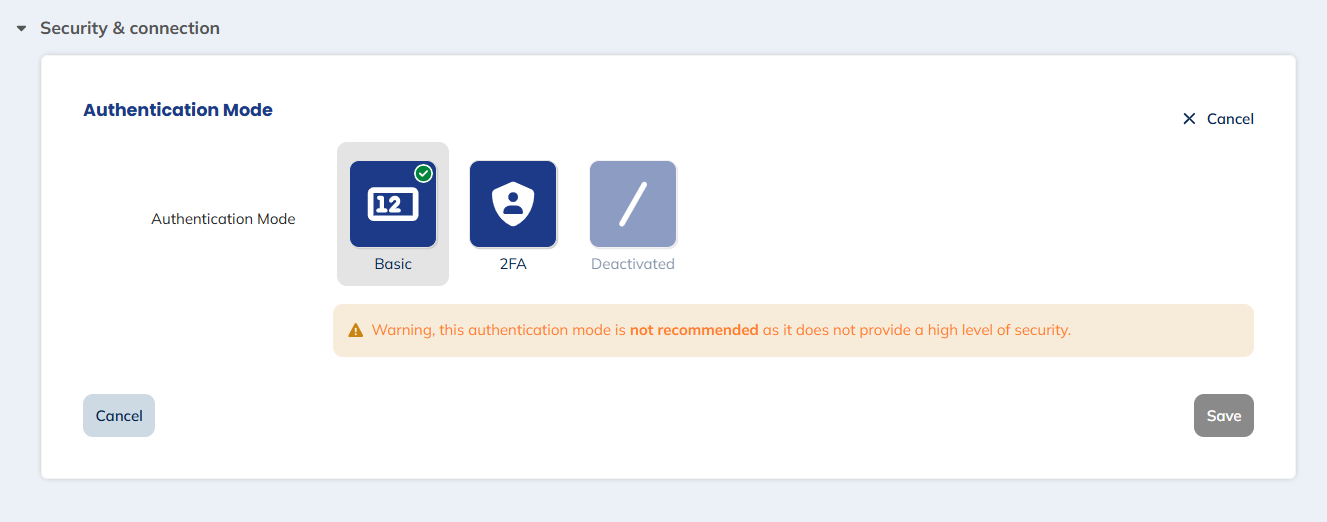
Basic
The basic authentication mode is the standard process of connecting through a login (user name) and a password.
The password must have a minimum of 12 characters and include at least three different character types between:
-
capital letters
-
lower case letters
-
numbers
-
special characters
Nevertheless, this method is not recommended as it is not considered secure enough compared to others.
Indeed, passwords can be compromised (phishing, repeated use of the same password...), in which case the basic method does not provide additional guarantees.
For security reasons, 2-factor authentication is automatically activated at the creation of a new licence.
"Admin" users have the possibility to deactivate it, though we do not recommend doing so.
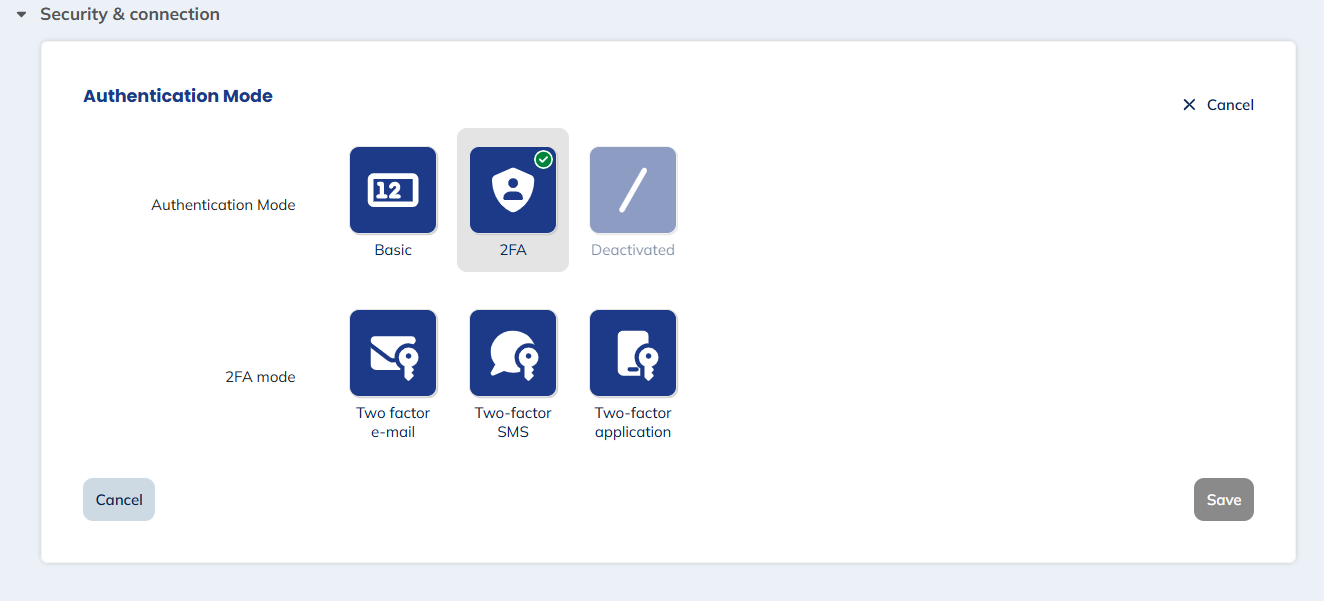
Two-factor authentication (e-mail, SMS or mobile application)
The concept of "two-factor authentication" (or 2FA) consists in multiplying the pieces of evidence required to let a user log in.
To be efficient, the authentication method should combine two factors of different nature:
-
Something the user knows: the principle is identical to standard single factor authentication. This is a password.
-
Something the user has: a device that generates a one-time code that must be entered to log in..
Three options were available for sending the code, but now only 2FA via a mobile app can be set up:
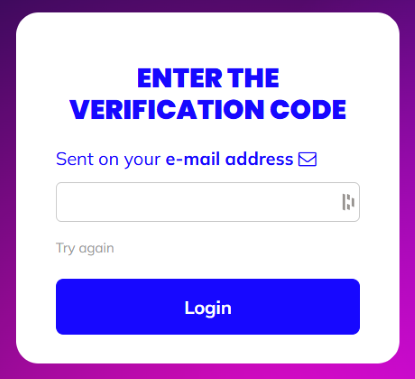
Email 2FA (existing configurations only)
For security reasons, email 2FA can no longer be enabled for new licenses or users. However, licenses and users that have already been configured can continue to use it temporarily while preparing to migrate to mobile app-based 2FA
The code will is sent to the e-mail address associated with the user account.
As an e-mail address is required at the creation of any new user, there are no additional pre-requisite to the use of e-mail 2FA. This implies however that the code will be sent to the same resource as the password reminder process.
SMS 2FA (existing configurations only)
For security reasons, SMS 2FA can no longer be enabled for new licenses or users. However, licenses and users that have already been configured can continue to use it temporarily while preparing to migrate to mobile app-based 2FA
The code will is sent by SMS message to a mobile phone number associated with the user account. Therefore, only someone in possession of the phone will be able to connect to the licence.
To activate SMS two factors authentication, a valid mobile phone number must be linked to each user.
The licence administrator can complete the existing users in the "Users" module.
Every new user account must have a valid mobile phone number.
Mobile Application 2FA
The mobile application 2FA is the most secure method and the only one currently available.
The code is found on the mobile authentication application previously installed on the user's phone. All mobile authentication applications are compatible (Google authentication, Sophos, etc.) with Actito 2FA mobile application.
This authentication method offers significant advantages over authentication via email or SMS. By using a dedicated app, it guarantees maximum security with no latency. Furthermore, since this method does not require receiving a code via email or SMS, there is no risk of phishing or interception of that code.
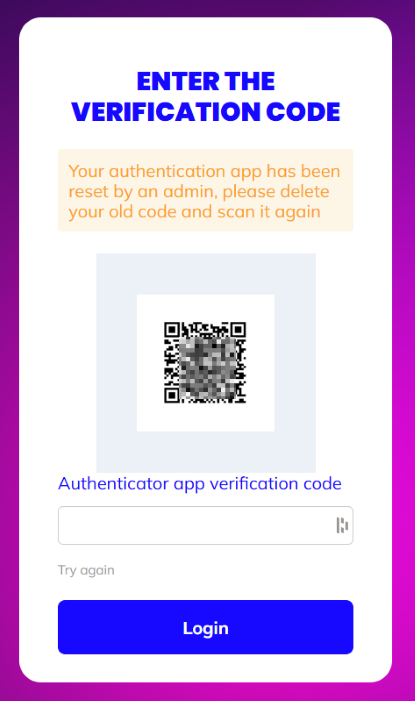
Using a mobile authentication app requires initial setup by the user. At the first connection, users will have to scan a QR code via the app using their mobile phone. They will then receive a one-time code. For subsequent logins, they will no longer need to scan a QR code but simply need to open their mobile authentication app to retrieve the code and enter it on the Actito license login page.
In your authenticator app, the key will take the name "login@licence".
If you have multiple licences with the same name in different environments (for example, in TEST), we suggest you rename the key accordingly. In most apps, you only need to keep pressing on the key to get the "Edit" button. Indeed, some apps will not allow you to have 2 keys with the same name.
Reset your token
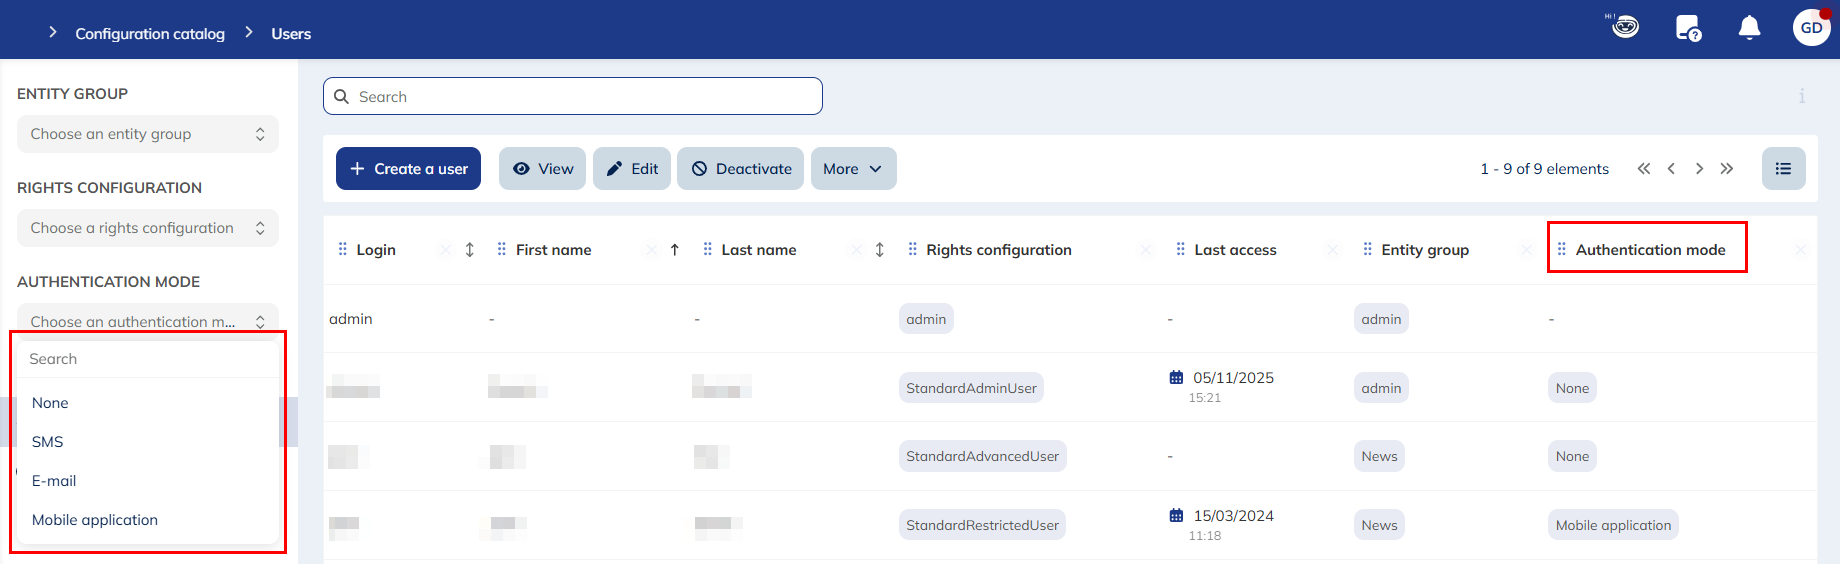
In order to facilitate the management of the 2FA, the Administrator has visibility on the type of 2FA activated for each user via the Users module.
In the license configuration, the Administrator has access to this information by applying the "authentication mode" filter in the columns or by selecting it in the drop-down menu on the left of the screen.
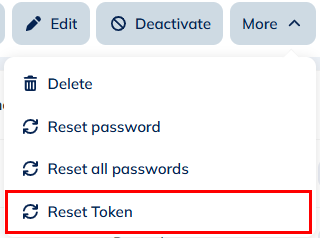
The Administrator has the ability to reset a user's token. That can prove to be useful in the following situations: loss/change of a cell phone, deletion of the token...
To do this, he will need to access the License Configuration > Users > More > Reset token. This feature exists only for users who use the 2FA mobile application.
Another page asking for a confirmation of the login of the user in question will then open.
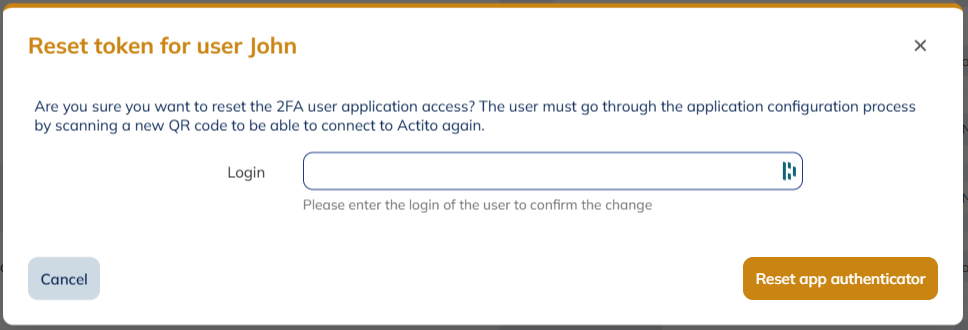
From the user's perspective, a new QR code will need to be scanned at the time of authentication:
Hierarchy of authentication modes
Depending on the authentication mode selected by the License Administrator, users will be able to choose another authentication mode. However, they will not be able to select a less secure mode than the one predefined.
Here is the classification, in ascending order of security, of the authentication methods that can still be configured in Actito (the 2FA Email and 2FA SMS are no longer available for setup):
- Basic
- 2FA mobile application
Logging in
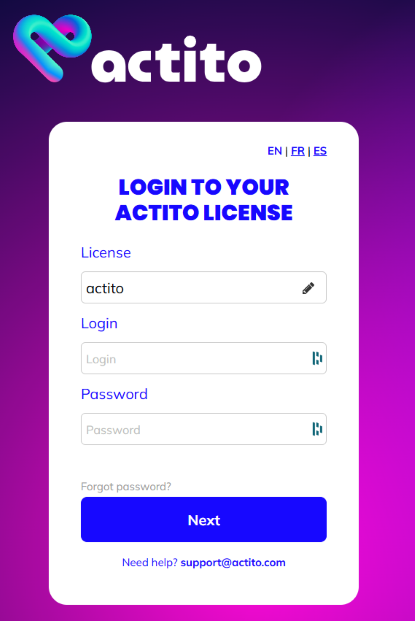
To connect to your licence after activating "2FA", your authentication will be done in two steps.
The first one will remain identical to single factor authentication. You need to provide:
-
The name of licence
-
Your login (user name)
-
Your password (which is still linked to your e-mail address)
If the login and password combination is correct, you will be directed towards a second screen where you will need to enter the code generated by the mobile authentication app to access the license.
In case of incorrect code, you will go back to the first screen and will have to provide your password again.
Entering several incorrect codes in a row will temporarily lock the user account.
Deactivated
The "Deactivated" mode means that access through the standard login page is no longer possible.
You can select it only if Single Sign-On (SSO) has been activated and set up in your licence. If it's not the case, the option will be greyed out.
To learn how to activate SSO, please see the next section.
 )
)
SSO connection parameters (advanced)
Turn on the "Advanced parameters" to access the "SSO connection parameters" section.
SSO is a billable feature. It is greyed out before its activation.
If you want to use SSO, please contact your account manager.
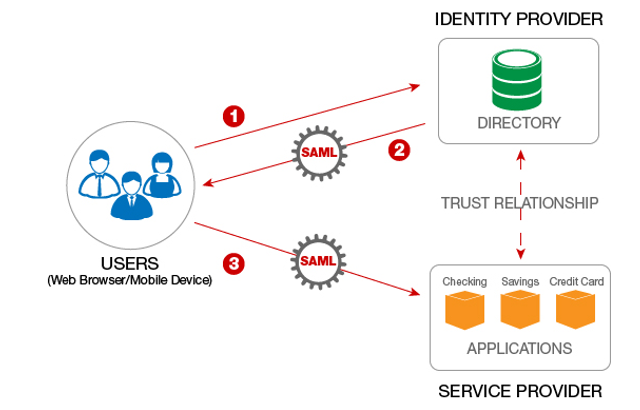
What’s SSO?
Single Sign-On (SSO) is an authentication scheme that allows a user to log in with a single ID and password to any of several related, yet independent, software systems.
Actito only supports SAML 2.0 protocol and Actito is a SAML Service Provider (SP), which means the authentication is made outside of Actito on your side. Then, when the user reaches Actito, Actito will interrogate your SAML Identity Provider (IDP) to have security information on the user and allow him to connect. Both Service and Identity providers must know and trust each other, which means that it requires some technical configuration on both sides.
Pre-requisites
Before starting the SSO configuration, make sure your IDP is compatible with our SSO implementation. You will need to confirm the below elements with your technical operator:
-
Your Identity provider (IDP) supports SAML 2.0
-
The mapping between IDP users and Actito users can be done with the users’ e-mail address
-
The IDP can provide the e-mail address of users in its assertions.
Configuring SSO access
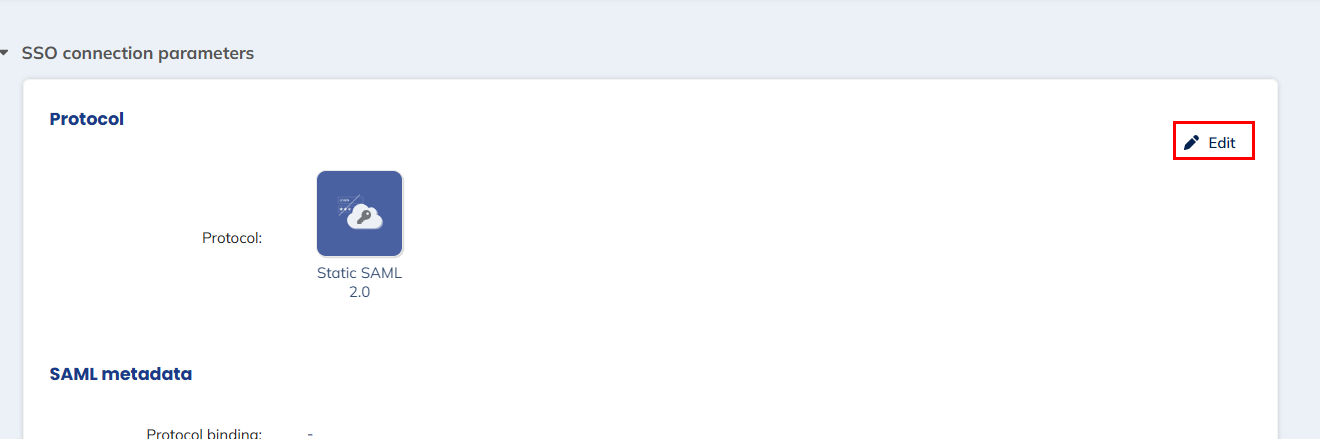
Click on "Edit" in the top right corner to start the configuration of SSO parameters.
Only one section can be edited at a time. You should close the "Login page" edition mode before editing SSO parameters.
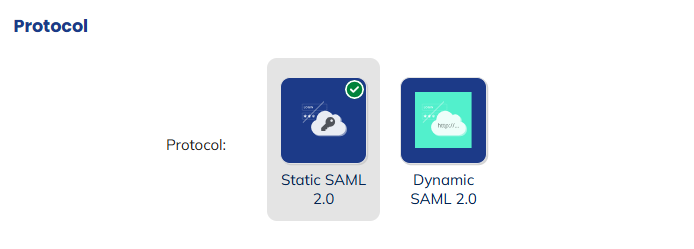
Protocol
The only protocol supported by the Actito SSO is SAML 2.0. The difference here is between providing the metadata of the IDP statically or dynamically.
To complete the configuration, the metadata of your IDP must be available to be coupled with the Actito metadata.
There are several possibilities for this:
-
Static SAML 2.0: the metadata of the IDP will have to be entered manually, or by uploading an XML file. If the metadata change on your side, it will have to be updated manually in Actito.
-
Dynamic SAML 2.0: the metadata of the IDP must be available on a public URL. If the metadata change on your side, any update will be reflected through the URL.
The information needed for the next section depends on the protocol.
SAML metadata (Static)
The easiest way to provide the IDP metadata is by uploading an XML file.
This is done by clicking on the icon next to the header of the section. This will allow you to load a file from your computer to automatically fill the required parameters.
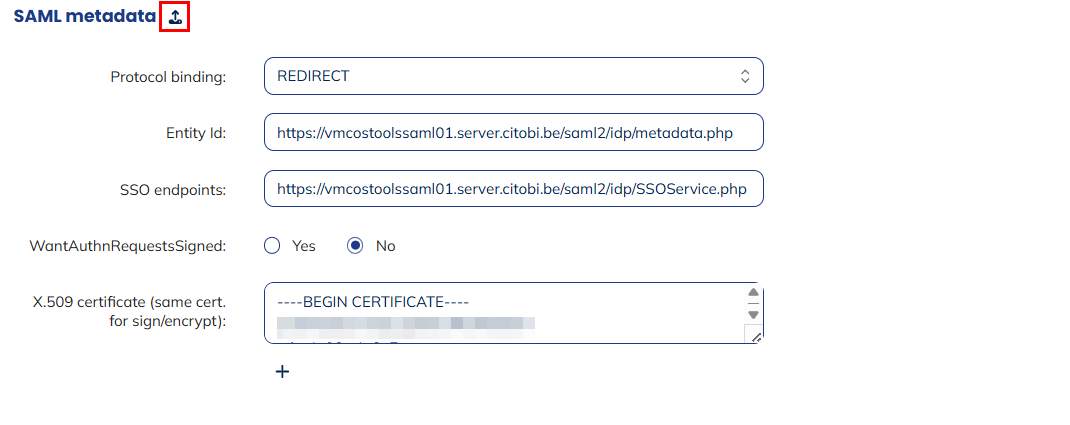
Otherwise, it is also possible to enter the parameters manually:
-
Protocol binding: this is the method used for communications between the SP and IDP, including the authentication request. It can be either REDIRECT (GET) or POST.
-
Entity Id: the entity Id is the globally unique and immutable name for a SAML entity. While it does not need to be a web location, it should usually be an absolute URL starting with "https://".
-
SSO endpoints: t he URL of the SAML 2.0 implementation that receives authentication requests for processing. It must be a valid URL starting with "http://" or "https://" (https is advised).
-
WantAuthnRequestsSigned: this specifies whether the IDP (your application) requires the authentication requests received from the SP (Actito) to be signed (Yes) or not (No).
-
X.509 certificate (same cert. for sign/encrypt): the certificates used by the IDP to sign SAML assertions, so that the SP can validate its authenticity. Several certificates can be added. The same certificate will be used for signing and encryption.
SAML metadata (Dynamic)
Most of the information is provided through the public metadata URL, which means any update to the SSO configuration is applied immediately when the metadata is updated on the URL.
You need to provide the following parameters:
-
Protocol binding: this is the method used for communications between the SP and IDP, including the authentication request. It can be either REDIRECT (GET) or POST
-
Entity Id: the entity Id is the globally unique and immutable name for a SAML entity. While it does not need to be a web location, it should usually be an absolute URL starting with "https://".
-
Metadata url: the public URL containing the metadata of your IDP.
Mapping with Actito users
The last section is common to both static and dynamic protocols.
It is used to provide the URI corresponding to a user's e-mail address in the ClaimType XML tag of the IDP configuration, as highlighted in the example below:
<auth:ClaimType xmlns:auth="http://docs.oasis-open.org/wsfed/authorization/00000"
                Uri="http://schemas.xmlsoap.org/ws/1111/22/identity/claims/emailaddress">
  <auth:DisplayName>Email</auth:DisplayName>
  <auth:Description>Email address of the user.</auth:Description>
</auth:ClaimType>
IDP metadata does not always provide the correct information for identifying the attribute name corresponding to the email address. You should therefore confirm the attribute with your IDP administrator. In some cases (such as with Microsoft), the information is contained in a ClaimType tag, via the uri attribute (as in the example above)
It will be used to match the external user logged through SSO with the Actito user. The matching key must be the e-mail address.

A user must be created in the Actito licence by the "Admin" user, with the exact same e-mail address as in your IDP. Otherwise, the e-mail address will not match and SSO will not work.
Your Actito SSO endpoints
Once you save the SSO configuration, you will exit "Edit" mode, see the information you provided as well the information that you need from Actito to connect through SSO.
These are:
- SSO login URL: the URL that you can use to connect to Actito after logging in your IDP platform.
It will always have the following structure: https://<actitoHost>/actito-sso/app/<licenseName>
- actito metadata URL (XML): the metadata of Actito as SP (in XML format), to provide in your IDP.
The URL will always have the following structure : https://<actitoHost>/actito-sso/saml2/service-provider-metadata/<licenceName>
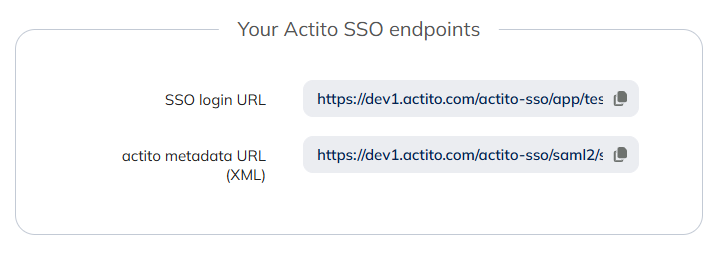
The variables in the URLs are:
-
actitoHost: depends on the environment of the licence (www.actito.be, www1.actito.com or www3.actito.com, same as the domain of the user platform)
-
licenceName: the name of the licence to configure.
Only one IDP can be used per licence.
Once SSO has been configured, you can choose to entirely disable the login page for your licence, to only allow login through SSO (see "Deactivated" option above).