DMA users
The DMA dedicated app is an extension of Actito. Therefore, even though, it uses the standard components of Actito, the logins of Actito do not allow access to the Distributed Marketing application, and vice versa.
There are therefore two types of access and user:
- Actito Users: marketing managers, who configure campaigns, branding and overall marketing strategy from the Actito interface
- DMA users: local operators, who interact directly with your customers and define the content of the communications in the DMA module, based on templates defined in Actito
Depending on the brand and the type of business, local entities can take many forms: sales outlets, clubs, workshops, etc. To make things easier to understand, we name these local entities 'Scopes' within Actito.
Create users
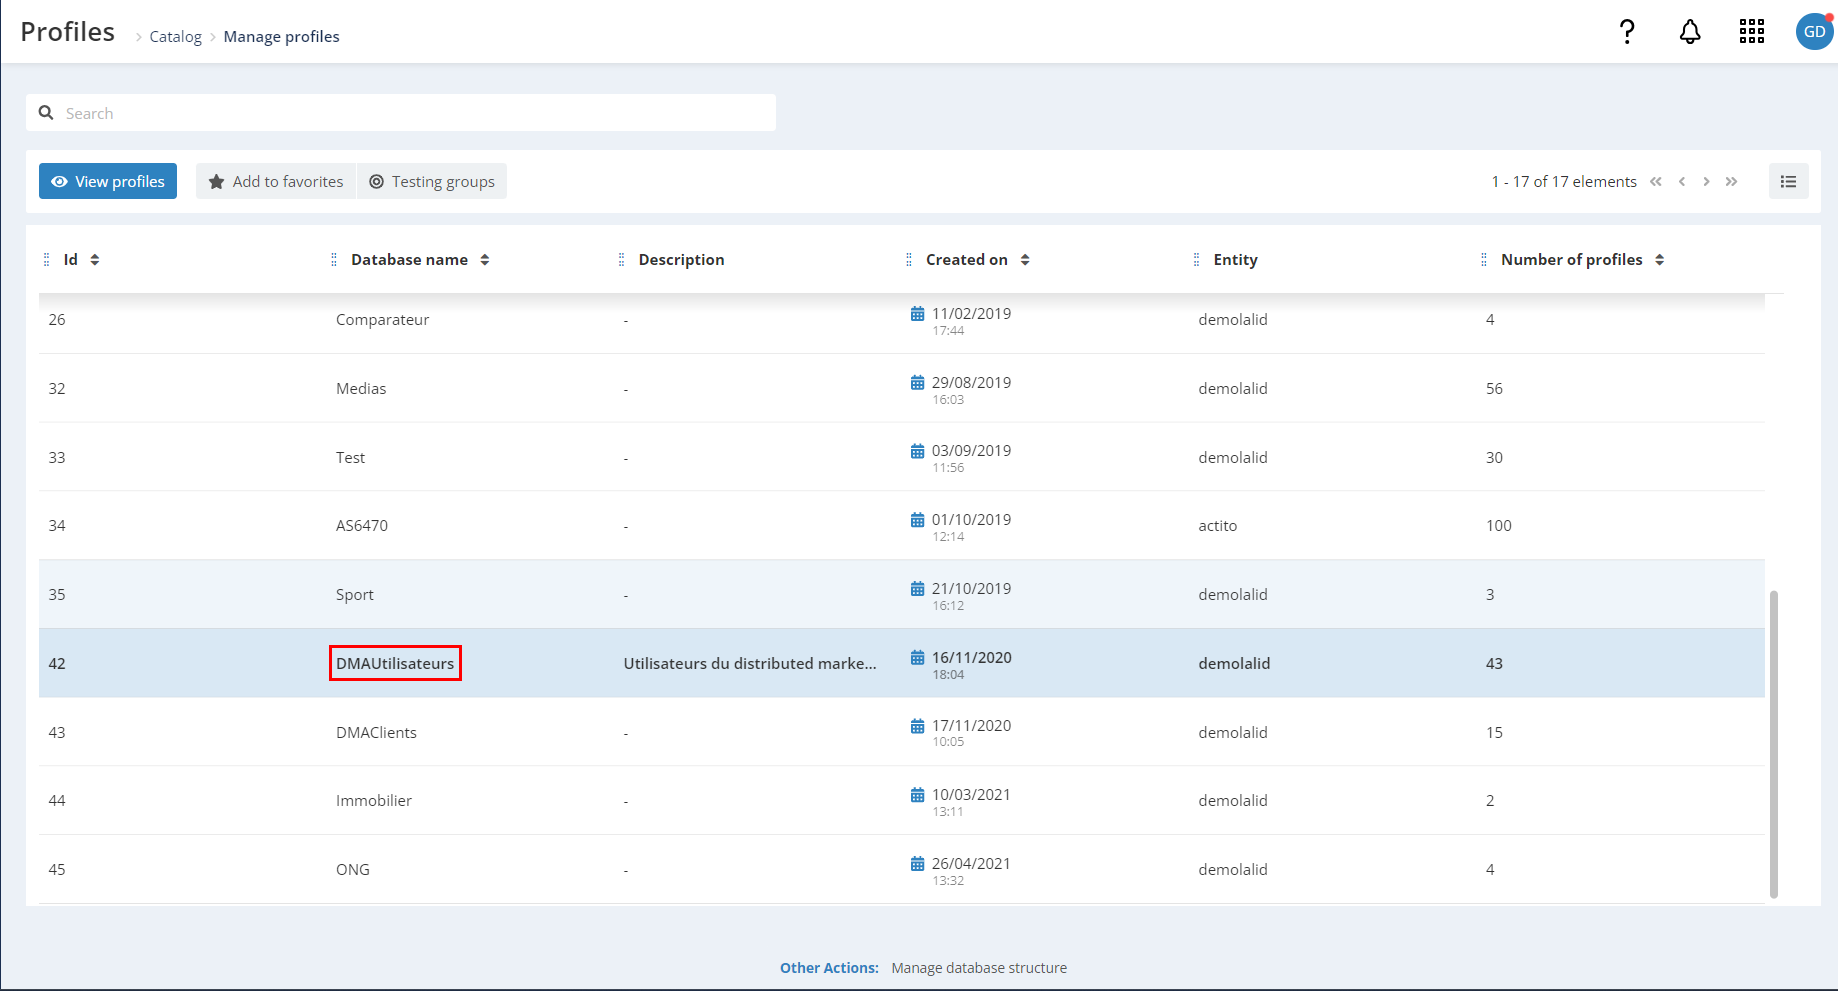
When the DMA module is setup, a profile table, dedicated to hosting DMA user data, will be created on your Actito license. You will be able to manage and create all the profiles of the DMA users from this table.
In the Actito interface, DMA users correspond to profiles in the dedicated profile table
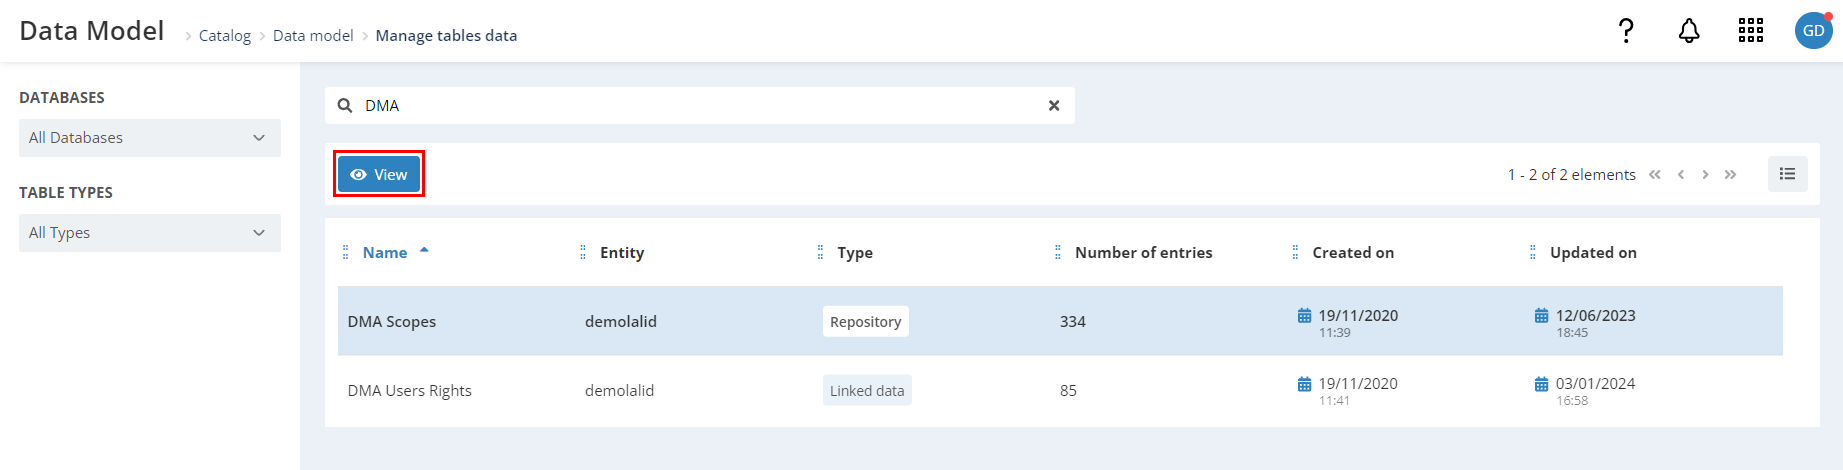
In addition to this Profile Table, you will also find a Repository Table to manage scopes and a Linked Data Table to manage access rights.
To access the DMA module, a user must be associated with at least one scope and one right.
Manually import users
To manually create users, go to the 'DMAUser' profile table and click on the '+Create' button.
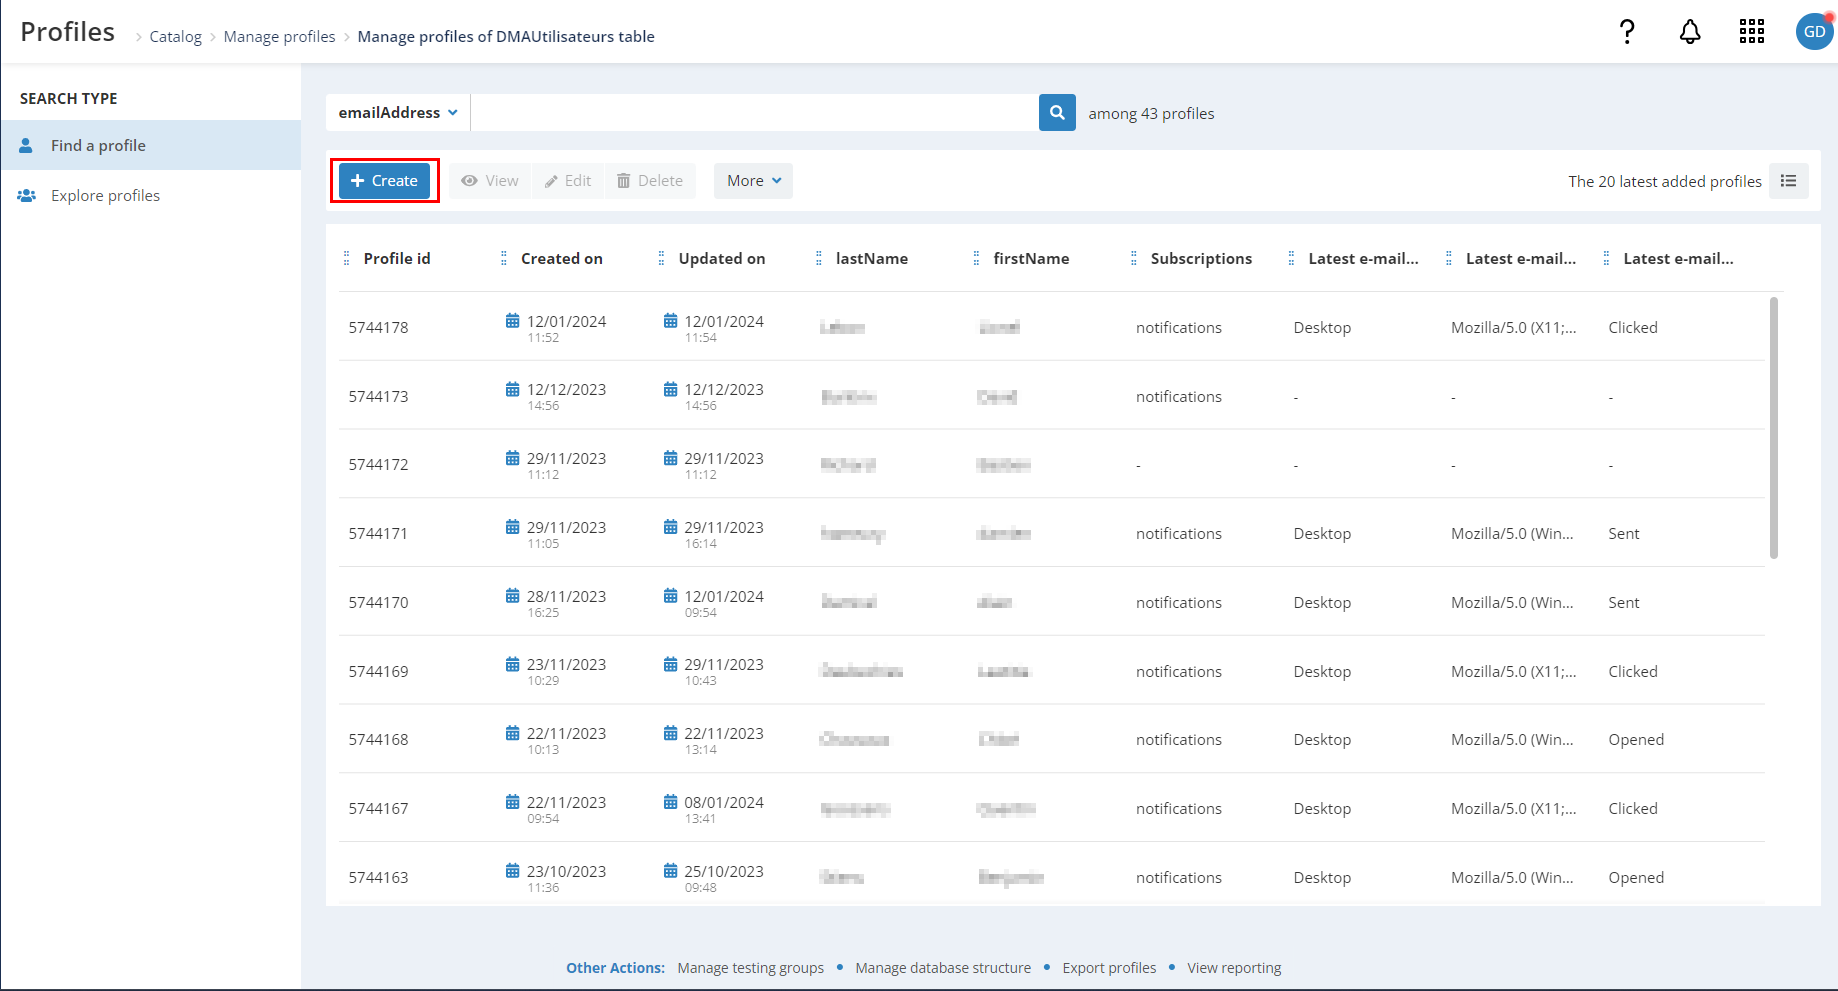
For each profile, you need to provide:
- First and last name of the user
- Its e-mail address
- A user name
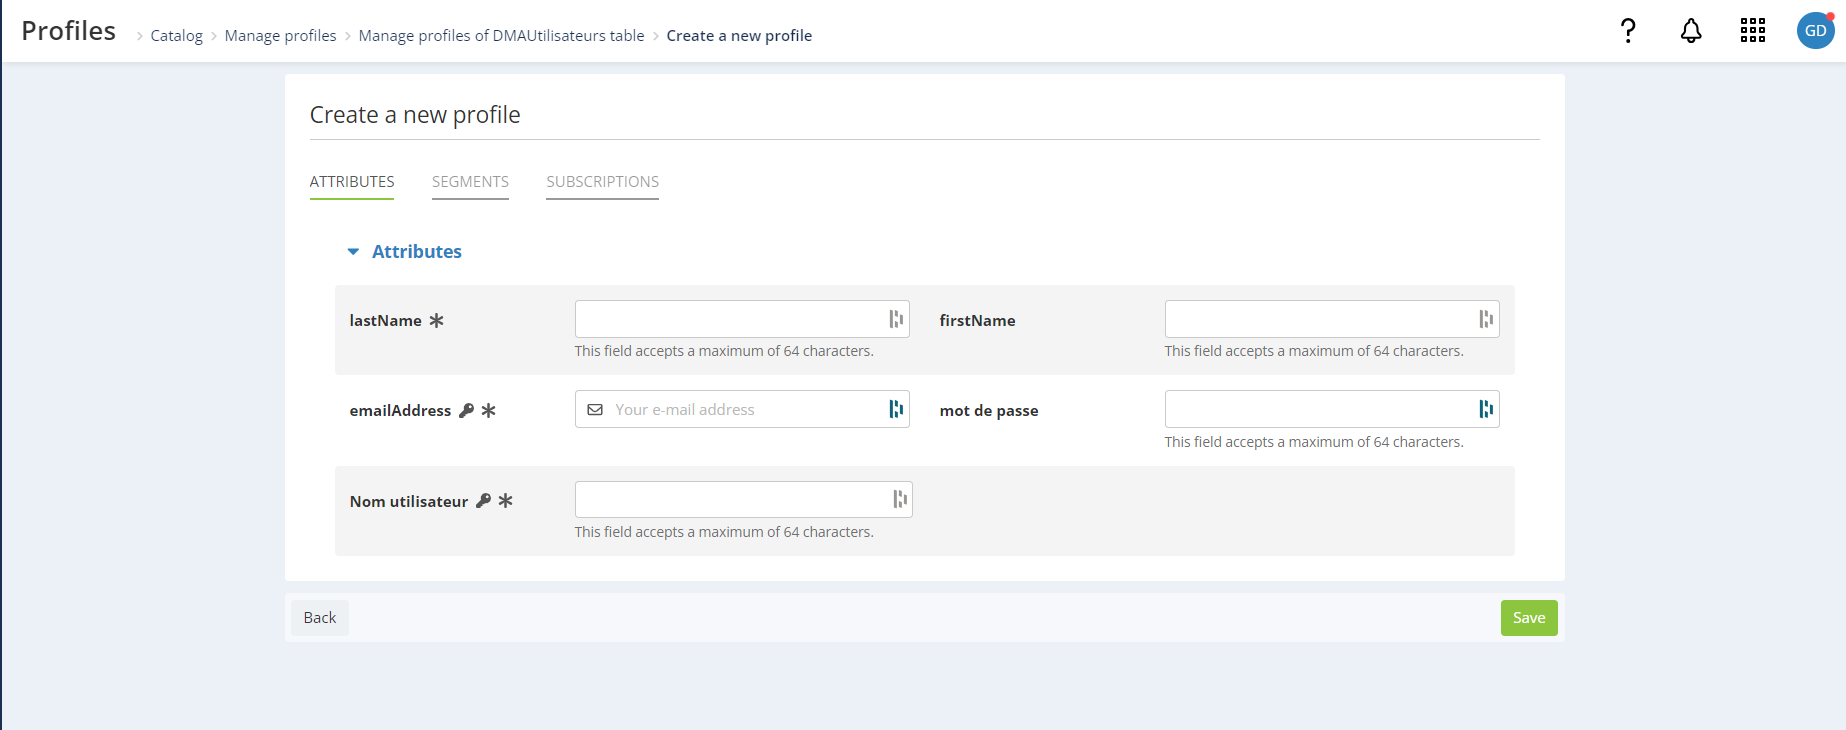
The password will be defined later by the DMA user only and will be stored encrypted in the profile table. An Actito user with access to this profile table will not be able to use this data.
Import profiles with a file
To import a file containing the list of DMA users, go to the 'Profiles imports' app (Catalog > Data > Profiles imports).
Your file must contain 2 columns:
- E-mailAdress
- Username
Then, you will have to follow the procedure for importing profiles by file.
Define Scopes
Once DMA users have been imported in the dedicated profile table, you can define the list of local entities (Scopes), that will be available in the DMA, in a repository table.
To do so, go to the 'Tables data' app (Catalog > Data > Tables data).

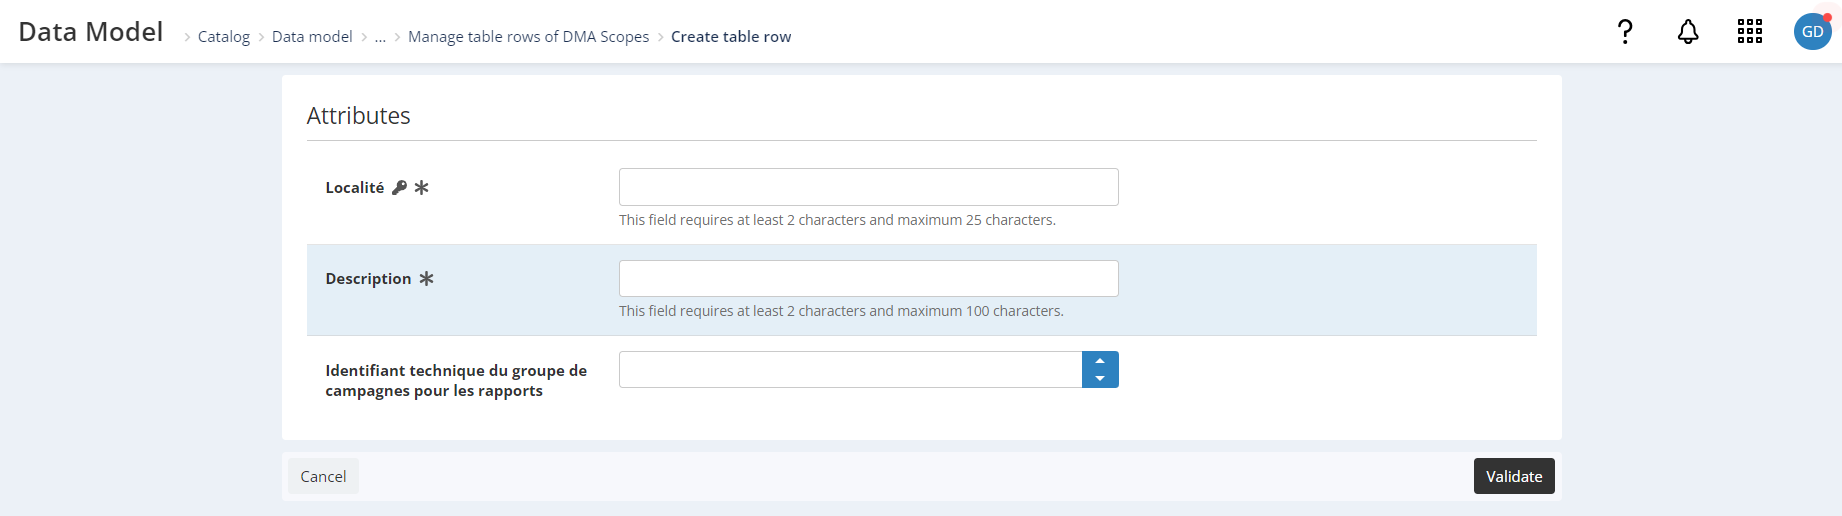
Manually create Scopes
Select the Repository table dedicated to Scopes and click on 'View'.
Then, click on the '+ Create a line' button.
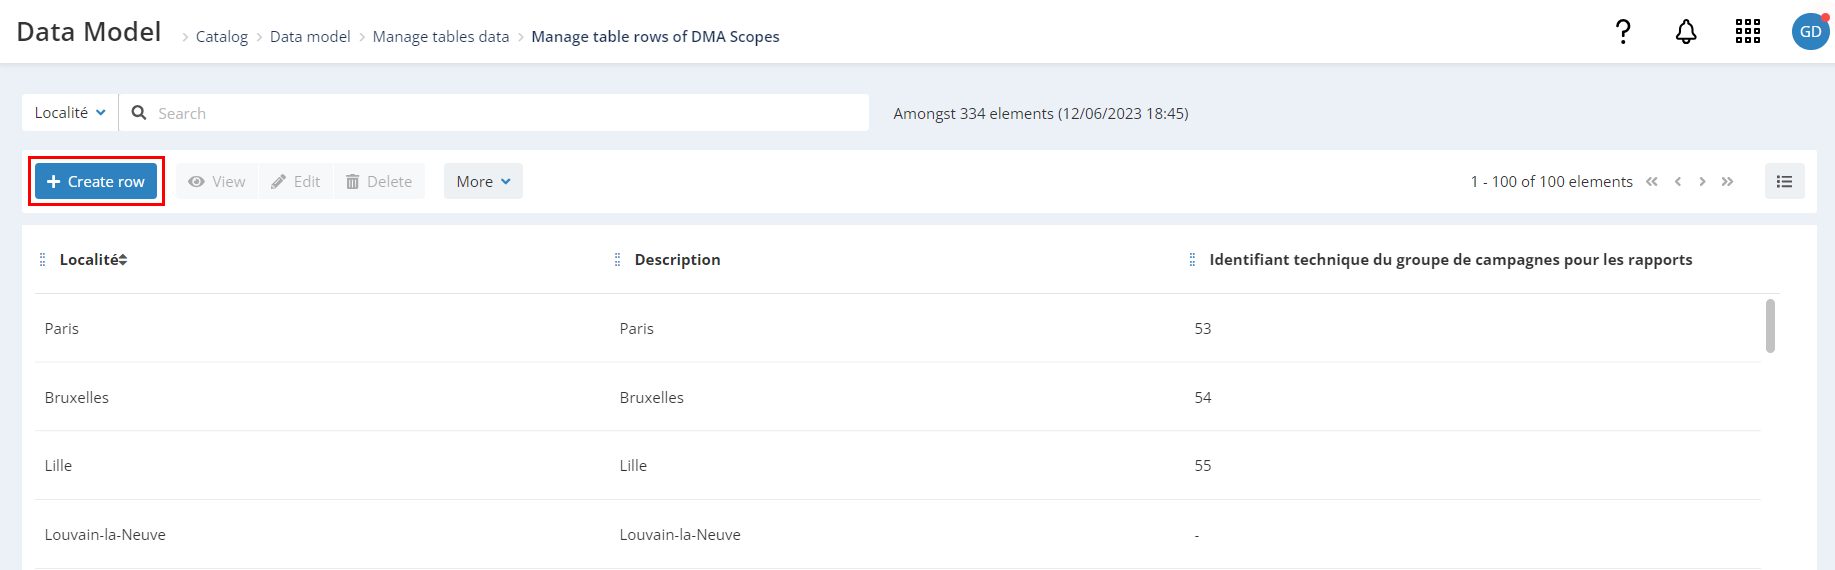
For each scope, you must provide :
-
The scope locality, that must be the same as the one used when associating users with their rights (case-sensitive).
-
The description that can be an additional description of the scope of your choice.
-
A technical id corresponding to the campaign group to which the campaign will be automatically attached. Allowing you to navigate more easily through campaign reports.
Create Scopes with a file
You can import a file with the list of DMA scopes:
- The file must be a .csv zip file, comma delimited
- The 2 columns names in the file must be 'Scope' and 'Description'
- The scope name should be exactly the same as the one mentioned in the profiles data you send in your main Actito profiles table (case sensitive).
- The description can be an additional description of the scope name of your choice.
Then, you will have to follow the procedure for importing Data via the Interface.
Define access rights
In the linked data table (linked to the profile table), you can define the Scopes to which each user should have access, as well as their access rights in these Scopes.
Within the DMA module, there are two types of rights:
- Builder: to create, modify and submit campaigns for approval (with this configuration, it is not possible to send a campaign without an Approver's approval)
- Approver: to create, modify, approve and send campaigns.
To manage the rights, go in the 'Tables data' app (Catalog > Data > Tables data).
Manually define the rights
Select the linked data table linked to the DMA user rights and click on 'View'.

You can easily find this table thanks to the intelligent filter which allows you to display tables linked to your 'DMAUsers' profiles table.
Then, click on the '+Create a line' button.
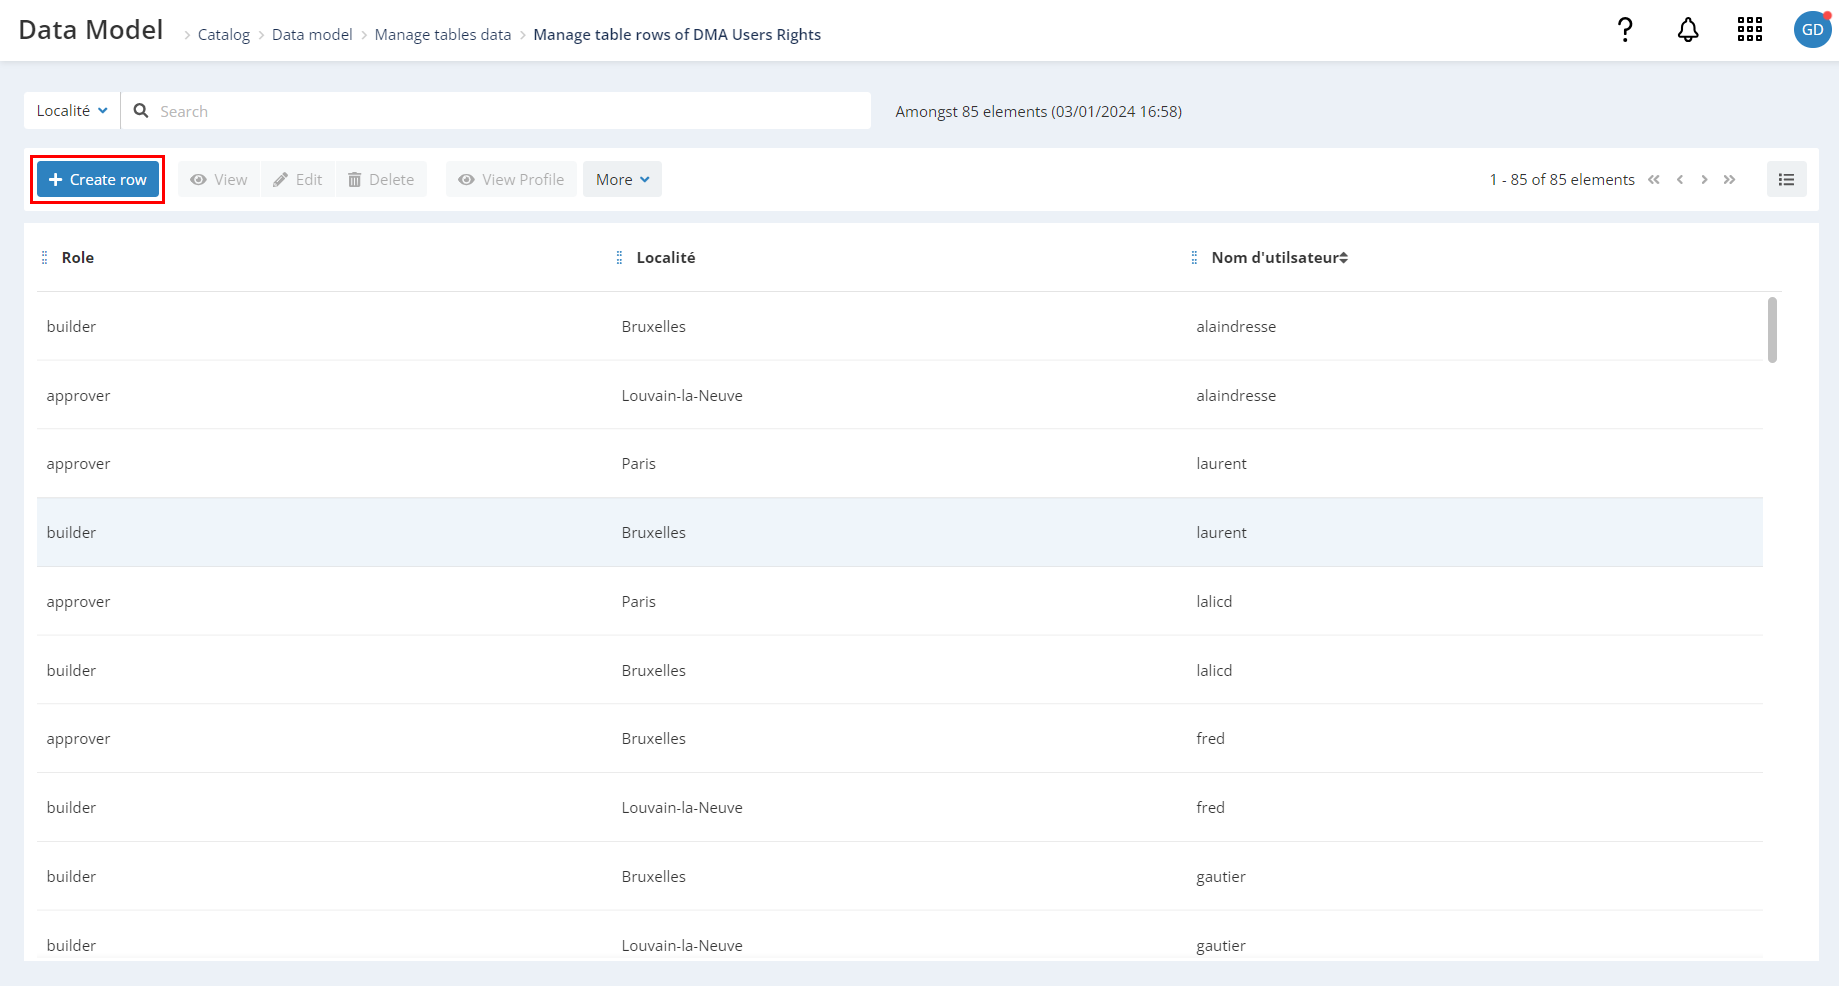
There, you will be able to define the attributes of your line:
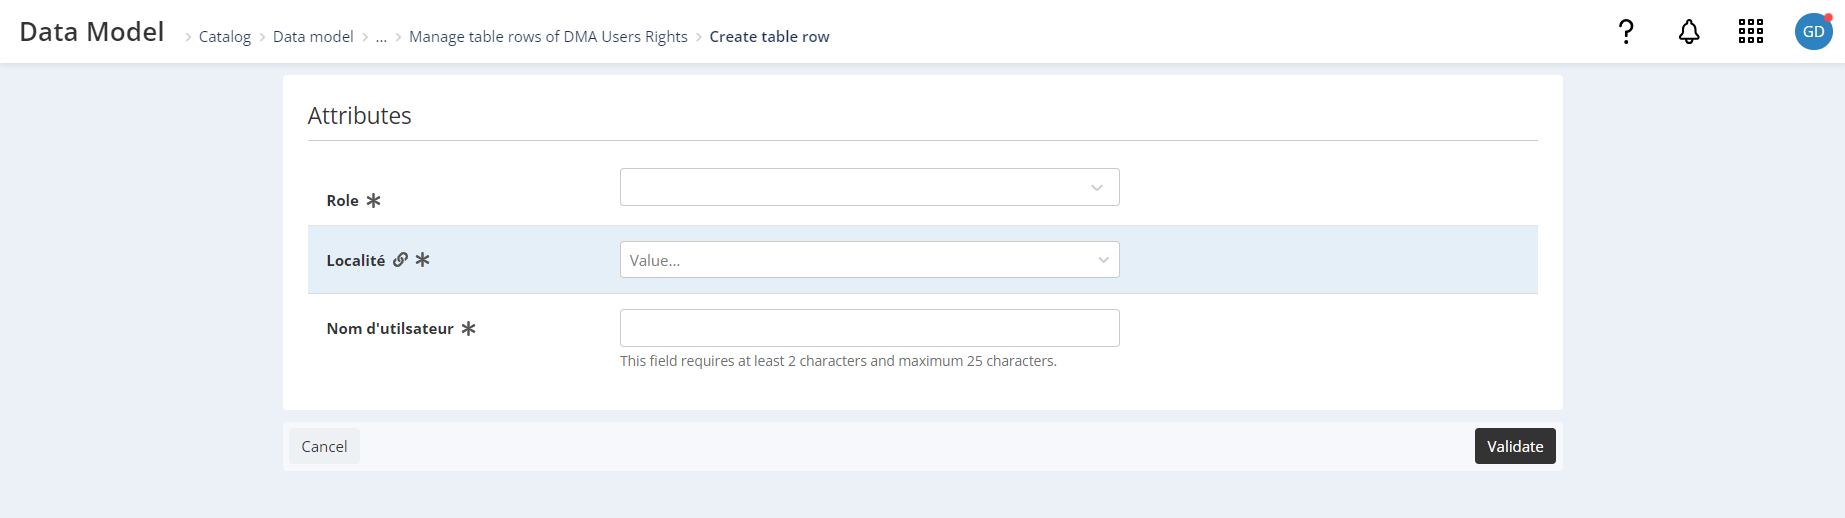
- Role: from the drop-down menu, you can choose between 'Approver' or 'Builder'.
- Locality: enter the name of the scope locality to which you wish to link the user.
- Username: enter the login of the user for whom you wish to define the right.
You can only assign one right to one scope for one user. So, if you wish to give a user access to several scopes or rights, you will need to repeat this process for each parameter to which the user needs access (or make an import using a file). This means that you will need to create as many lines as there are rights/scope combinations to assign to a user.
Define the access rights with a file
To import your file containing the list of profiles and their linked scopes, go to 'Tables data' (Catalog > Data model > Tables data).
Then select the table of linked data dedicated to scopes and click on 'View'.
Finally, click on 'More' and 'Import data'.
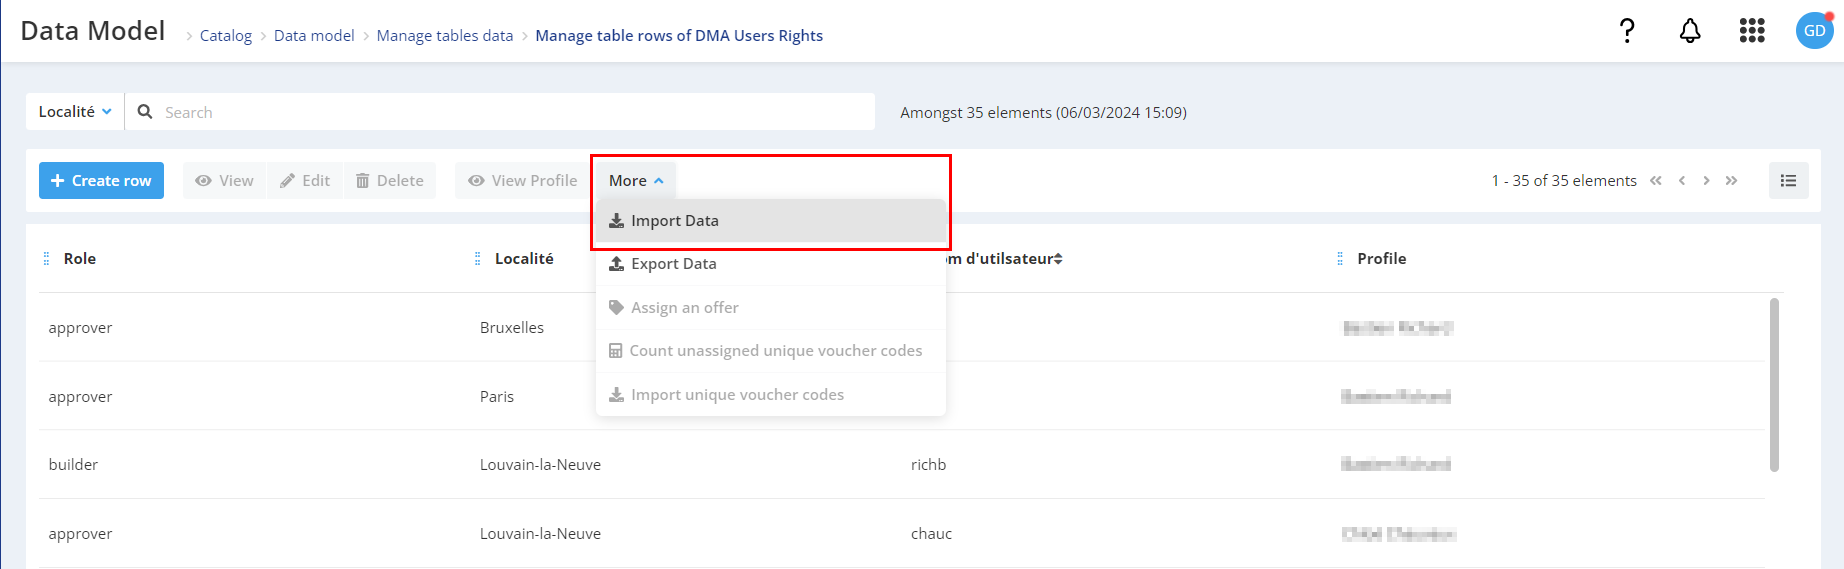
You file must contain 3 columns:
- Role
- Username
- Scope
Then, you will have to follow the procedure for importing Data via the Interface.