Apple Wallet
Before you can issue passes on Apple Wallet, you need to create a Pass Type ID and generate a certificate from your Apple Developer account. This certificate is what identifies your organisation as the legitimate issuer of passes on iOS devices.
You will need a Mac to complete this setup. Generating the certificate requires the Keychain Access application, which is only available on macOS.
Prerequisites
- An Apple Developer Program account of type "Organization" (99$/year). Individual accounts are not supported for pass issuance.
- A Mac with Keychain Access available.
- Administrator access to your Apple Developer account.
Step 1 - Create a Pass Type ID
The Pass Type ID is a unique identifier that will be associated with all passes issued under your organisation.
- Sign in to developer.apple.com and go to Certificates, IDs & Profiles.
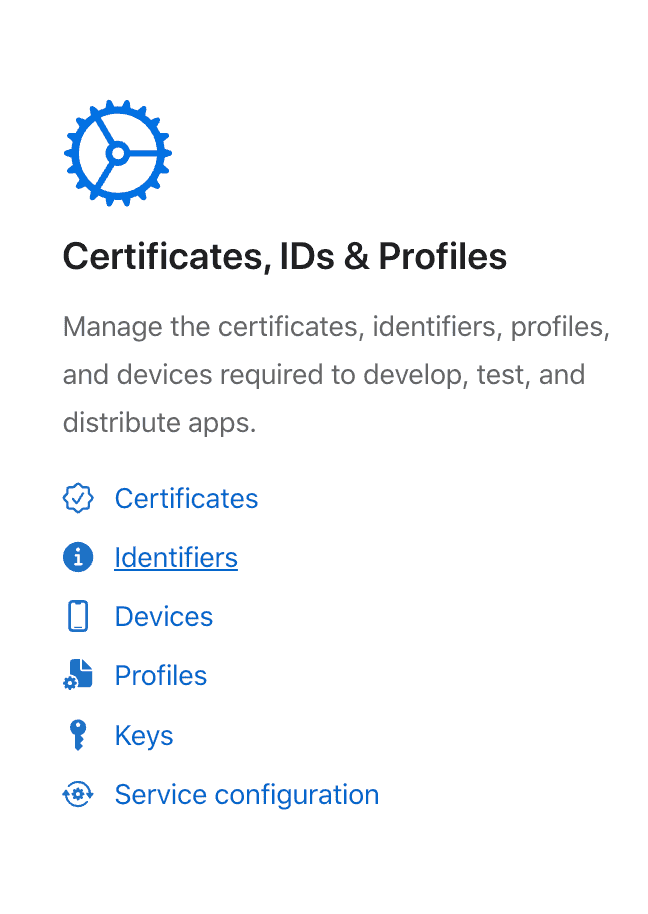
- In the Identifiers section, click the (+) button.

- Select Pass Type IDs and click Continue.

- Fill in the form:
- Description: a human-readable name for your programme (e.g.
Loyalty Programme – My Brand). - Identifier: a unique ID starting with
pass.(e.g.pass.com.yourbrand.loyalty).
- Description: a human-readable name for your programme (e.g.

- Click Continue, then Register.
Choose your Pass Type ID carefully — it cannot be changed after creation. Use a naming convention that reflects your brand and programme type, especially if you plan to create multiple Pass Type IDs.
Step 2 - Generate the certificate (.p12)
The certificate is the file you will upload into Actito. It proves that you are authorised to issue passes under your Pass Type ID.
Generate a Certificate Signing Request on your Mac
- Open Keychain Access on your Mac.
- From the menu bar, go to Keychain Access > Certificate Assistant > Request a Certificate from a Certificate Authority.
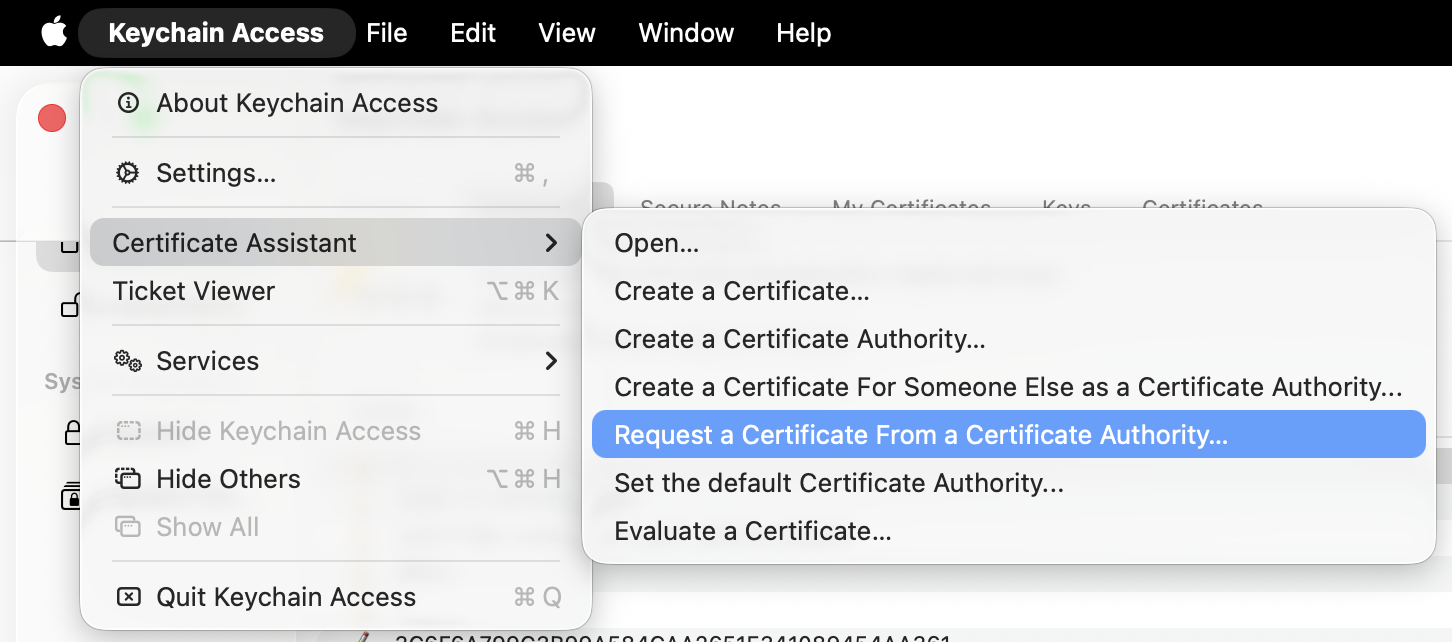
- Fill in your email address, select Save to disk, and click Continue.
- Save the
.certSigningRequestfile to your desktop.
Create the certificate on the Apple Developer Portal
- In your Apple Developer account, go to Certificates and click (+).
- Select Pass Type ID Certificate and click Continue.

- Select the Pass Type ID you created in Step 1.

- Upload the
.certSigningRequestfile you just generated and click Continue.

- Download the
.cercertificate file generated by Apple.

- Double-click the
.cerfile to add it to your Mac's Keychain.
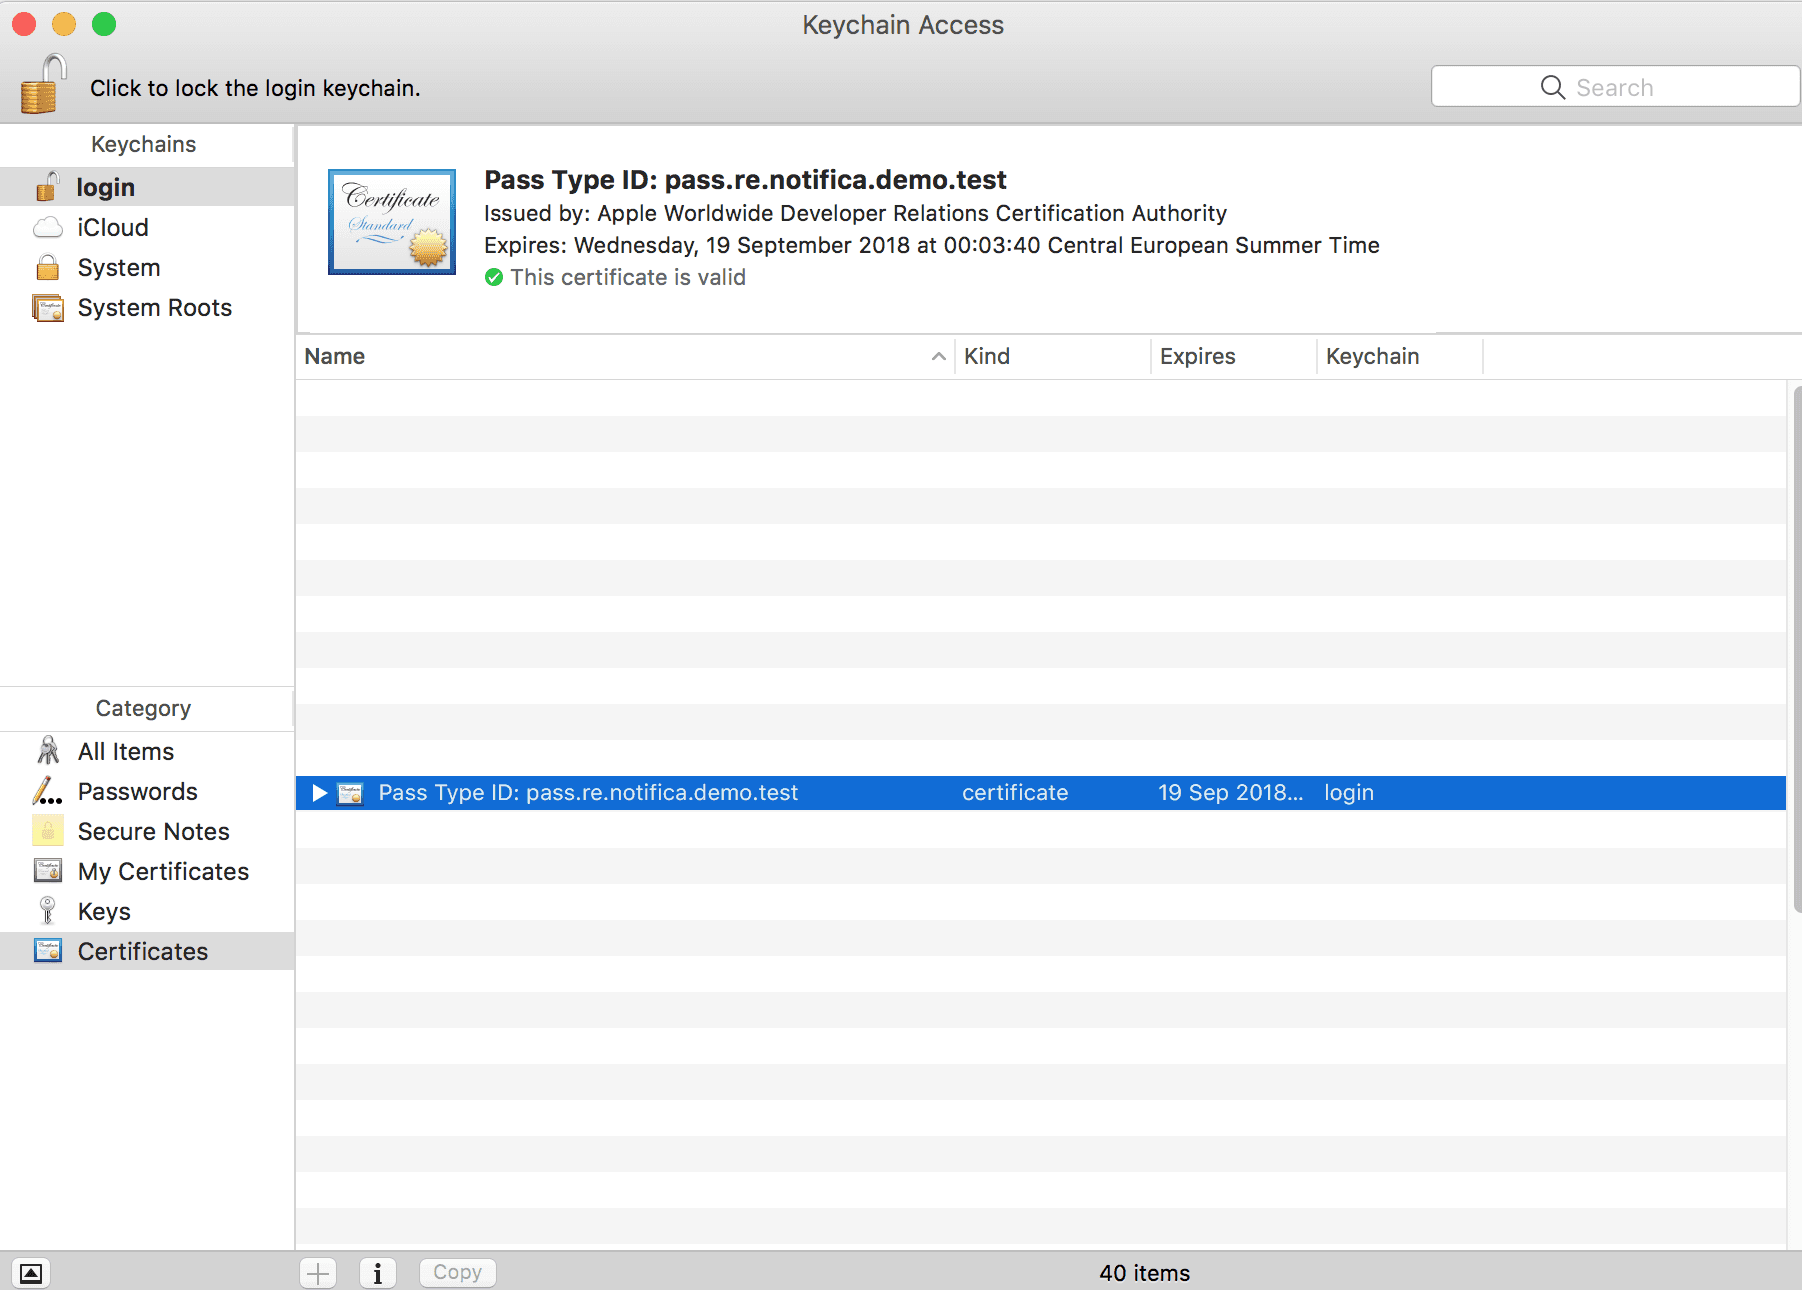
Export the certificate as .p12
- Open Keychain Access and locate the certificate you just added.
- Right-click on it and select Export.
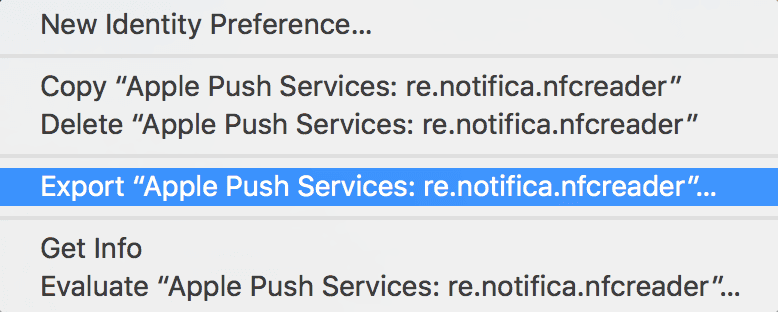
- Choose .p12 as the file format and click Save.
- Set a strong password to protect the file.
Keep both the .p12 file and its password in a safe place. You will need them to configure Apple Wallet in Actito, and to renew your certificate when it expires.
Step 3 - Upload the certificate to Actito
Once your .p12 certificate is ready, go to Hub > Wallet > Configuration in Actito and click Update Apple Wallet Certificate:
- Pass type ID certificate: upload your
.p12file. - Password: enter the password you defined when exporting the certificate.

Apple certificates expire periodically. Make sure to renew your certificate in your Apple Developer account before it expires and update it in Actito — failing to do so will prevent passes from being issued or updated.
NFC (Optional)
If you want to enable NFC-based contactless interactions on your Apple Wallet passes, an additional entitlement is required from Apple. This is a separate request submitted via developer.apple.com/contact/passkit/nfc-certificate.
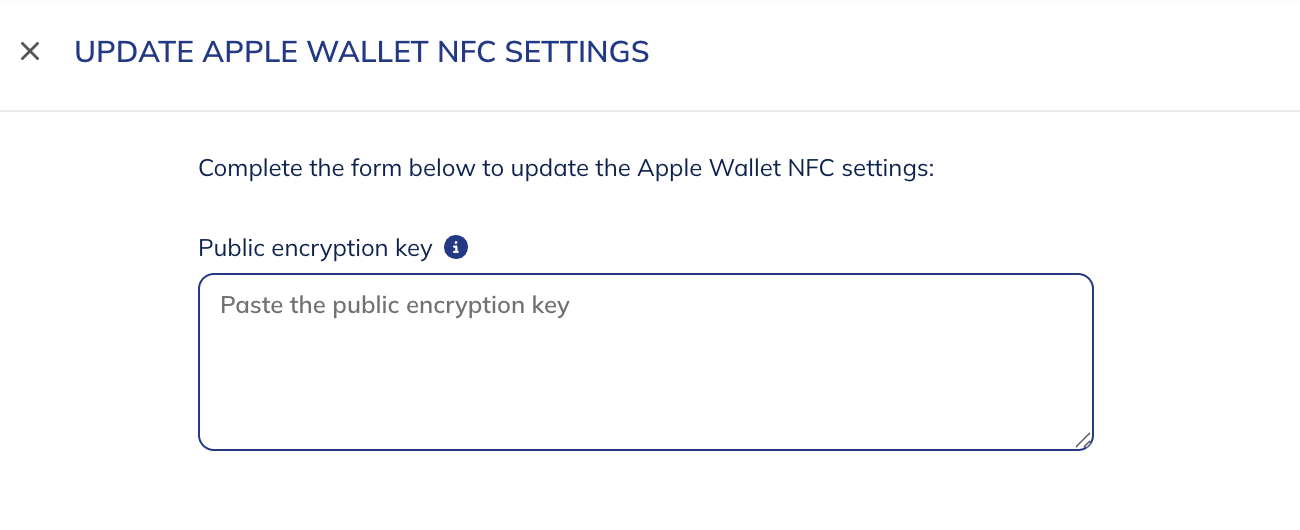
Once granted, additional NFC settings can be configured in Actito by copy/pasting the public encryption key.
Reference links
- Apple Developer Portal — developer.apple.com/account: create your Pass Type ID and generate your production certificate.
- Apple PassKit documentation — developer.apple.com/wallet: documentation on pass types (Loyalty, Coupons, Tickets).
- NFC Entitlement Request — developer.apple.com/contact/passkit/nfc-certificate: form to activate NFC contactless reading.