In-App campaign creation
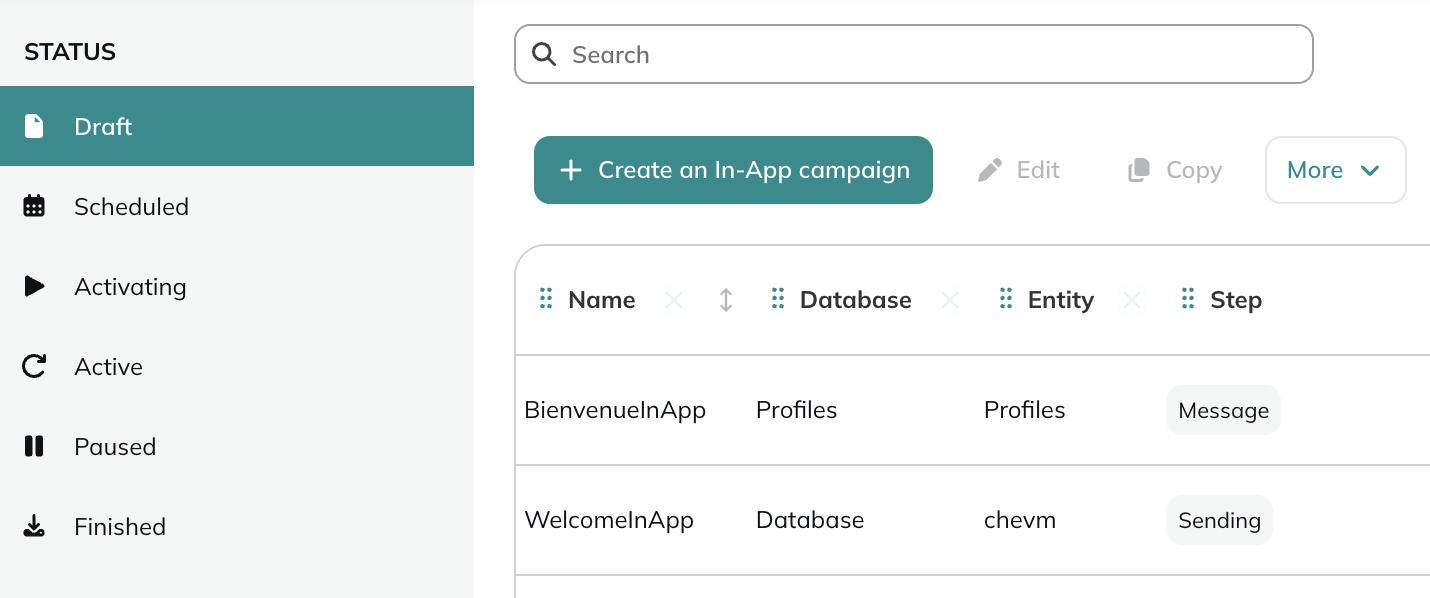
In order to create an In-App campaign, go to the In-App campaigns module (Hub > In-App campaigns > In-App campaigns).

This application can be reached directly via the quick menu on the side bar, under the "In-App campaigns" tab.
In-App campaigns are an optional module that require an additional set-up, both on Actito and on your website/your app.
If you are interested by this channel, please contact your account manager.
Click on Create an in-app campaign.
Select an app
Select the app to which the campaign will be linked. You can see the definition of each app by clicking on the "i" icon. Select the app linked to the right app and/or website and the profile table you want to target.
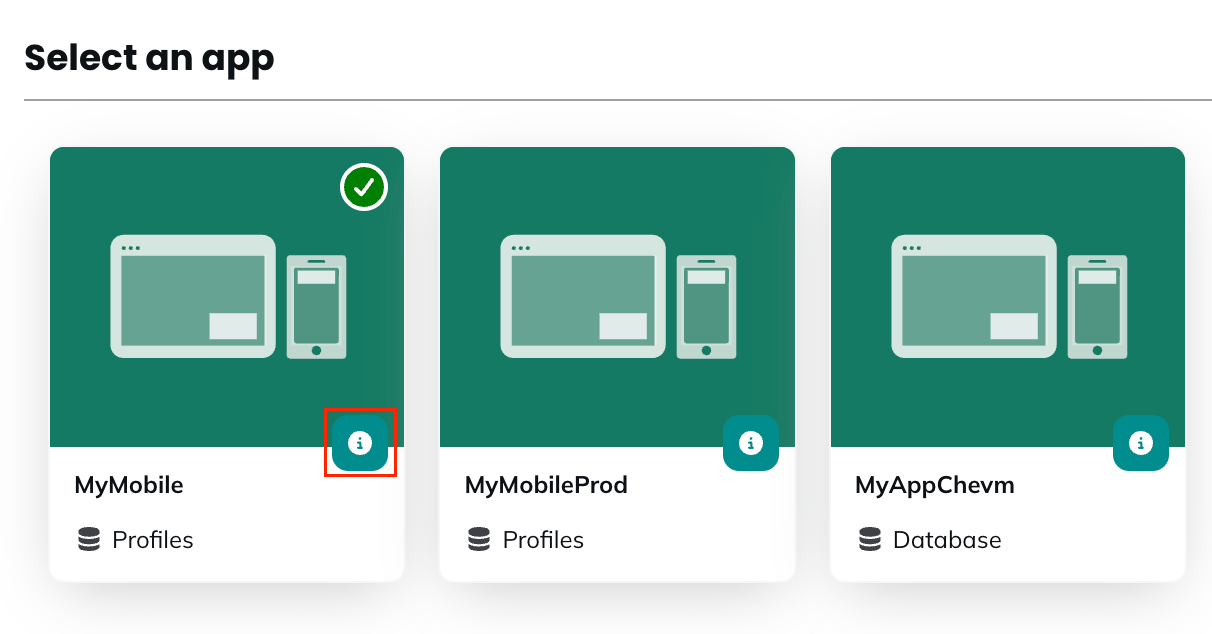
An app is the link between one Actito profile profile table and one website and/or one native app.
If you have several brands, and therefore several websites or native apps, it means you need to have several integrations configured in your license.
You can see the information about your apps' configurations, in My Apps.
Step 1 - General data
At the first step, give a name to your in-app campaign.
Like in every Actito channel, your in-app campaign can be created in different languages at once, and displayed in the mother language of the profile.
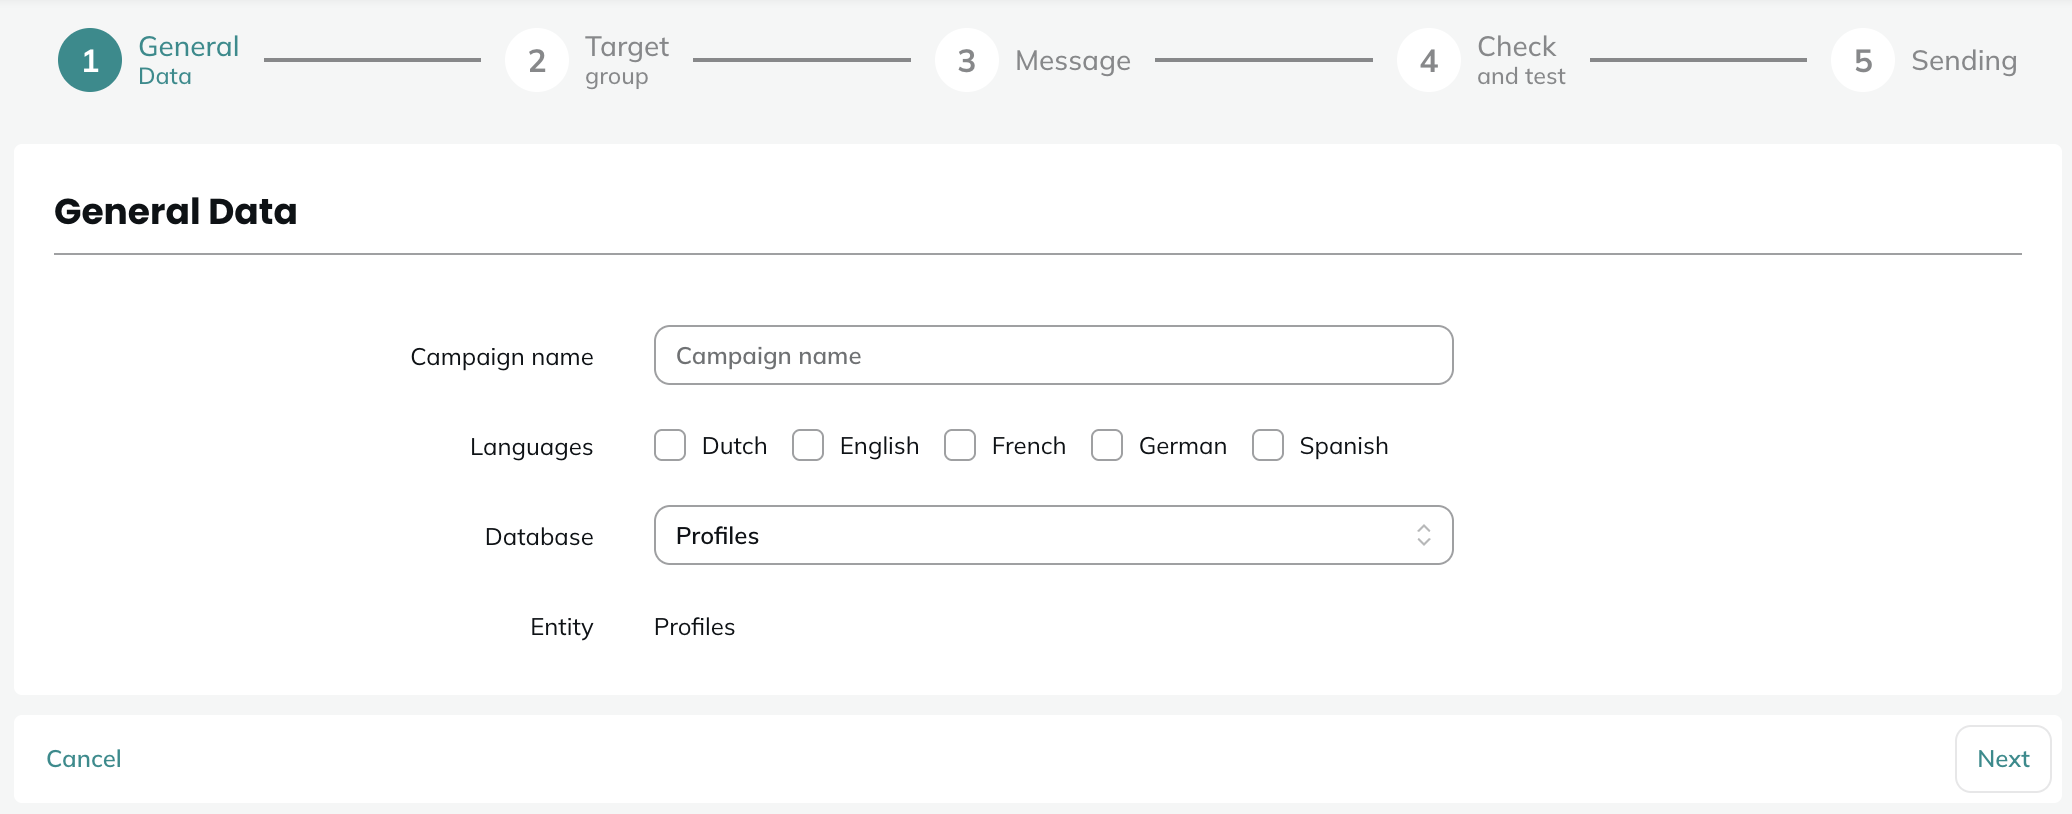
Choose the profile table on which you are going to send the campaign. Each integration is tied to two profile tables:
- Your main profile table that stores identified profiles
- The anonymous profile table, created specifically for anonymous profiles
In Actito, a campaign is always linked to only one profile table. If you want to target both your identified and anonymous profiles, you can create two campaigns, one on each profile table.
Step 2 - Target group
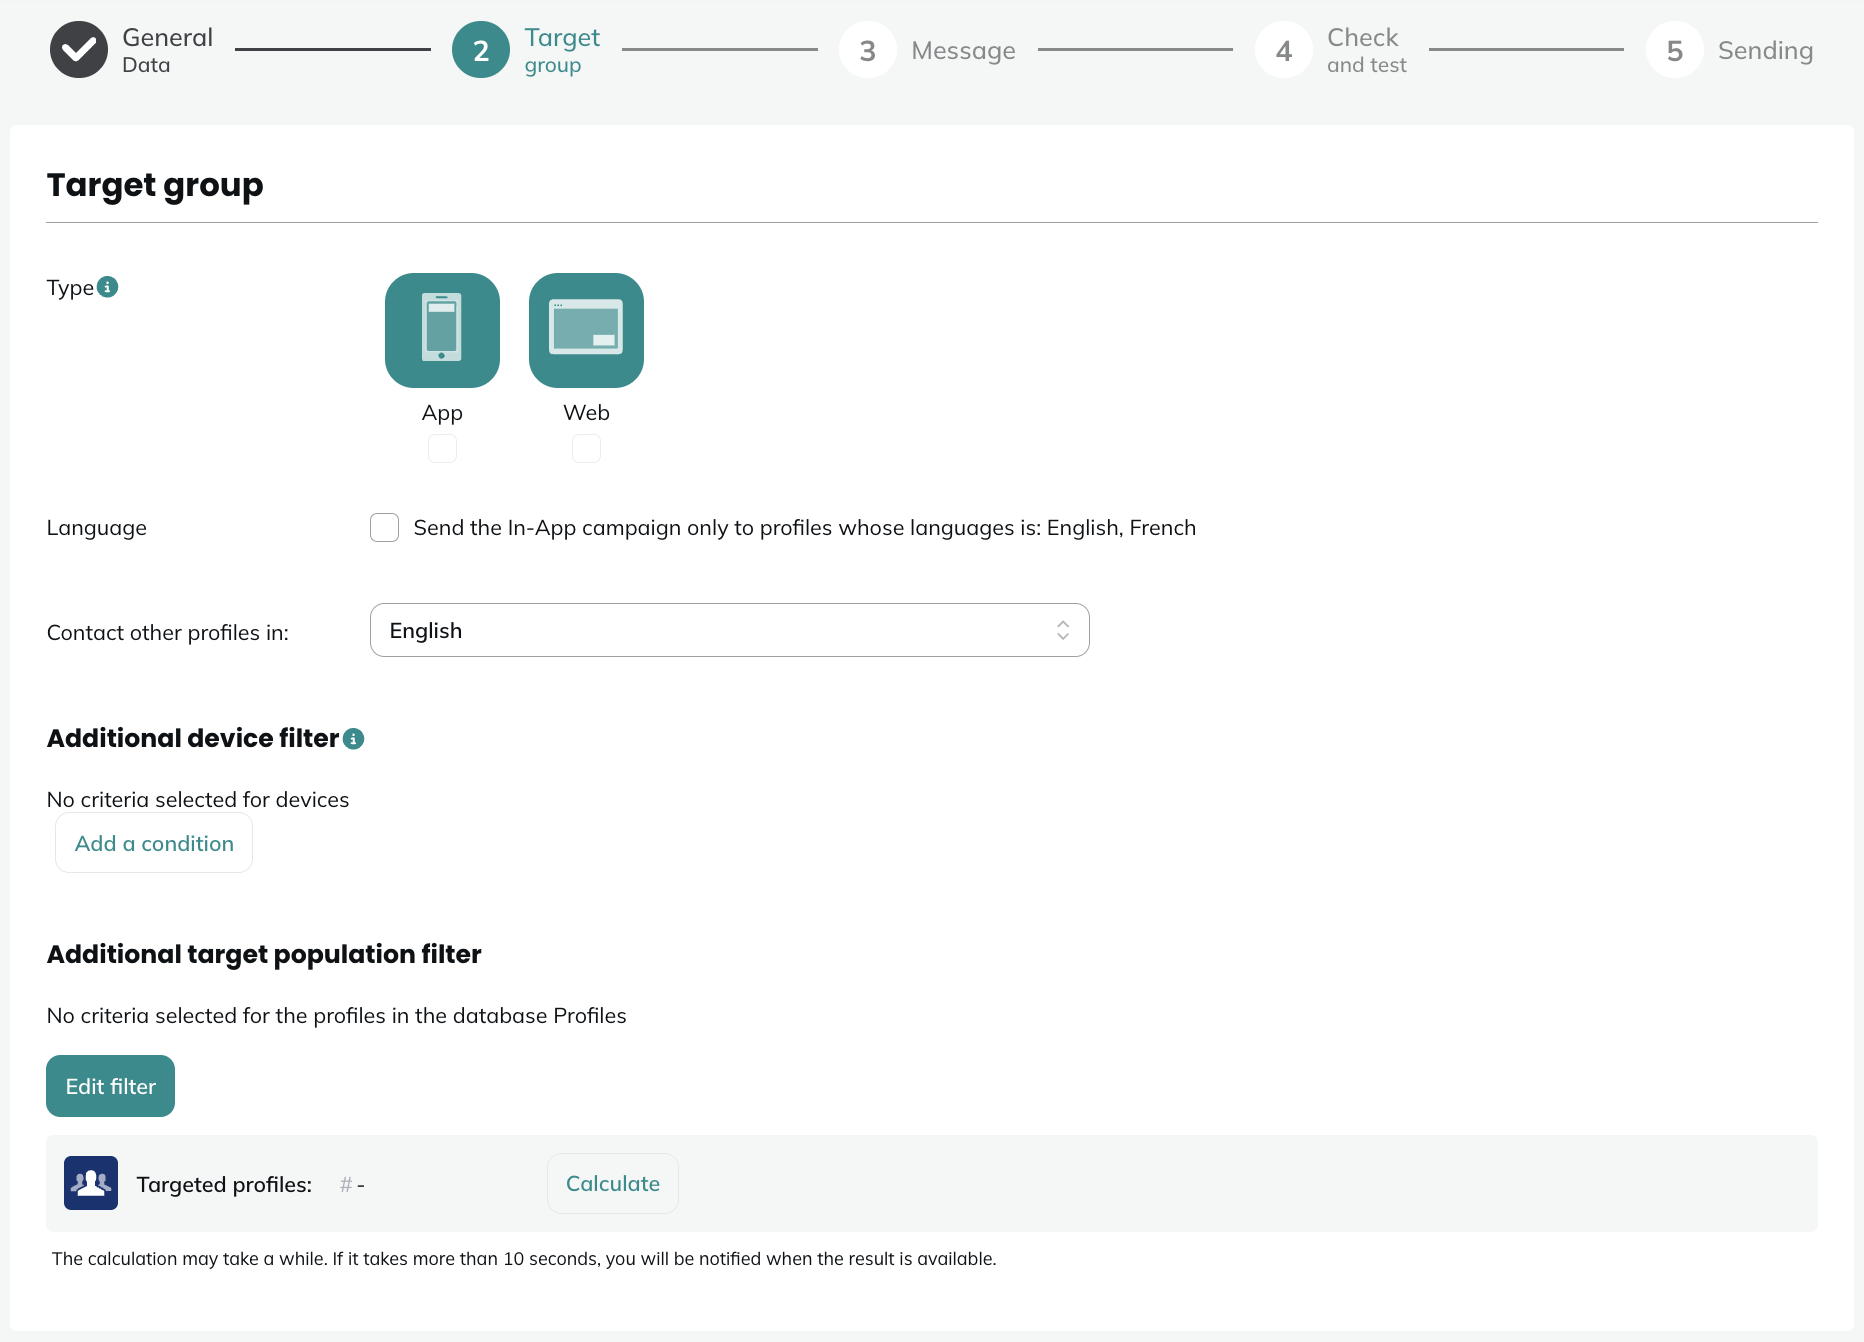
Type
At the second step, you first need to choose the type of device to which you will send the campaign. It can be:
- Web in-app message to trigger the campaign to profiles having a web device registered in Actito
- App in-app message to trigger the campaign to profiles having a native app device registered in Actito
- Both: if you want to target profiles regardless of their device, you can select the two options at once
When selecting both Web and App, this is understood as an OR operator between them: profiles having at least one type of device (Web or App) will still be targeted on the relevant device. They do not need to have both types to be targeted.
In-app messages are based on the device used, which means that the same profile could own both a native app and web device. If you select both types, profiles with the two types of devices would receive an in-app message on both devices at the same time.
A profile can have on multiple devices for the same type (two different browsers on the same computer, for instance). In such case, they will receive the notification on each device.
Language
Next, you can choose to target only the profile whose mother language is one of the languages chosen at step 1, or to define a default language to send the notification to everyone.
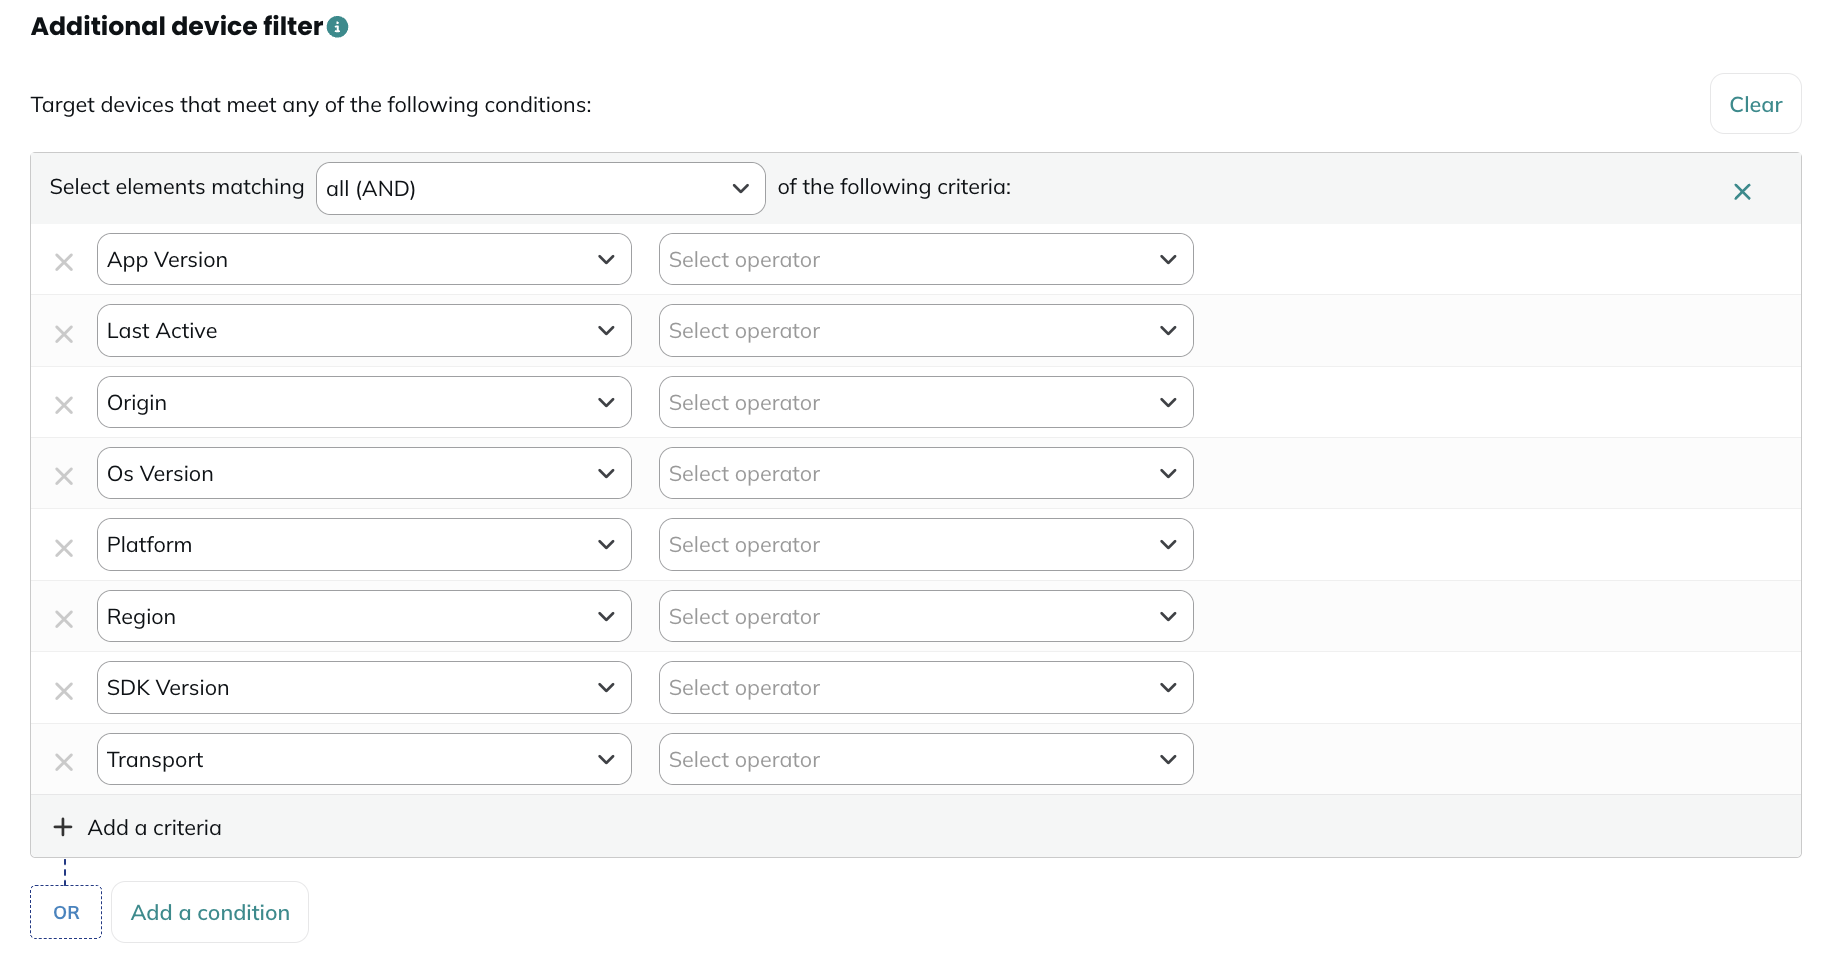
Additional device filter
Afterwards, you can apply additional device filters. This filter is dedicated to the push and in-app channels and is based on information stored in the Device custom tables. This special filter has been added because the classic targeting filter selects profiles, while this new filter selects the devices of the targeted profiles.
The device filters are the following:
- App version: the version of the app on the profile's device
- Last active: the last moment the device was active
- Origin: the URL where the web push devices are registered
- OS Version: the version of the Operating System
- Platform: the type of platform (Web, Android, iOS)
- Region: the region collected for the device
- SDK Version: the version of the SDK
- Transport: the service used to deliver the push notification and in-app message
For example, if you only use the classic target population filter and you want to target profiles having an iOS device, you will use the following targeting:
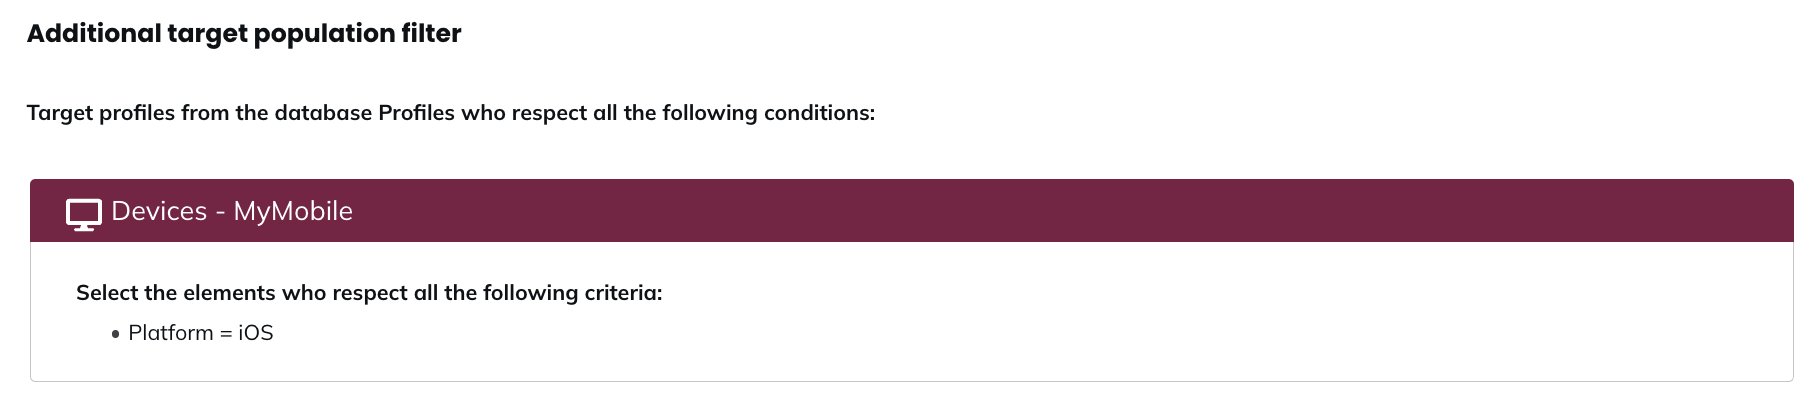
With this targeting, you will target all profiles having an iOS device, and you will send the in-app campaign to all their devices.
Now, if you combine the classic target population filter with the device filter:
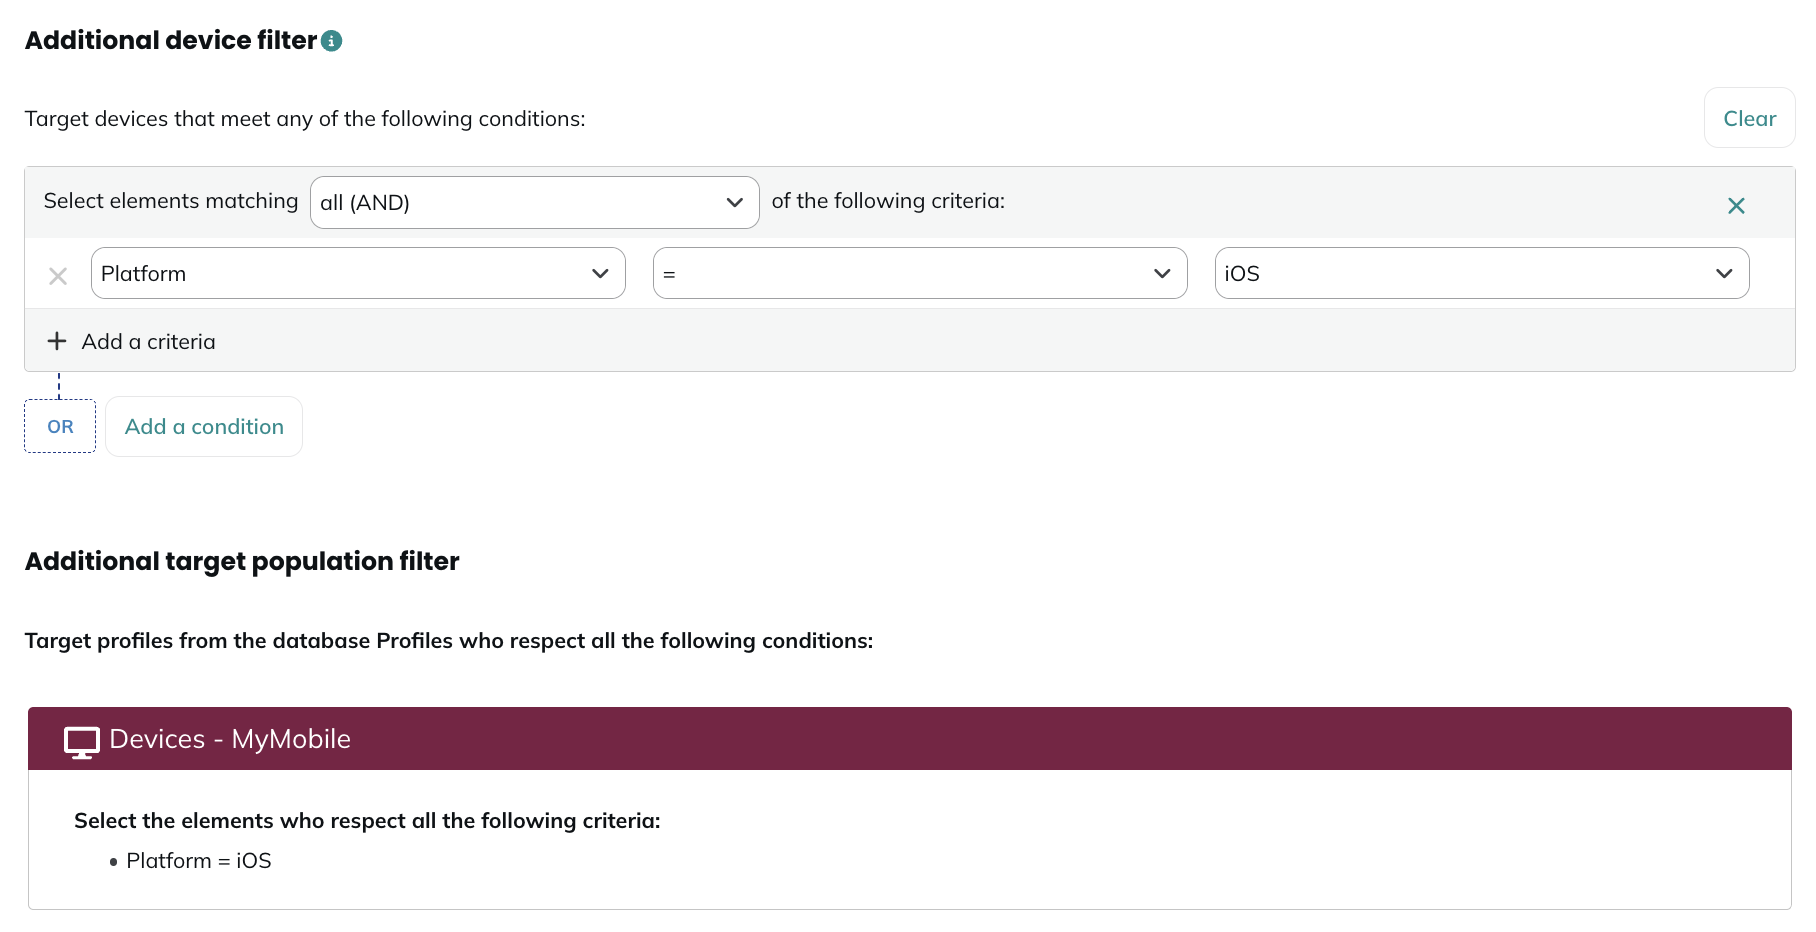
You will target profiles having an iOS device, on their iOS devices (and not on their other devices).
Additional target population filter
Finally you can apply additional targeting filters, thanks to the Targeting module. All the profiles who fit the criteria will receive the campaign.
The Calculate button helps you check the number of profiles who fit the criteria at the moment you are clicking on this button.
For in-app campaigns, there is a pre-computation for the targeted profiles. Read more information about this topic here.
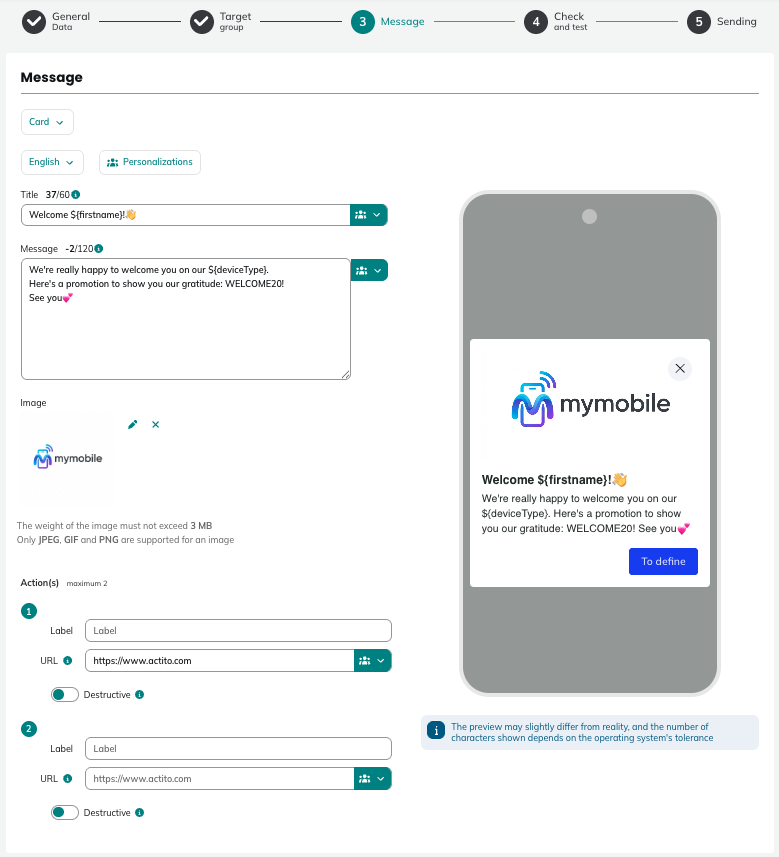
Step 3 - Message
At the third step, you will be able to define the content of your in-app message.
Message in-app type
You have the possibility to choose between three different in-app messages types:
- Card: a card in the middle of the screen, containing up to two action buttons
- Banner: a banner on the upper side of the screen, containing up to one action button
- Fullscreen: a full screen image, containing up to one action button
Message language
If you create a multilingual campaign, you can select the edition language in the dropdown. Make sure to define the content in all the languages of the campaign.
Preview
The content will be the same for both Web and App in-app messages (if you selected both options at step 2). You can preview your content in real-time on the right of the screen.
The number of characters displayed in the notification differs depending on the browser/OS of the receiving device.
Message content
An in-app message is made out of different parts:
Title
This text will appear at the top of the in-app message, in bold or a slightly bigger font depending on the browser. Its recommended length is maximum 60 characters and can contain personalizations, to directly address the profiles using data stored in your data model.
Message
This is the main text of the message, displayed in a slightly smaller font than the title. Its recommended length is max 120 characters and can contain personalizations.
The character counter for the title and the message is a recommendation. The message will not be blocked if you go over limit but its display might not be optimized.
Image
The image will be displayed on different places depending on the type of the in-app message you will have chosen:
- Card: on the top of the title
- Banner: at the left of the title and message
- Fullscreen: takes the full screen
The weight of the image must not exceed 3MB, and only .jpeg, .gif and .png files are supported.
Actions
Depending on the type of the type of in-app message you have chosen, you can define one or two actions.
For actions in a Card in-app message, you can define up to two actions with the following information:
- Label: define the text on the button
- URL: define the URL to which the profile will be redirected when clicked on. URLs starting with http://, https://, deep_link:// and mailto: are allowed (websites, internal link of the app or email address)
- Destructive: if the action is destructive, it will delete the item from the list once the profile clicks on the button
For an action in a Banner or Fullscreen message, you can define one action with the following information:
- URL: define the URL to which the profile will be redirected when clicking on the message. URLs starting with http://, https://, deep_link:// and mailto: are allowed (websites, internal link of the app or email address)
Step 4 - Check & test
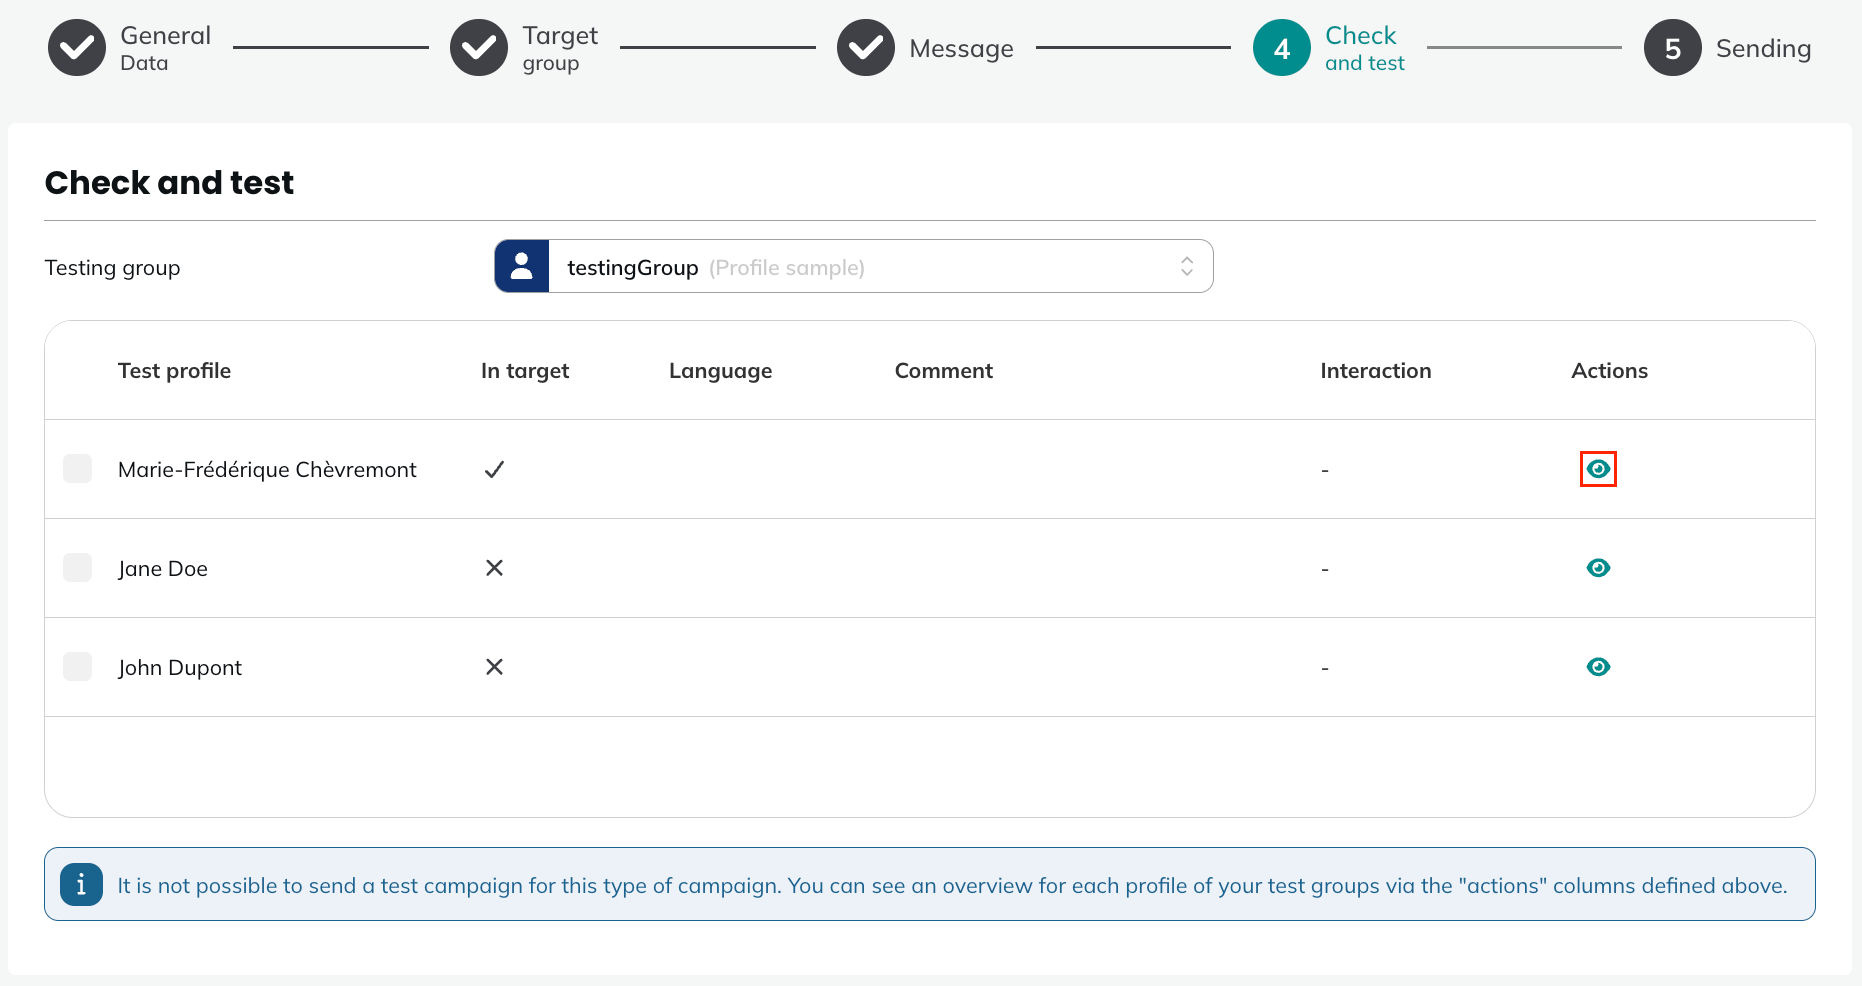
Once your in-app message is ready, you will be able to test it.
Unlike email or SMS, you won't be able to receive the in-app message directly. Indeed, by nature, an in-app message is not tied to an email address or a phone number, but to a device.
Therefore, your in-app message can be checked by generating the preview for your test profiles: this is done by clicking on the eye and this will generated the in-app message as it would appear to this profile, with the calculation of all personalizations.
Step 5 - Sending
Once your In-App campaign has been tested, you will be able to review the details of the different steps. If everything is satisfactory, you will be able to activate your campaign.
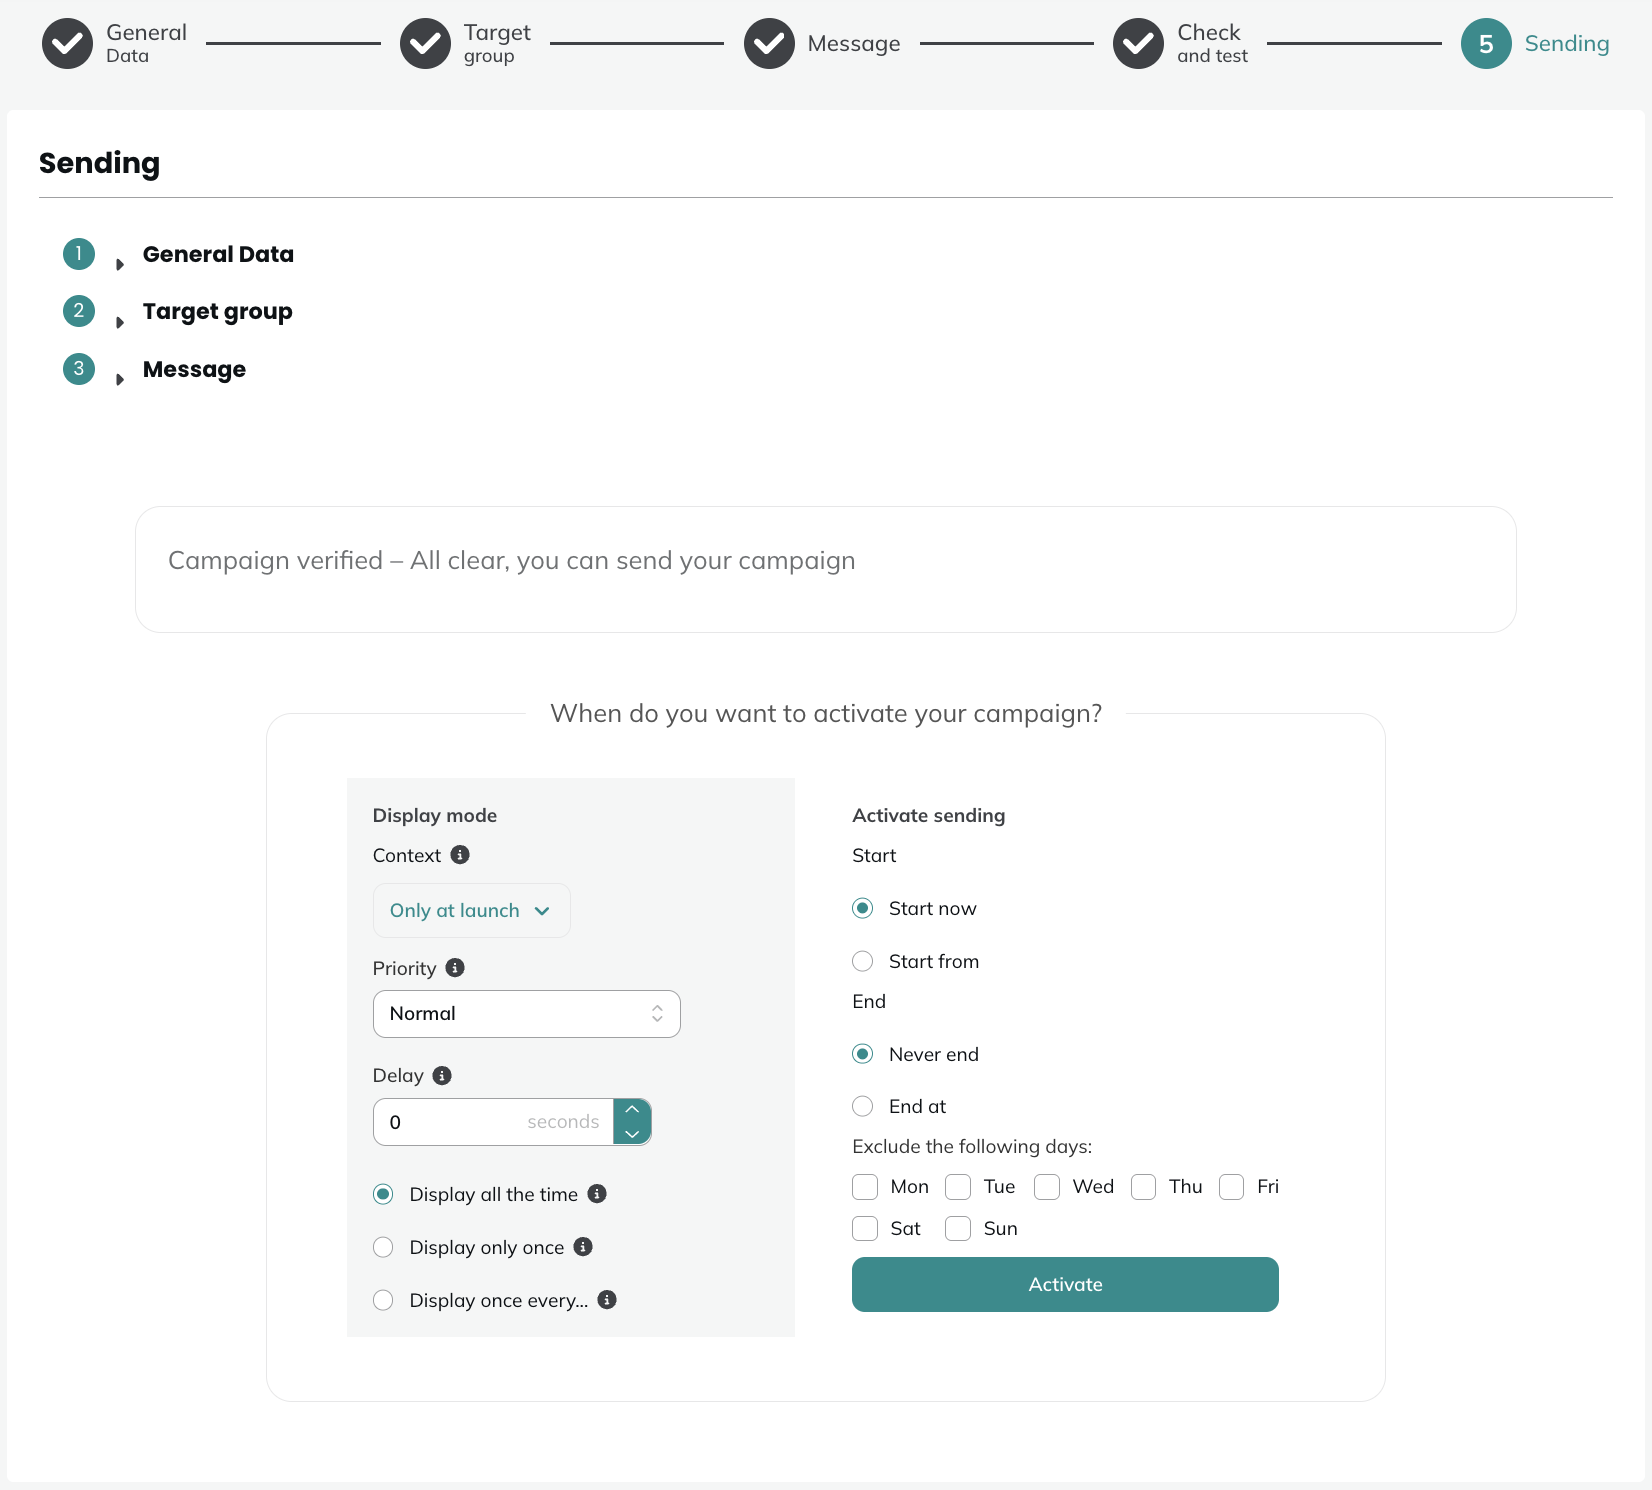
Display mode
Before the sending, you'll have to define different information for the display mode:
-
Context
- Only at launch: display the in-app message when the website or native app is launched
- Foreground and launch: display the in-app message when the website or native app is launch & when the app or website was in the background (open, but not in use) and comes back on the foreground (in use)
noteFor example, when you have the app or website open but switch to do something else on your device, the app moves to the background. When you return to the app or website, without having closed it completely, it returns to the foreground.
-
Priority: defines which in-app message will be shown if profiles are eligible for multiple in-app messages. The message with the highest priority will be shown.
If a profile is elegible for two campaigns having the same priority, the campaign with the most recent update moment will be sent.
- Delay: defines the number of seconds after which the in-app message will be displayed
- Display all the time: display the in-app app message as long as profiles are included in the targeting
- Display only once: display the in-app message only once to profiles included in the targeting
- Display once every...: defines how often the in-app message is displayed to profiles included in the targeting (in seconds, minutes, hours or days)
Activate sending
You'll also have to define the sending activation parameters:
- Start: start now, or start as from a specified date and time
- End: never end, or end at a specified date and time
- Exclude the following days: you can define days where the campaign will not be displayed
Pre-computation
Once you click on Activate, your campaign will move to the Activating tab and remain there during pre-computation. This is the process during which the number of targeted profiles for your campaign is calculated.
Unlike other channels, in-app campaigns do not compute the number of targeted profiles in real time. Instead:
- An initial computation occurs when you activate the campaign
- Subsequent computations run automatically once per day at 1:00 AM throughout the campaign's duration
Status
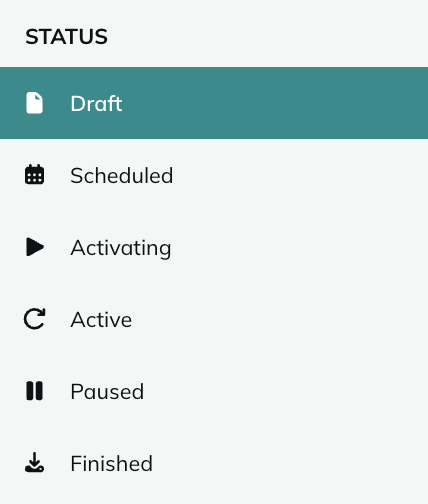
Once pre-computation is complete, your campaign will move to one of two tabs:
- Active tab: The campaign runs immediately and remains here throughout its duration.
- Scheduled tab: The campaign waits here if it cannot be displayed on the activation day. For example, if you excluded Mondays from display days but activate the campaign on a Monday, it will remain in Scheduled until the next eligible day, then move to Active.
Your campaign will move to the Paused tab if you pause it (More > Pause).
Your campaign will move to the Finished tab if you stop it (More > Finish or Stop), regardless of its current status (Scheduled, Paused, or Active).
If you want to find more information about the reports of in-app campaigns, please read this article.
When an Actito app is deleted, the status of its associated campaigns is updated automatically depending on their current state:
- Draft and scheduled campaigns are permanently deleted. Since they were never activated, no interaction data is lost.
- Active and paused campaigns are moved to the Finished state. This preserves all recorded interactions, but the campaigns are no longer linked to any app.
Corrections
Once an in-app campaign is launched, you no longer need to create a new campaign to fix a typo, adjust a visual, or change a setting. The Correct feature lets you edit a live campaign's content and settings directly, without interrupting delivery.
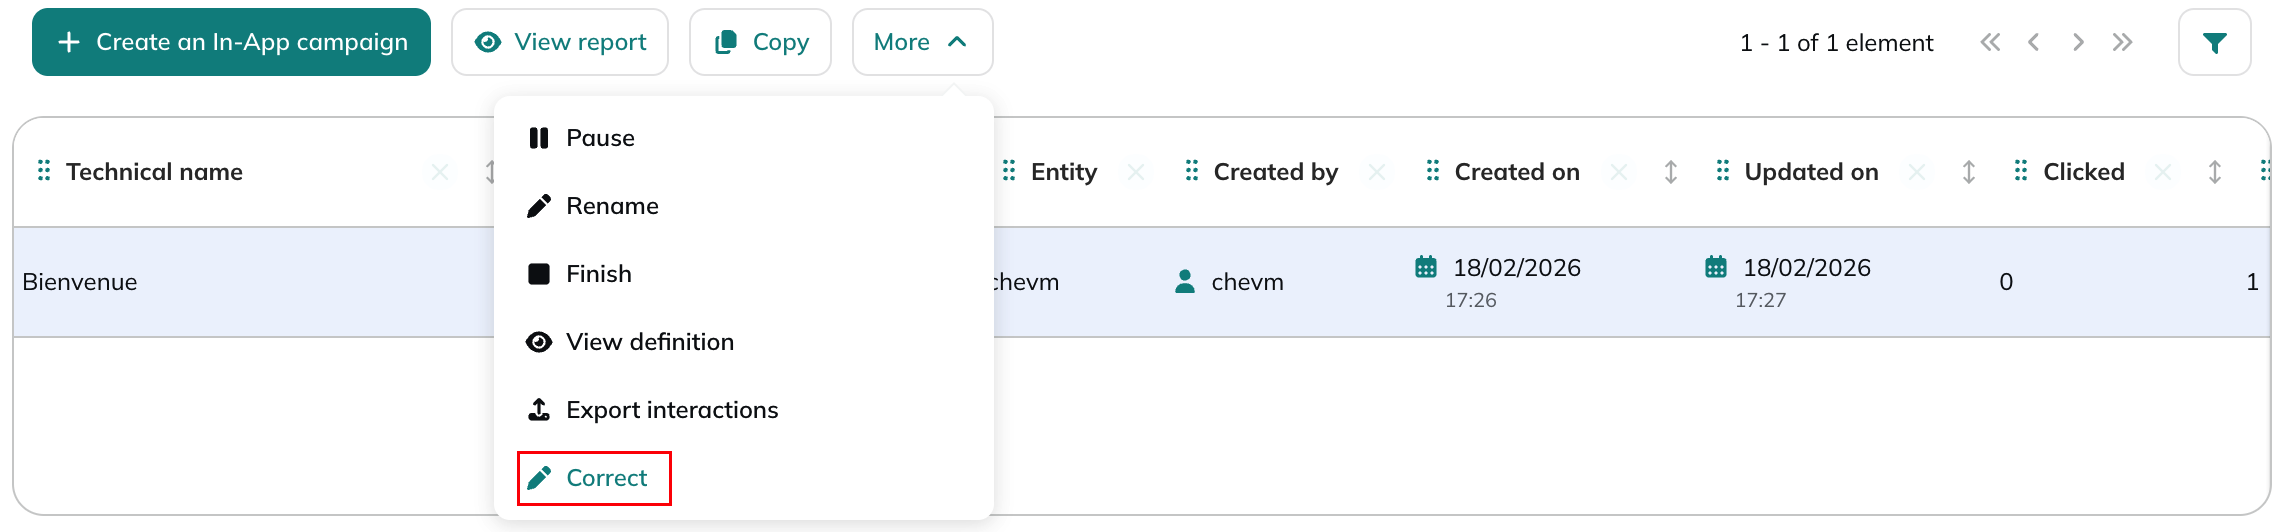
Corrections are available for campaigns in any of the following statuses: Scheduled, Activating, Active, or Paused.
Almost everything in the campaign can be corrected. The only two exceptions are the target group and the start date, which stay locked once the campaign is live. One nuance, though: for scheduled campaigns, the start date can still be changed, since the campaign hasn't started sending yet.
While a correction is in progress, the campaign keeps running normally. It isn't paused or interrupted. In the manage, the campaign is flagged as being in correction, and a matching draft of the same campaign appears in the Drafts tab. This is where the actual edits happen.
If the correction changes the Context setting (Only at launch / Foreground and launch), the campaign moves back into the Activating tab, then returns to Active campaigns once it's ready again. If the Context isn't changed, the campaign simply stays in the Active tab throughout.
If you start a correction and then decide not to keep any of the changes, you can delete the draft. The live campaign continues unaffected, as if no correction had been started.