Synchronizing custom fields
By default, Engage already synchronizes a lot of data, including information related to the campaign as well as personal info related to the participant.
But depending on your business, there are many more pieces of information that you may want to collect, such as what are the hobbies of the participant, do they own a car or anything related to the scope of your brand.
This is why you have the possibility the create additional fields that will be synchronized between the Qualifio campaign and the Actito form, to help you activate the profile thanks to the data relevant to your business.
If the key of your profile table is not the e-mail address but rather a client ID, a custom question must be created for this client ID to enable you to enrich your profile table.
You will be able to hide and prefill this question when your share your Qualifio campaigns through Actito channels.
You can complete this step in autonomy by following the walkthrough below. If you want the help of Actito teams to set-up the integration, do not hesitate to contact your account manager.
Step 1 - Create the field to store the data in the Actito form
In the Actito platform, go to the Form and Pages module and select the active form "Engage campaigns"
- Click on "More" then "Correct"
- Go to step #5 "Define question"
- Create a new question:
- Define simple question or define a question from a participant database attribute if the attribute already exists in the profile table
- Question text should be the "name of your field"
- Presentation type: open field, radio buttons or according to the answers
- Answer types that can be used:
- Open field types accepted:
- Text
- Integer
- Date
- Radio buttons accepted:
- Boolean (yes/no)
- Multiple checkboxes (for multi values data)
- Text
- Open field types accepted:
- Additional parameters:
- Keep Optional
- Maximum of characters: keep the current value
- Pre-fill the answer: no value
- Open text field length: keep the current value (empty)
- Display condition: keep the current value (always visible)
- Research and reporting: "name of your field" – without space
- Go to the last step to correct and publish the form again
You now have a new question matching you custom field.

Step 2 - Assign a technical name to your field
After publishing the form, select it and click on 'More', then 'Define technical name'.
Assign the technical name of your field (without spaces), and take note of it.

If you delete a question on the engage campaign form on Actito, the question will still appear in the structure of the form (target module, the personalization module or API). There is no true deleting. We recommend no to delete questions.
This means that, while there are no hard limits to the number of fields synchronized by Engage, you should avoid creating questions that will be used for one campaign and never again. You can create 'placeholder' fields, that will accept different answers depending on the campaign
Step 3 - Set the new mapping variable on Qualifio Portal
Go back to the Qualifio portal.
Remember you can use the SSO.
Go to the 'Integrations' section and select 'Mapping variables'.
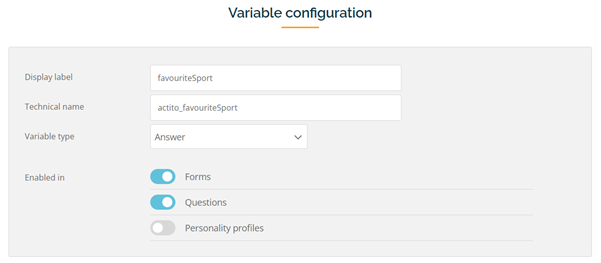
- Set a display name with the technical name set on the step #2
- Set a technical name with the technical name set on the step #2 with the prefix "actito_". For instance, the "myCustomField" field becomes "actito_myCustomField".
- Keep the variable type as "Answer".
- Enable this mapping variable for questionnaire and/or forms (see step 4 for practical applications).
Step 4 - Use the custom variable in your campaign
Depending on the settings chosen at step 3, you can use your custom variable:
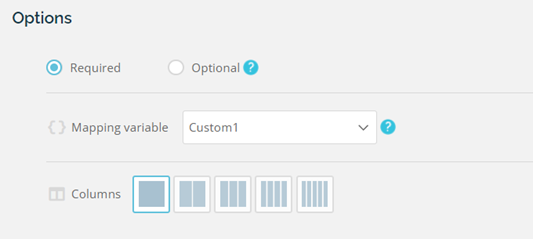
- At the 'Questions' step of your Qualifio campaign. This is where you define the quiz proper, namely the interactive part of the campaign. Simply choose the relevant mapping variable in the options.
Using a custom variable in the Questionnaire allows you to collect additional data from your profile while making it part of the 'game'.
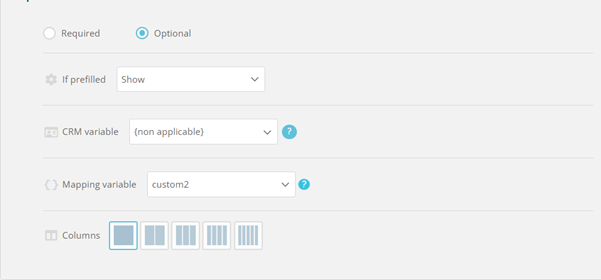
- At the 'Forms' step of the campaign, where you collect the personal information of the participant such as the Identification questions. But you can also write your own questions, then map them with a custom variable to push the answer in Actito.
Using proper question formats
Make sure that the format types of the questions are matching on both Actito and Qualifio. Please mind the following comparison table when setting up custom fields.
| Type of data | Type of answer on Actito | Type of question on Qualifio | Value of questions on Qualifio | Type of data to enrich on Actito profile table |
|---|---|---|---|---|
| Text | open field - text | Single answer - Answer buttons - Radio buttons - Clickable images br/> - Drop down list - Related drop-down list Multiple answer - Alphanumeric field with instant check Open-ended questions - Text box | Text – be careful about the characters limit if using enrichment rules | Text attribute |
| Integer | open field - integer | Single answer -Answer buttons - Radio buttons - Clickable images - Drop down list - Related drop-down lists Open-ended questions -Numeric field | With an integer as a value | Integer attribute |
| Date | open field - date | Open-ended questions - Date field | Date attribute | |
| Boolean | Radio buttons – yes/no | Single answer - Answer buttons - Radio buttons - Clickable images - Drop down list - Related drop-down lists | With a value: true/false | Boolean attribute |
| Text multi-values | Multiple checkboxes – text | Multiple answer - Checkboxes Ranking | Warning: all answers values set on Qualifio must be also set on Actito answers | Text attribute with multi-values |
Step 5 - Enriching profile attributes
Do the custom fields match some attributes of your database? Then you probably want to use the answer to theses questions to update your database. See here to add enrichment rules to your form.